Sunday, August 28, 2011

Galaxy Nails

Lynn from Uncolour My World did a galaxy nails design a few days ago and I was so captivated I wanted to try it again. The first time I tried doing galaxy nails, I failed so miserably I didn't even bother taking pictures.

This second attempt is definitely better than the first but I still find that it still doesn't look that realistic.


And now ugly pictures of my right hand cuz it was quite hard to do the design with my left hand! And also cuz I tried to be a smarty pants and use other colours like green and it turned out really weird! I did try another nebula pattern for my thumb which turned out pretty darn sweet!


Close up of my thumb! Really liking this one. Looks like some whirlpool in the making!

Here's what I used for the design:
- Elianto Black (friggin' aweseom one coater! MUCH better than OPI Black Onyx!)
- Rainbow White
- Random yellow polish my brother bought for me from BKK
- China Glaze IV
- TFS BL604
- China Glaze Meteor Shower
- China Glaze Flyin' High
- Essie Something Borrowed
- OPI Planks a Lot
- OPI Jade is the New Black
- China Glaze Fairy Dust

I also tried out a tribal nail art design but I didn't have a striper brush so I had to use my dotter to draw the "straight" lines.


Really like how tribal prints are so easy to do, just paint lines and dots, and yet they looks quite intricate! I think it's time to invest in a striper brush! (:

Friday, August 26, 2011

Matte About You

Oh yes, I'm officially mad about Essie Matte About You! Matte About You is a matte top coat that can turn any glossy polish into a matte finish and from what I've seen online, it's best to turn glitter polishes matte so I decided to take a stab at it and try turning some of my glitters matte!


Here are the polishes I have on my nails for the above pictures:
Thumb: TFS BL604 and one coat of Nubar 2010 on top
Index: TFS BL607 with one coat of China Glaze Fairy Dust on top
Middle: LA Girl Color Addict Idol with one coat of OPI I Lily Love You on top
Ring: Essie Lapis of Luxury with one coat of OPI DS Sapphire on top
Pinkie: LA Girl Color Addict Idol with one coat of China Glaze Meteor Shower on top

And of course one coat of Essie Matte About You on top of them all!


For this nail, I've got LA Girl Color Addict Idol and one coat of OPI Sparkle-icious on top and then mattified with Essie Matte About You.

Don't you think Matte About You made the glitters shine even more (such a paradox I know)! I did notice that with holographic colours (DS Sapphire and Fairy Dust), Matte About You made them rather flat so I wouldn't recomment mattifying any holo shades/glitters. Other glitters where the particles are of different colours (but not holographic) will because even more beautiful! Matte About You brought out the pink, blue and green particles in I Lily Love You as well as the red, blue and green particles in Meteor Shower. I particularly love these two shades being mattified because they reminded me of the night sky! I also can't wait for my Nfu Oh flakies to arrive so I can mattify them too! (:

Wednesday, August 24, 2011

Look What Came In The Mail Today!


Received China Glaze Grape Pop from Eliza today and look what she included! A whitening mask as well as a Clarins sunscreen sample! So sweet of her! And to think I only paid $3! SUCH A GOOD DEAL! I was contemplating whether to buy Grape Pop for a while now and when I saw it for sale, I pounced! Eliza was also selling $OPI Metro Chic but sadly I was a little too slow. Oh wells, better luck next time! (:

Idolising Lapis and Sapphire

Decided to rock some blue nails and I dug out LA Girl Color Addict Idol, Essie Lapis of Luxury and of course, my new favourite bling bling polish, DS Sapphire!

I have two coats of Idol and three coats of Lapis of Luxury with one thin coat of DS Sapphire on top on my accent ring finger. Took this picture under my table lamp.


And this one was taken in sunlight!


Absolutely in love with the olive-gold shimmer in Idol! And well, the idea of layering DS Sapphire over Lapis of Luxury wasn't exactly my idea. The moment I saw it on Fashion Polish and Spaz & Squee, I knew I had to try it for myself!

YAY! In love with this accent combi! By the way, since I'm talking about blue polish, have you seen Chanel's Les Jeans de Chanel Collection pictures yet? I have my eye on Blue Boy!


Pictures taken from temtaplia!

Monday, August 22, 2011

My Rocking Rock Coat

Recently, Dior came up with a polish called Rock Coat and what it did was that when painted on any polish, it would darken the colour of the polish (kinda made it a little dustier too) and I was so amazed at how it was able to do that! I even went down to Sephora to look at this mysterious Rock Coat. LUCKILY, I didn't shell out $35 for a bottle of it because a few months later, while reading Alizarine Claws, I came across a recipe on how to make my very own Rock Coat! The recipe is VERY simple so gals, please, don't give Dior your money! Why buy it when you can make it yourself?

Pictures first before I talk about how to go about making your very own rock coat!

Used a tiny 5ml bottle so it's easy to store and we all know I won't be able to finish a 15ml bottle anyways, so small bottle it is!

Here's where the magic happens! I used OPI Parlez Vous OPI? (I'll tell you something exciting about this polish later on!) on all my nails. On my index, I didn't paint the rock coat on for reference. On my middle finger, I have one coat of Rock Coat, on my ring finger, two coats of Rock Coat, and lastly on my pinkie, three coats on Rock Coat on top of Parlez Vous OPI?.

Hopefully you can see the colour graduation a bit better here!

Can you see how it makes the polish looks darker with every coat? Awesome way to spice up your polish collection right? So next time you see a shade that's just a tinge darker than what you already have, you don't have to buy it! Just paint this baby on top for a whole new colour! It's so budget friendly too once I tell you how to make it!

This Rock Coat is essentially a very sheer black jelly, so making it is simple enough!

Recipe:

5ml clear polish

3 to 4 drops of black polish

THAT'S ALL! Take note that if you're gonna franken a 15ml version (OPI bottle size), just triple the amount of black polish! Another point to note is to add the black polish drop by drop and test for sheerness/opacity after every drop because what might be too sheer for me might be perfect for you! This Rock Coat is buildable so if you want a more subtle change in colour after painting on most of the time, then put less black polish in! I kinda want a more dramatic effect, like the original Rock Coat (which you can read more about here) so I'm gonna add more black polish to my franken after this!

* I did not come up with the recipe myself so I will give credit to Alizarine Claws and here's her article! Do give it a read cuz after reading it, I want to do more jelly frankens! It seems so fun! (:

Hope you have fun making your very own Rock Coat!


--------------------------------------------------------------------


Oh, and I said I have exciting news on OPI Parlez Vous OPI? to tell you! Today, while I was walking around Jurong Point, I saw a brand new bottle of Parlez Vous OPI? and I just had to grab it! My mum really loves the colour so I thought I'd get a back up just in case. BUT I decided that I'm gonna do a giveaway once I hit 50 followers and I'm gonna decant 5ml of Parlez Vous OPI? into my soon-to-arrive (or rather soon-to-be-collected) 5ml bottles! I'll also be throwing in another decant of OPI I Lily Love You (WHICH I'M TOTALLY IN LOVE WITH)! Maybe I'll even get more polishes for the giveaway if I'm feeling richer then! (:

Sunday, August 21, 2011

Rubi Emerald City

I was at Cotton On at VivoCity when I saw this Emarald City and since it was only $2, I thought what the heck, just get it! But when I went home and opened the bottle, all ready to swatch, this was what I saw!


Friggin slanted brush! :(


Slanted. And worst of all, since it was a sale item, I couldn't go back and exchange it!


This is what it looks like then it's held flat at the angle I'd use to paint my nails. Tell me how to paint? I tried and the brush went everywhere! It was so hard to control! Luckily, I had an extra OPI brush (from a broken bottle I received in the mail, from which I managed to salvage the cap / brush)!

I promised Candy from Cherub's Lips I'd swatch Emerald City soon! I didn't do a full mani with the Rubi polish but here's a comparison!

L-R: Tony Moly TR05 (it's one coater yo!), Misa Dirty Sexy Money (2 coats) and of course Rubi Emerald City (2-3 coats)


I'm in love with TR05! I've been on the lookout for it since I saw it swatched on some other blog but it was ALWAYS OOS whenever I dropped by Tony Moly to check. I even left my contact number for them to call me once their stock was replenished but no one called. And then yesterday, I decided to try my luck and what did I find? TR005! Whoooooo! (: I only have 2 Tony Moly polishes but they're both one coaters and they go on so smoothly! Definitely worth the $4.90 I paid!

Emerald City went on rather unevenly. Even with the OPI Pro-Wide brush! I did one coat but it was uneven and a bit sheer so I did a thicker second coat to even things out! Color-wise, it was pretty nice but the smell, OH! I have no idea why Rubi polishes have that smell! And don't tell me it's cuz they're cheap! Because TFS and Etude House polishes are cheap too (only a few cents more) but they smell like regular (by regular I mean OPI, China Glaze and every other polish brand I own). Rubi polishes smell like PAINT. The kind of paint you use to paint your house! Weird right!

Oh wells, gonna remove the polish and let my nails breathe for a few days before painting them again!

Saturday, August 20, 2011

OPI Touring America

No, I didn't buy (or rather I haven't bought) any of the Touring America polishes yet with the exception of Uh Oh Roll Down the Window (which I have yet to receive) but I mamnaged to swatch a couple of them the other day when I was at Robinsons! I had to grow some balls to blatantly swatch all 5 of my fingers but I did it and not to brag but I think I did a pretty neat job too, considereing the fact that I was shaking (from being hungry as well as being a little paiseh) while polishing my digits!


L-R: Are We There Yet?, A Taupe Space Needle, Uh Oh Roll Down the Window and Road House Blues


And here we have Get in the Expresso Lane

When I went home, I went through my Helmer to search for dupes cuz we all know how much we love dupes (or at least I do)!


Potential dupes!!!


Road House Blue and China Glaze First mate but I think Road House Blues has much more purple to it so I pulled out OPI Dating a Royal.


Dating a Royal looks similar to First Mate in this picture but trust me they're not the same! Dating a Royal was too light though.


Now we have Essie Sew Psyched vs Uh Oh Roll Down the Window.


And here we have Khaki Vert vs Uh Oh Roll Down the Window. I was deperately trying to find comparison shots on google but I couldn't so I thought I'd find out myself!


Khaki Brun and A Taupe Space Needle, which I saw high potential dupe material.


Are We There Yet? vs Milani Fashion Design.

And then I painted on the potential dupes on the side(s) of the Touring America swatches! (PS: You can click on all the pictures to enlarge them, especially for the following two!) The order for the below picture is as follows:

Pinkie: China Glaze First Mate and Road House Blues
Ring: Khaki Vert, Uh Oh Roll Down the Window and Sew Psyched
Middle: Khaki Brun and A Taupe Space Needle
Index: Are We There Yet? and Fashion Design


Orders are reversed for the next picture! Please ignore the dust on my pinkie.


Sadly, no dupes at all. Fashion Design was pinker than Are We There Yet?, Khaki Brun is VERY similar to A Taupe Space Needle just that Khaki Brun was browner than A Taupe Space Needle, Sew Psyched and Khaki Vert were bluer than Uh Oh with Sew Psyched being the darker of the two and First Mate was too light.

They're all gorgeous colours too so please go out and get them cuz NO DUPES here!

Friday, August 19, 2011

Testing out my Bundle Monster

I've only recently had the time to test out my Bundle Moster plates and I picked these 3 designs to try out first!

I was having problems with the leopard print one (on my ring finger), especially with black polish (from elianto)! I even used my special konad polish and buffed my stamper but nothing worked! The stamper would actually grab onto the polish but it just wouldn't transfer well onto my nail! So I ended up using China Glaze Millenium (on my pinkie). I guess it was a little bit better but still, not as good as I wanted it to be!

That said, I do LOVE the tribal print one (on my middle finger)! I used Essie Jazz as the base colour and then stamped it on my black elianto polish (great for konad cuz it's a one coater!)

The zebra print one was also a pretty fun design!

I guess the bundle monster was really worth the money considering the price difference between konad plates and the bundle monster! Hopefully you'll see me spotting more konad designs instead of just plain colours!

PS: Just asking, is anyone interested in getting Nfu Oh polishes? They have gorgeous holographics and flakies (#61 and #51 respectively to name two) and Jamie from (squoval)licious can get them at around SGD 20 to 22 per bottle! She's taking orders now, till to tomorrow (20th August) and the more bottles ordered, the lower the price can go (I guess due to shipping)!  Let me know if you're interested and I'll help you email her!

OPI DS Sapphire

Sorry for the lack of posts! I'm oly into my second week of school and I'm already lagging behind with readings and tutorials! I've been busy helping out with my CCA and everything had to take a back seat this week, including my nails! They've been naked (not to mention sad) the entire week! But anyway, on to DS Sapphire!

I've shown swatches of this gorgeous polish before but I've never done a full on mani until now! And boy, the holo effect does not disappoint! You can click on the images to enlarge them for more holo goodness!

The following swatches were taken under my table lamp.

And in sunlight, wow. It sure makes up for its flat appearance indoors. (Yes, it does appear to be a flat silver with a hint of blue indoors, under low lighting.)

I actually purchased 2 bottles of DS Sapphire just to use it as a holo base for frankens! I initially regretted getting two bottles but after seeing how it shines under sunlight, I'm so happy I got 2 bottles!

Monday, August 8, 2011

Misa Paint My Nails @ Work

Got this baby during my frantic polish-crazy phase (I'm gonna say I'm not as crazy these days though I still love polish no less) when I got almost all of the colours in the same collection (Misa 9 to 5)! I swatched it previously here and here but never used it as a full on mani!

I used 2 coats here which went on pretty smoothly but I had to thin it down a little after the first coat so the second coat could on go better!

Colour-wise, what I love about this baby is how it changes colour in different lighting, much like Rimmel Beige Babe!

Purple in certain light.

Grey in some.

And a light taupe in most lightings!

It's a pretty neutral colour and should be easy to match with clothes! Looking at it, I'm kind of reminded of Deborah Lippmann's Waking Up in Vegas, which I don't have so no comparisons there, sorry. I wanted to have a nice, neutral yet edgy colour for my first day of school but apparently I didn't read some ammouncements correctly and my first day is on Wednesday instead (YAY, two more days of slacking around!) so I hope my manicure will last till then!

Check out this blog!

Okay, I don't normally full on promote blogs on my blog (shout outs don't count okay!) but check out this blog Poppynails!

One of the reasons why I'm promoting her is because she's Singaporean! (: LOCAL TALENT OKAY! (Yes, painting nails is considered a talent to me!) I was just randomly googling swatches of polishes (I do that when I'm bored okay, don't give that look!) and I happened to click on her blog link. And before I knew it, I was entranced by her swatches! They aren't perfectly painted (we're not all pro nail bloggers here) but I always get so excited when I find out I'm not the only one in Singapore going GAGA over polishes. Kinda makes me feel normal having a nail polish collection!

She's totally made me want to buy China Glaze Refresh Mint all over again with this post of her's! And after seeing another post of her's, I so want to try out the combination of grey nails with mint tips!

Oh and can I just add this girl has MAC Blue India!!! I'm beyond jealous. I've been lemming for Blue India since I laid eyes on it but I discovered nail polish a bit too late so it's been sold out ever since. I've even tried to acquire dupes of it (Sally Hansen Complete Manicure Grey by Grey) but no to avail as drugstore.com/beauty.com and ulta doesn't ship polishes outside the US. So I've basically resoted to frankening my own Blue India dupe but how the hell will I know how close I am until I actually see a swatch of it IRL for myself?

If only someone will see my blog and go absolutely bonkers over it! I guess that will take some time to build this baby up and in the mean time, I can only continue to swatch away!


Sunday, August 7, 2011

July's Haul

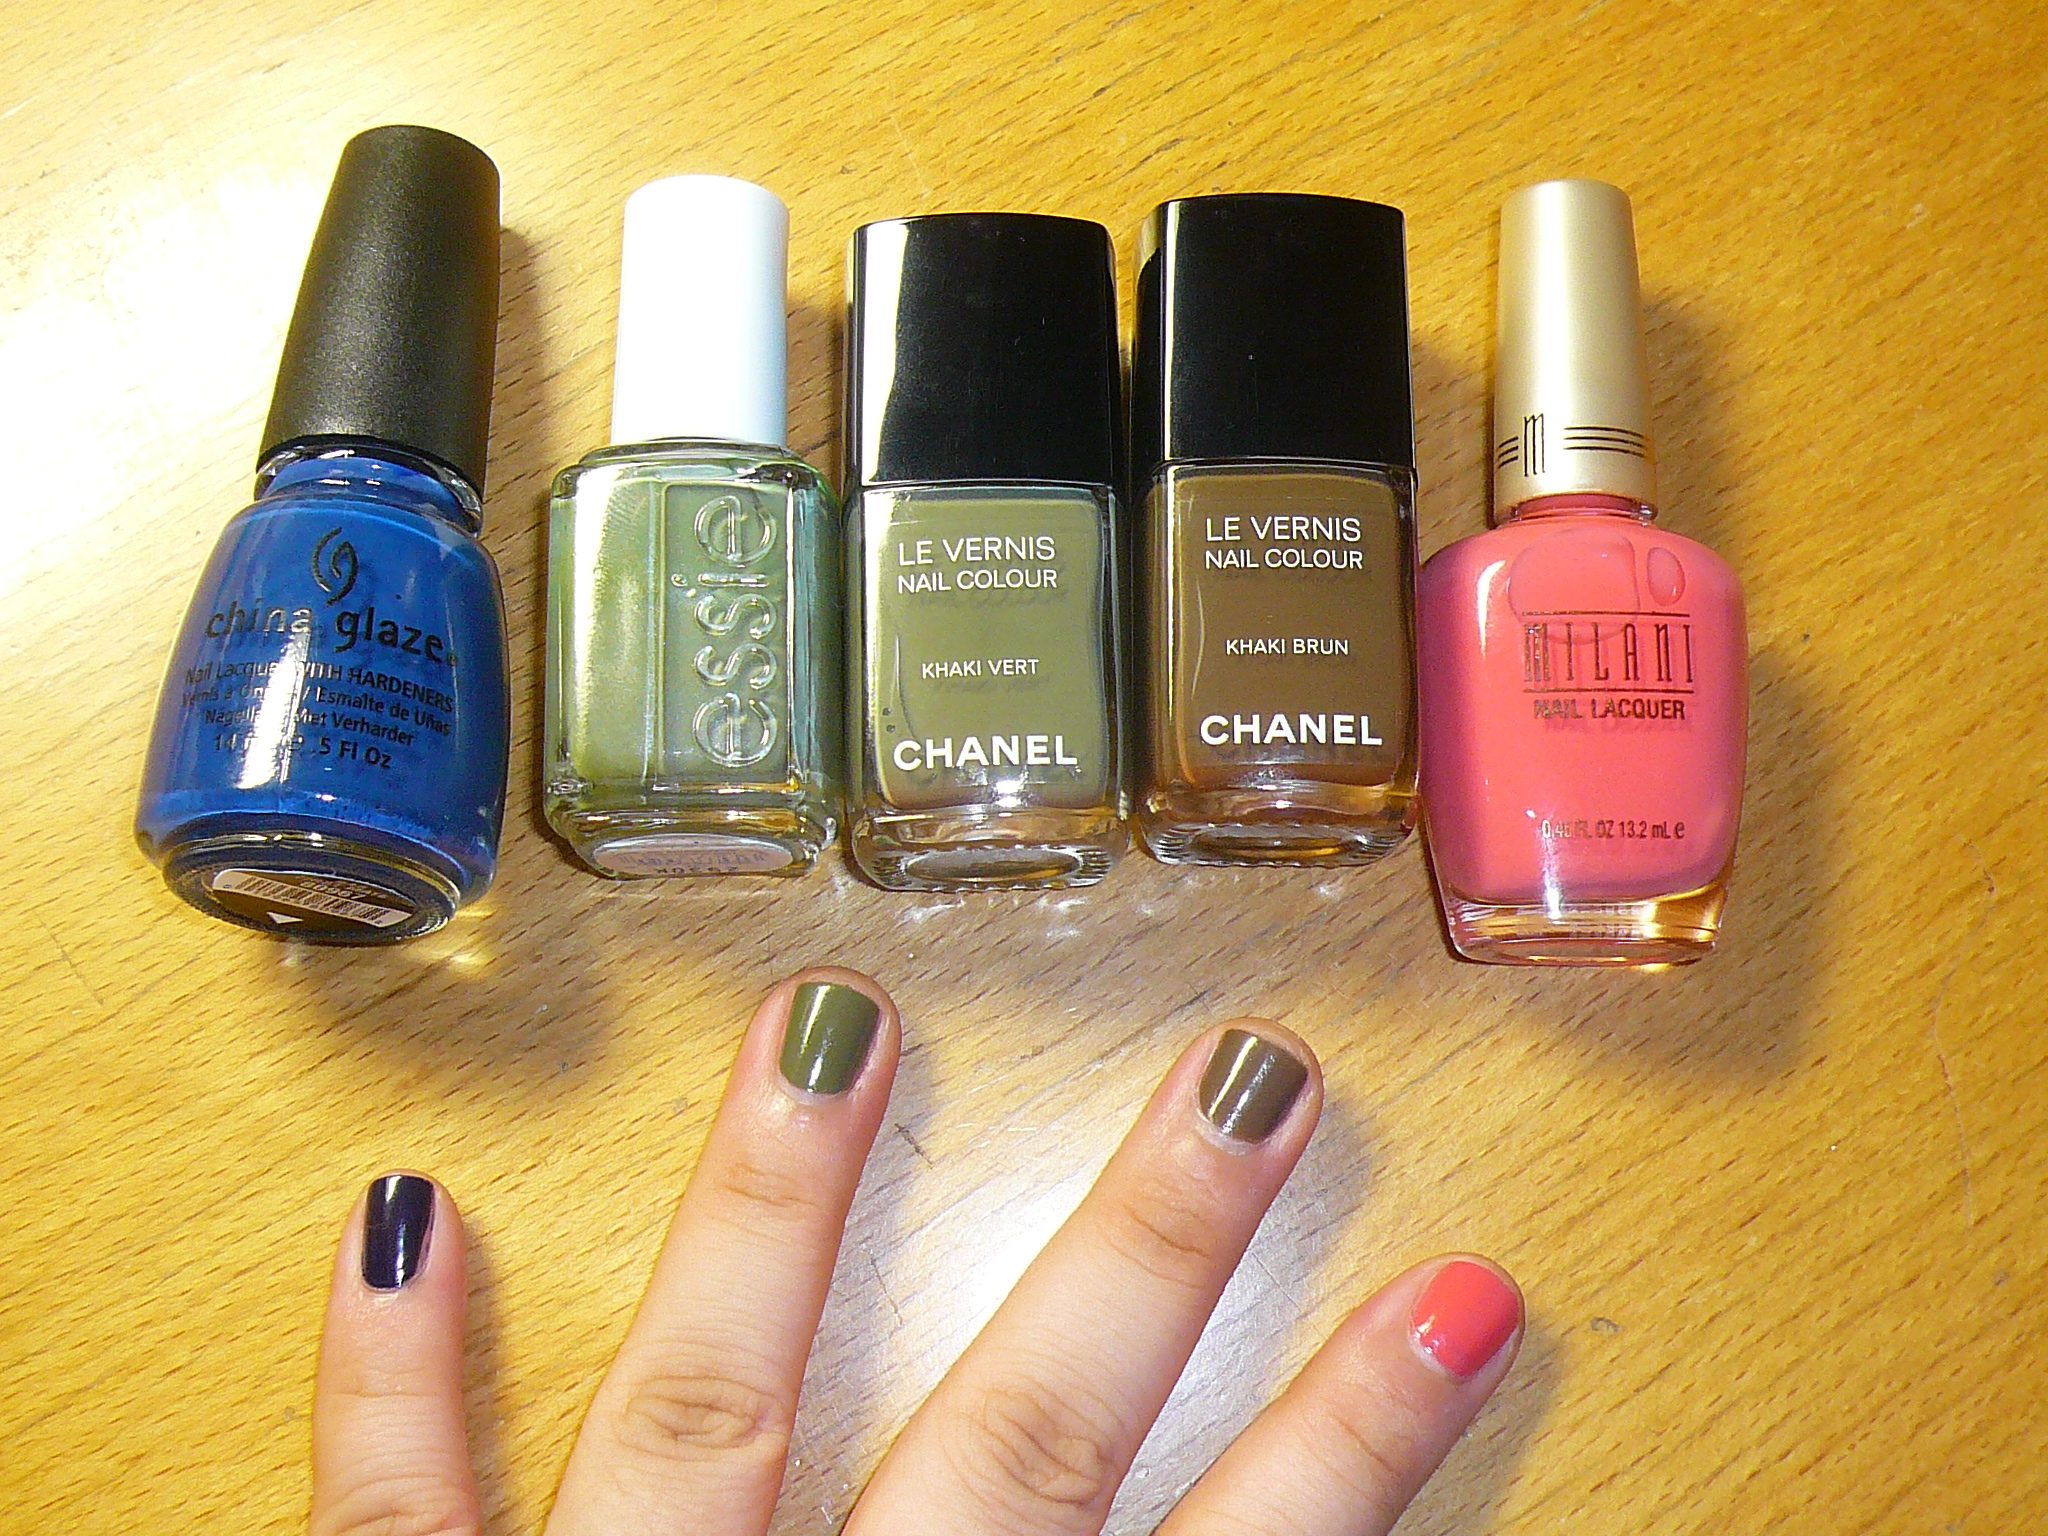
I've cut it back. BY SO MUCH. I'm so proud of myself! I only bought SEVEN polishes this month! (:

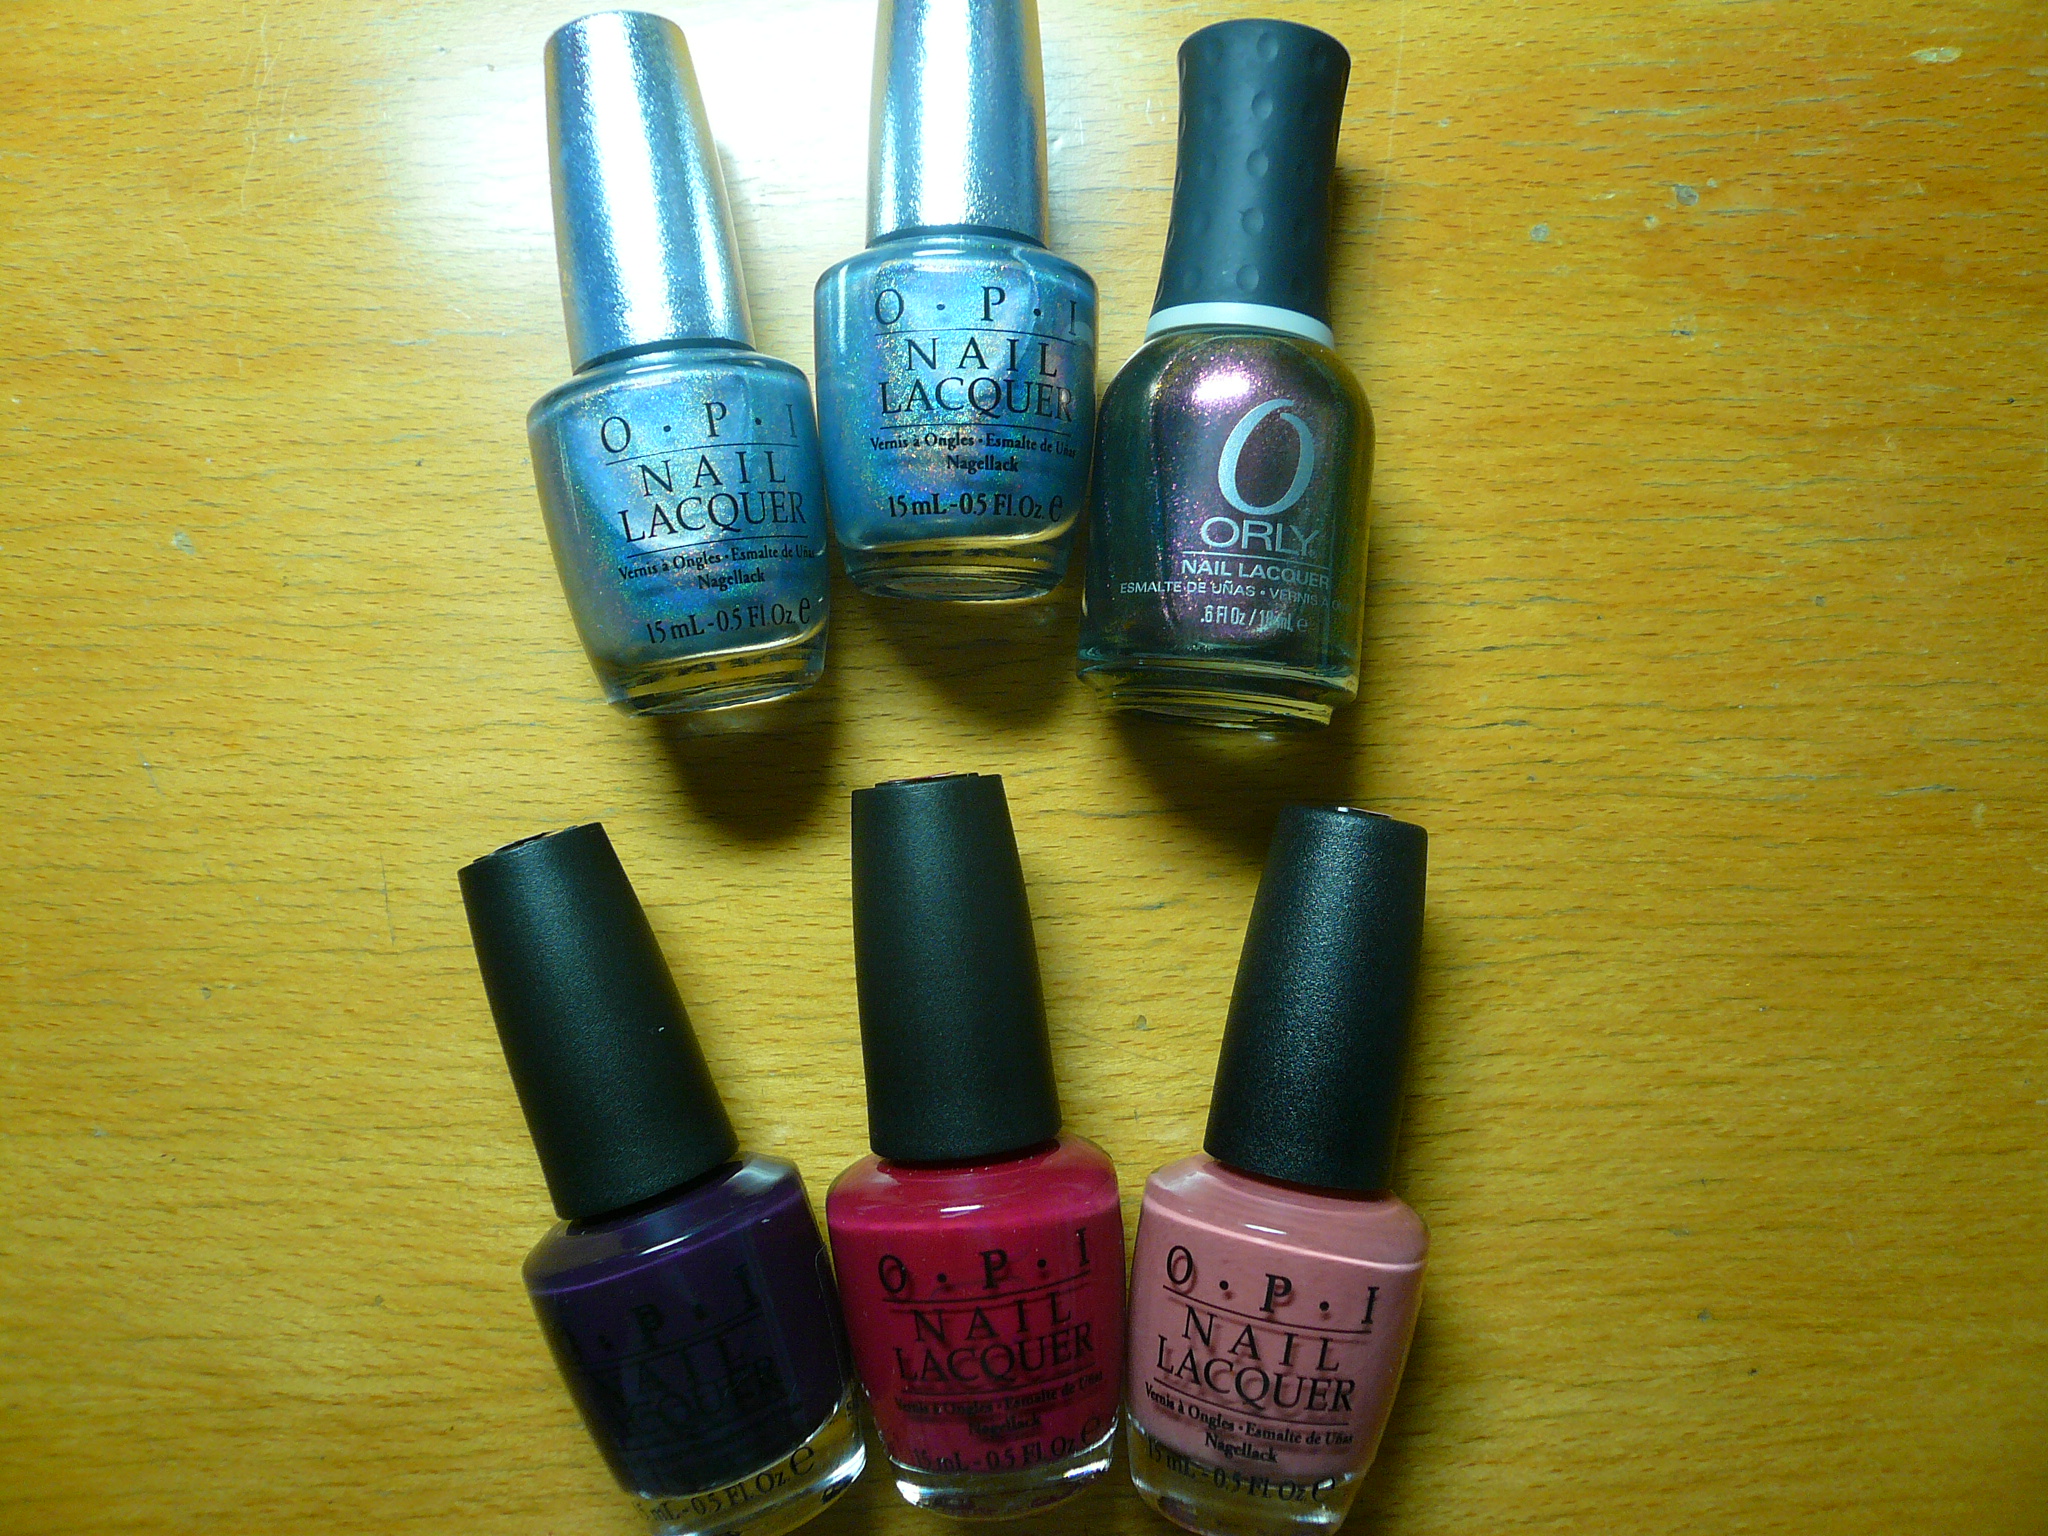
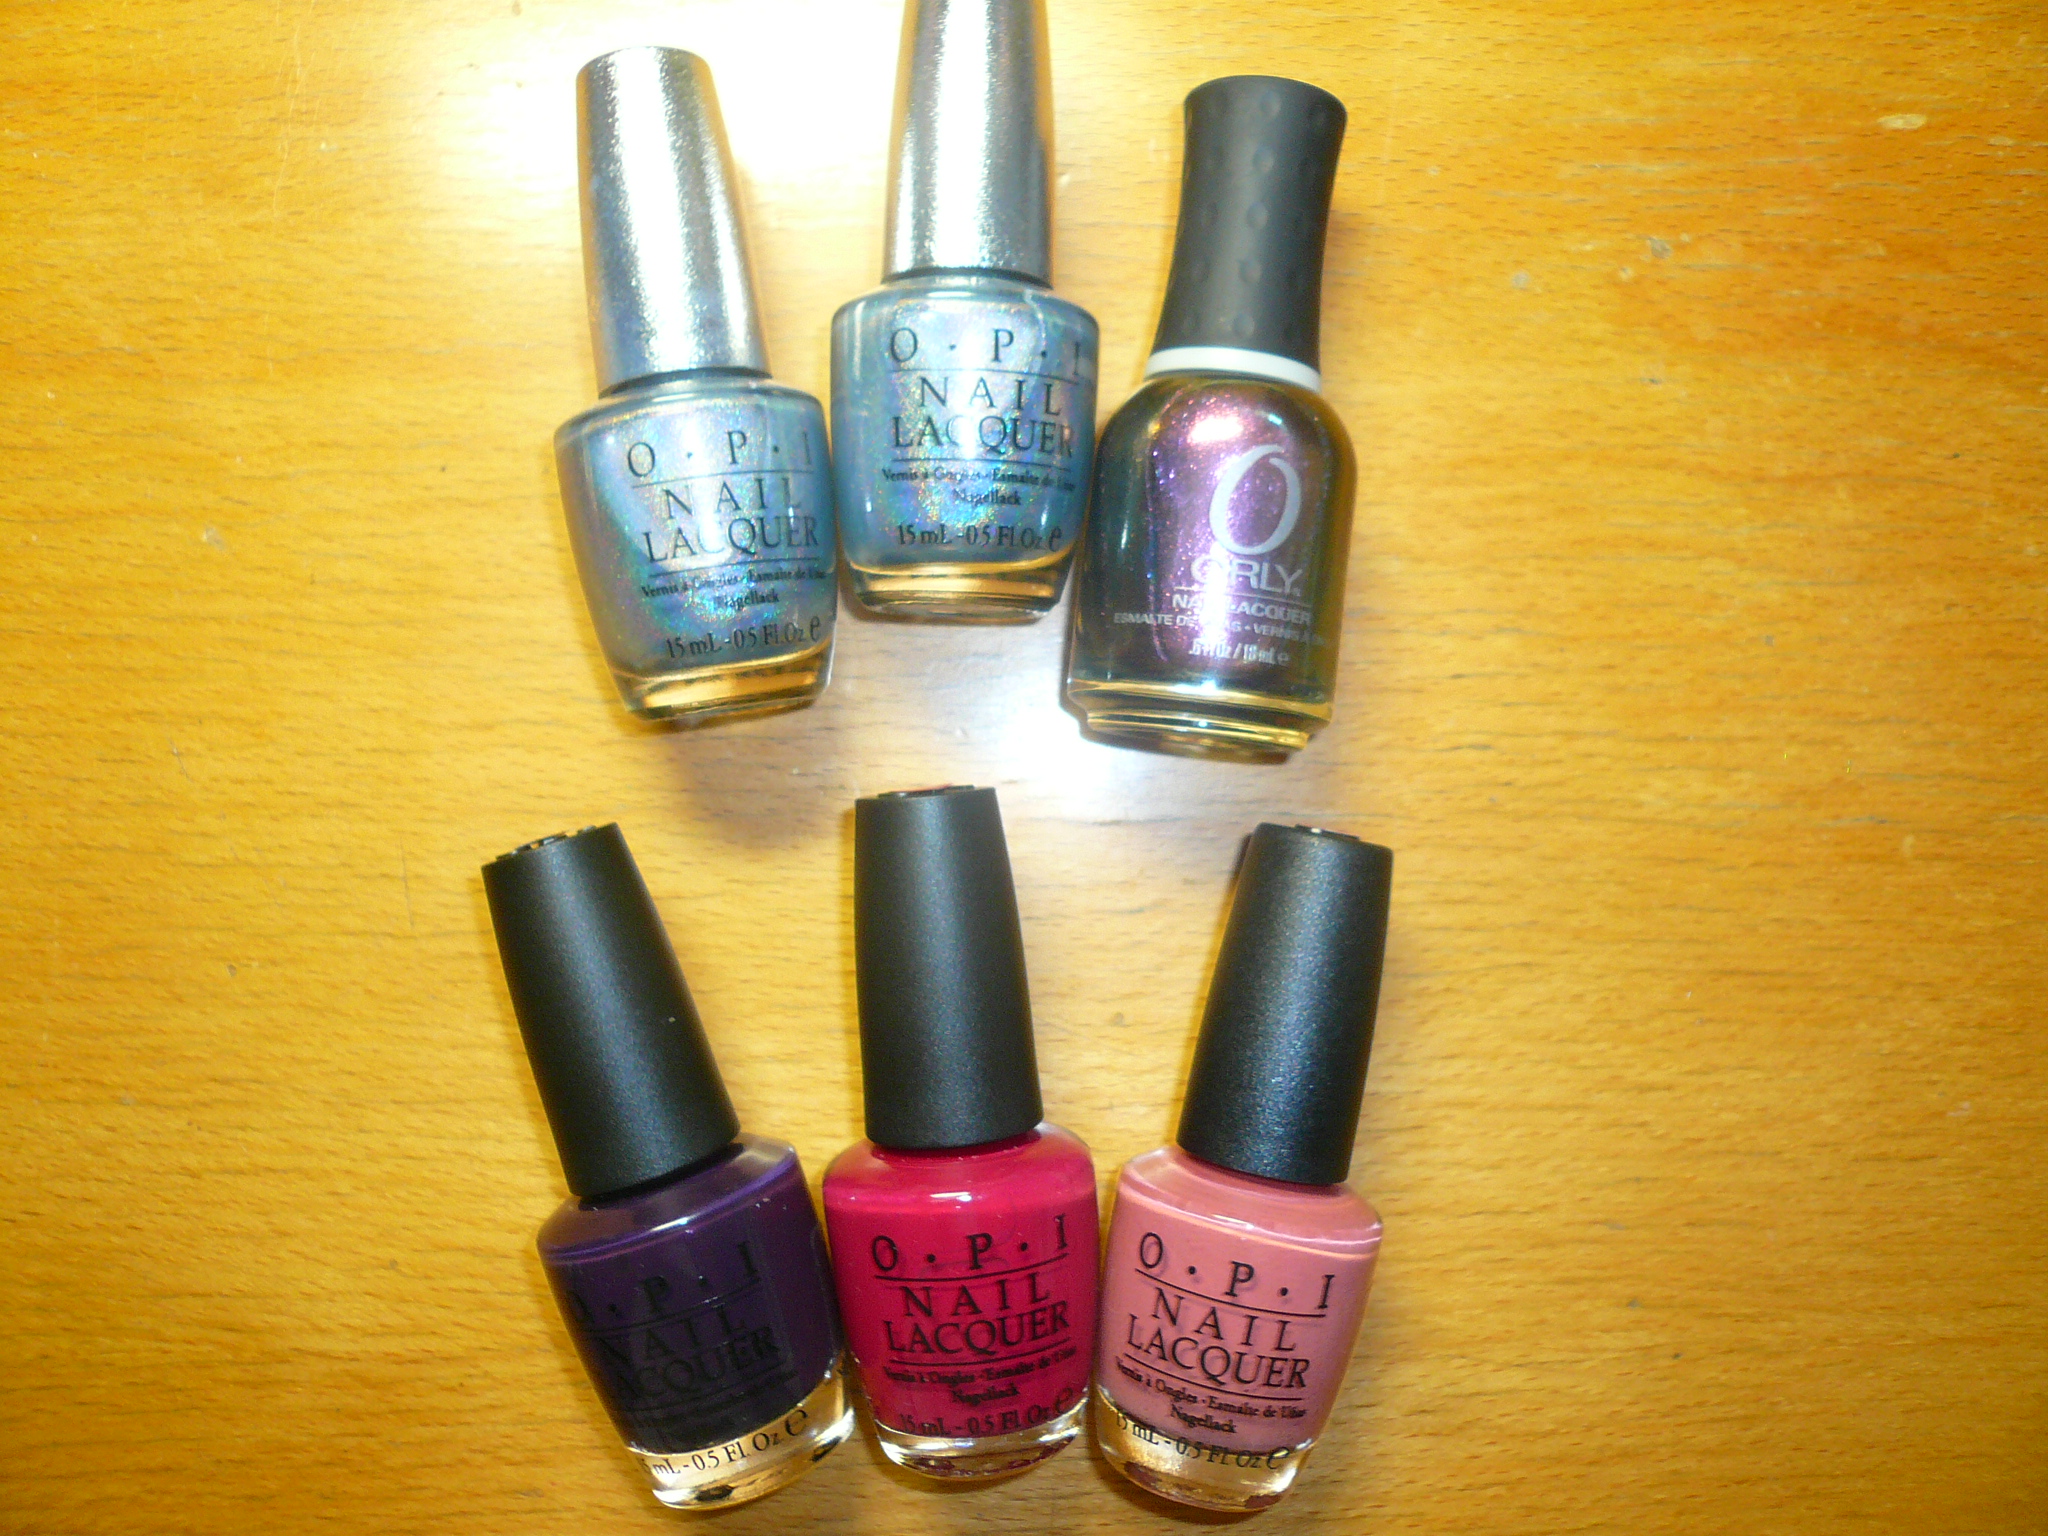
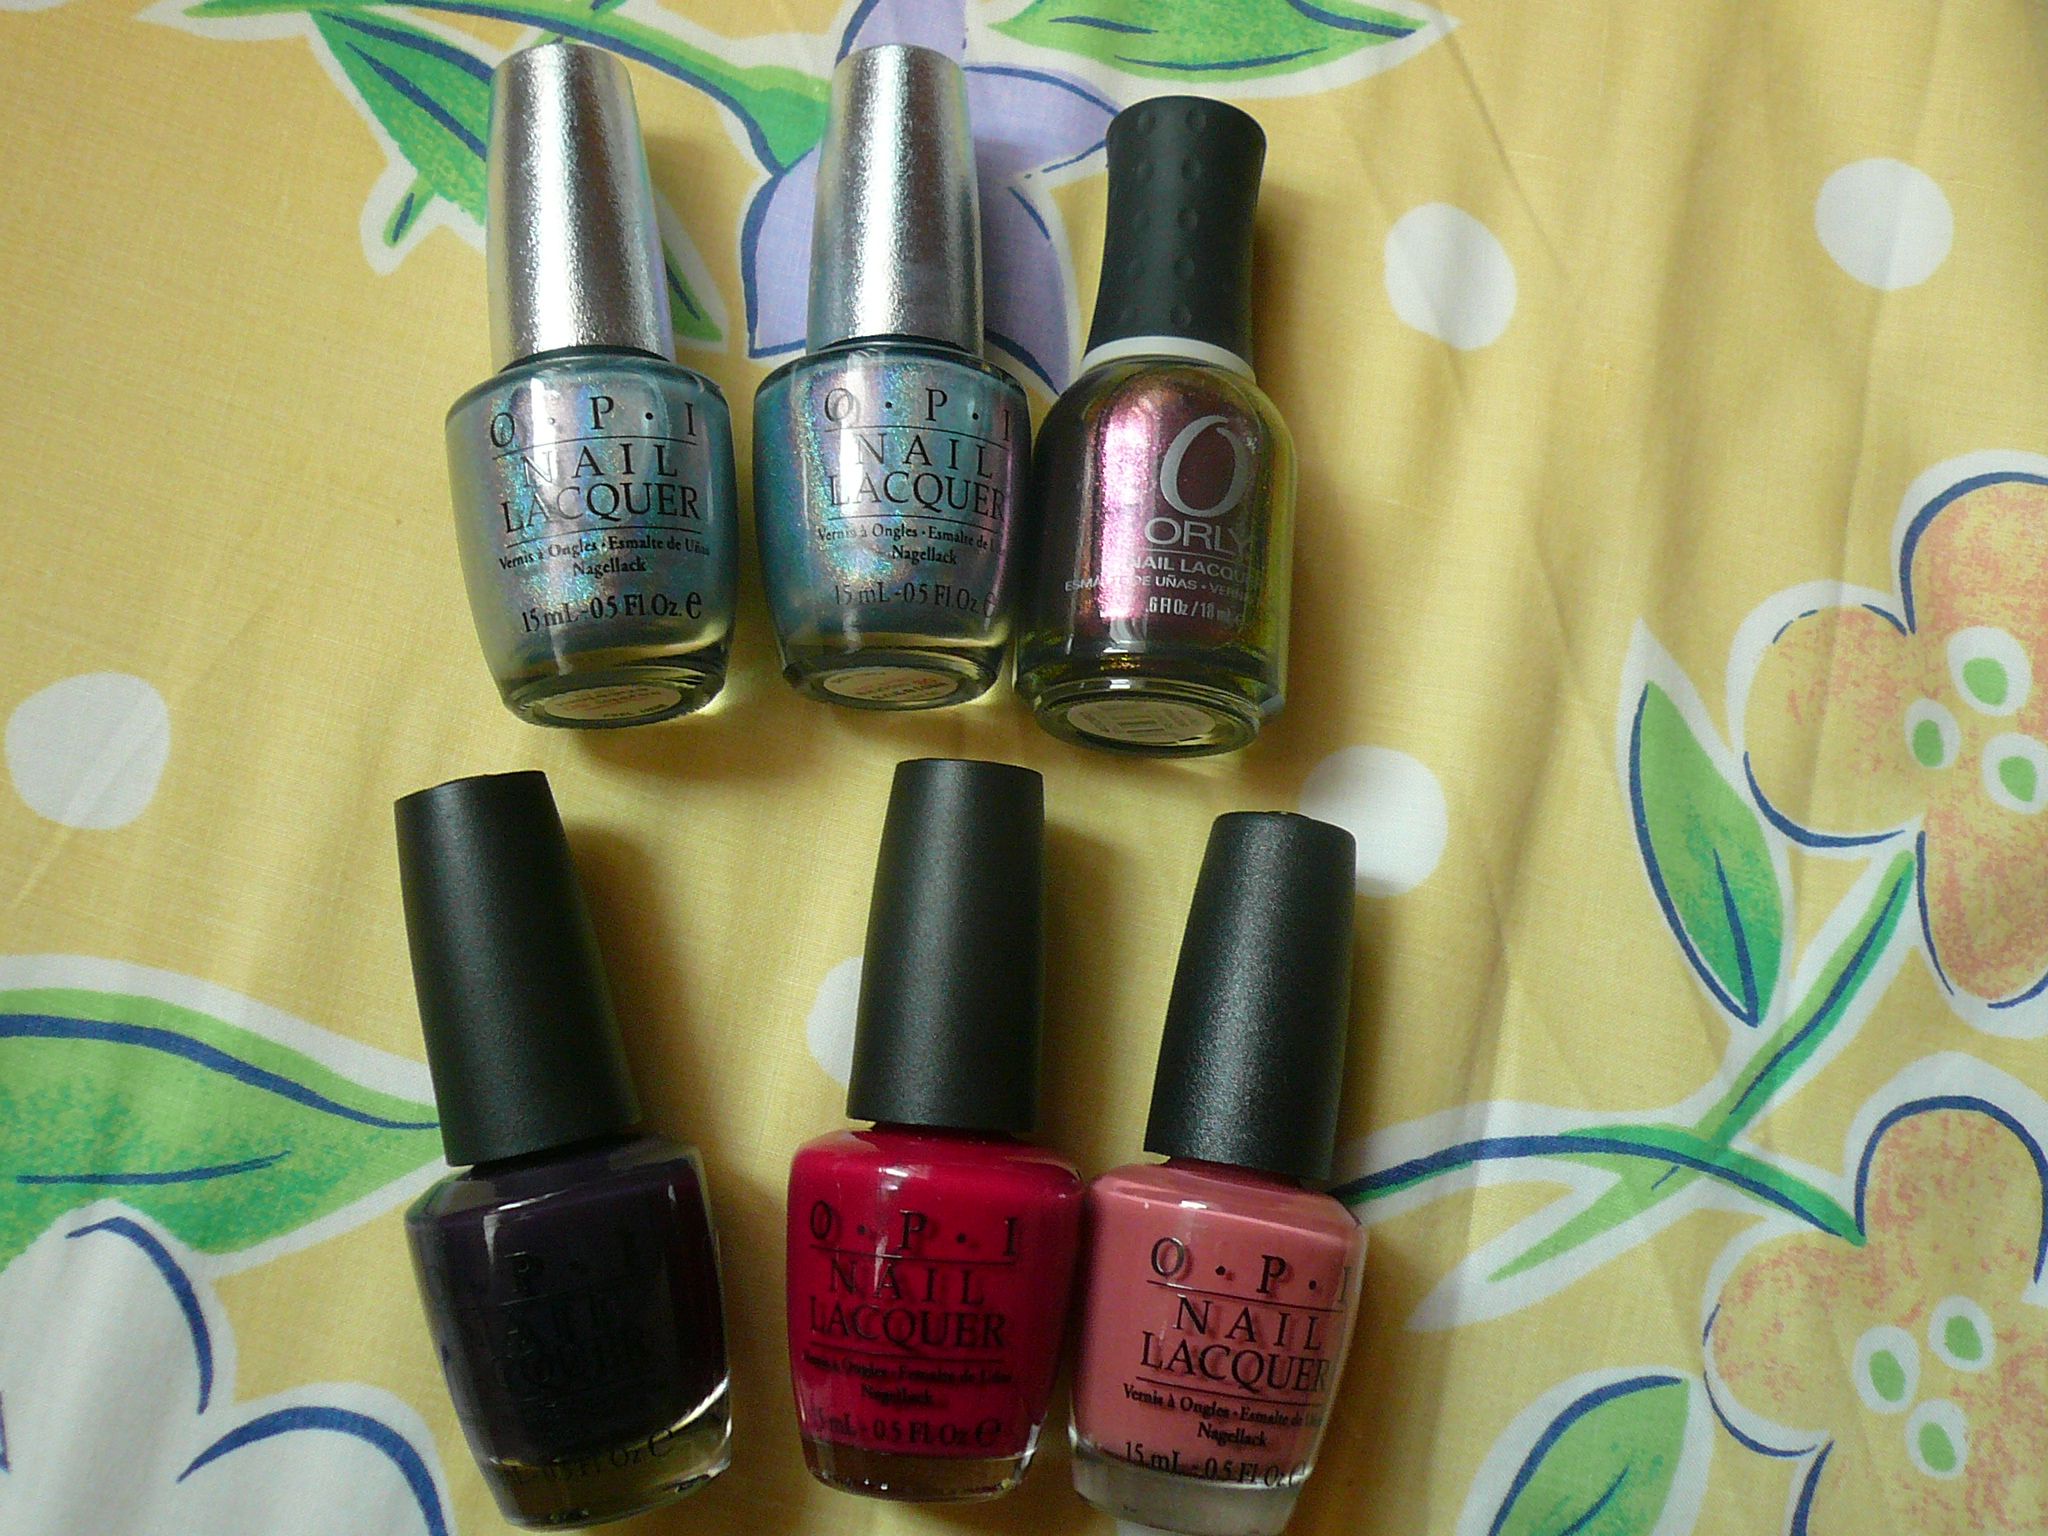
Top row: OPI DS Sapphire (the first two bottles. YES, I bought two bottles *bows head in shame*) and Orly Space Cadet

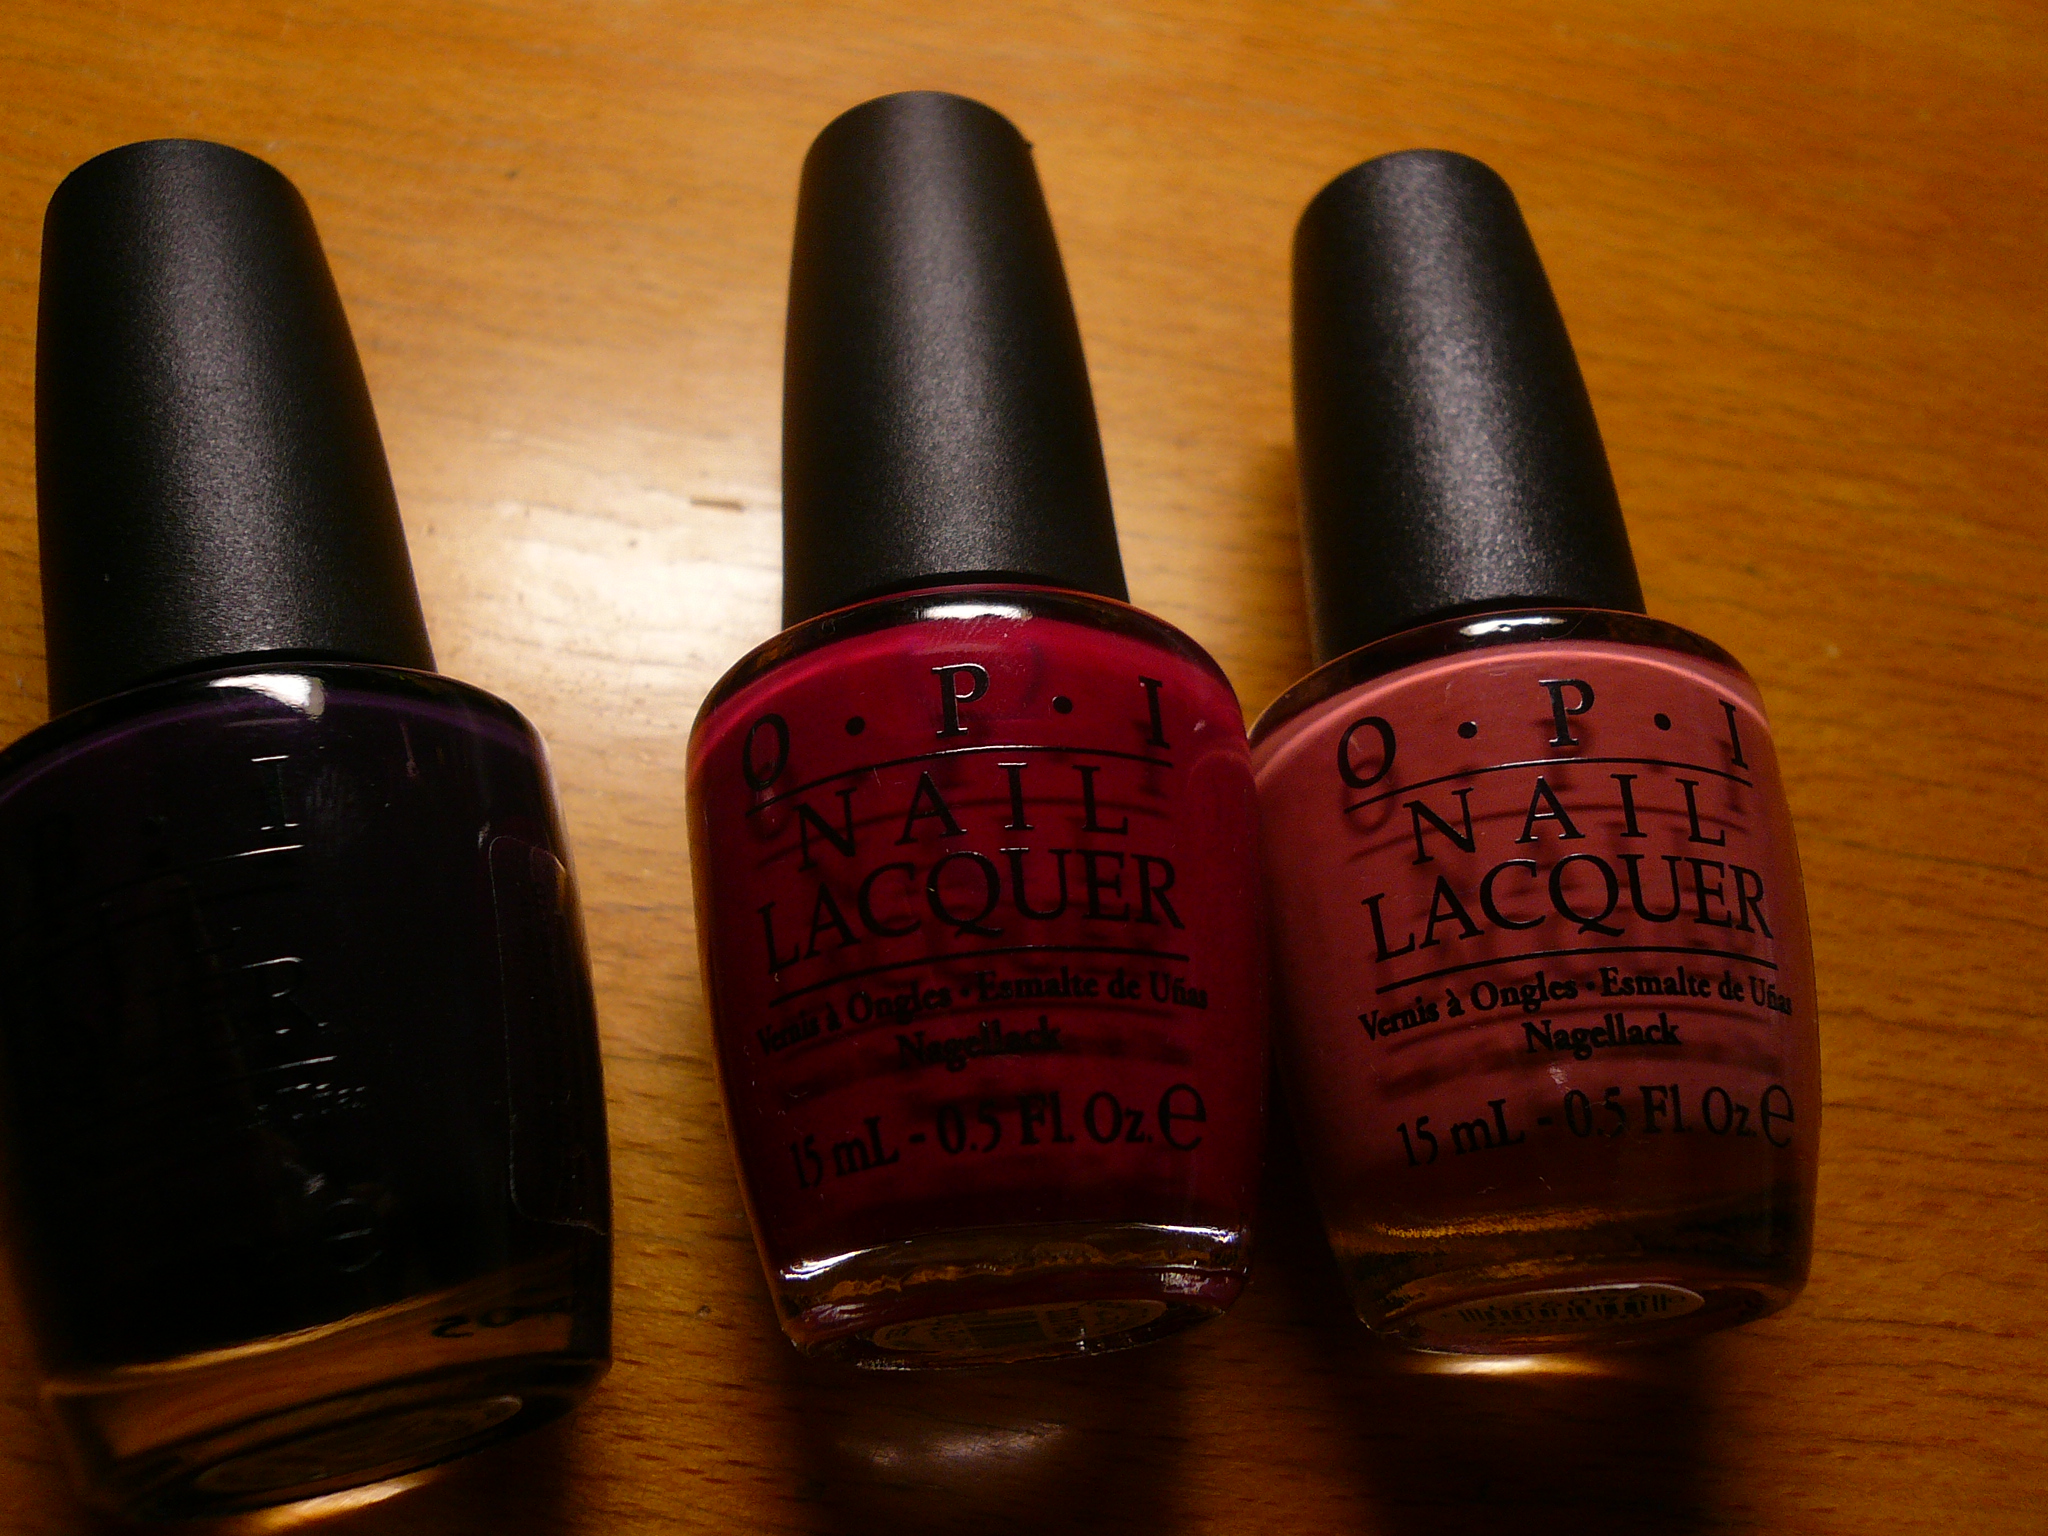
Bottom row: OPI Siberian Nights, From A to Z-urich and Java Mauve-a


This was taken under my table lamp.


This was taken under my table lamp with flash.


This was taken in natural sunlight. The colors here are pretty accurate for the most part.

I totally forgot to take the haul pictures with the TFS BK901 holo polish I got while I was in Malacca but it's been swatched here and here so click away for bottle pictures and swatches of it!


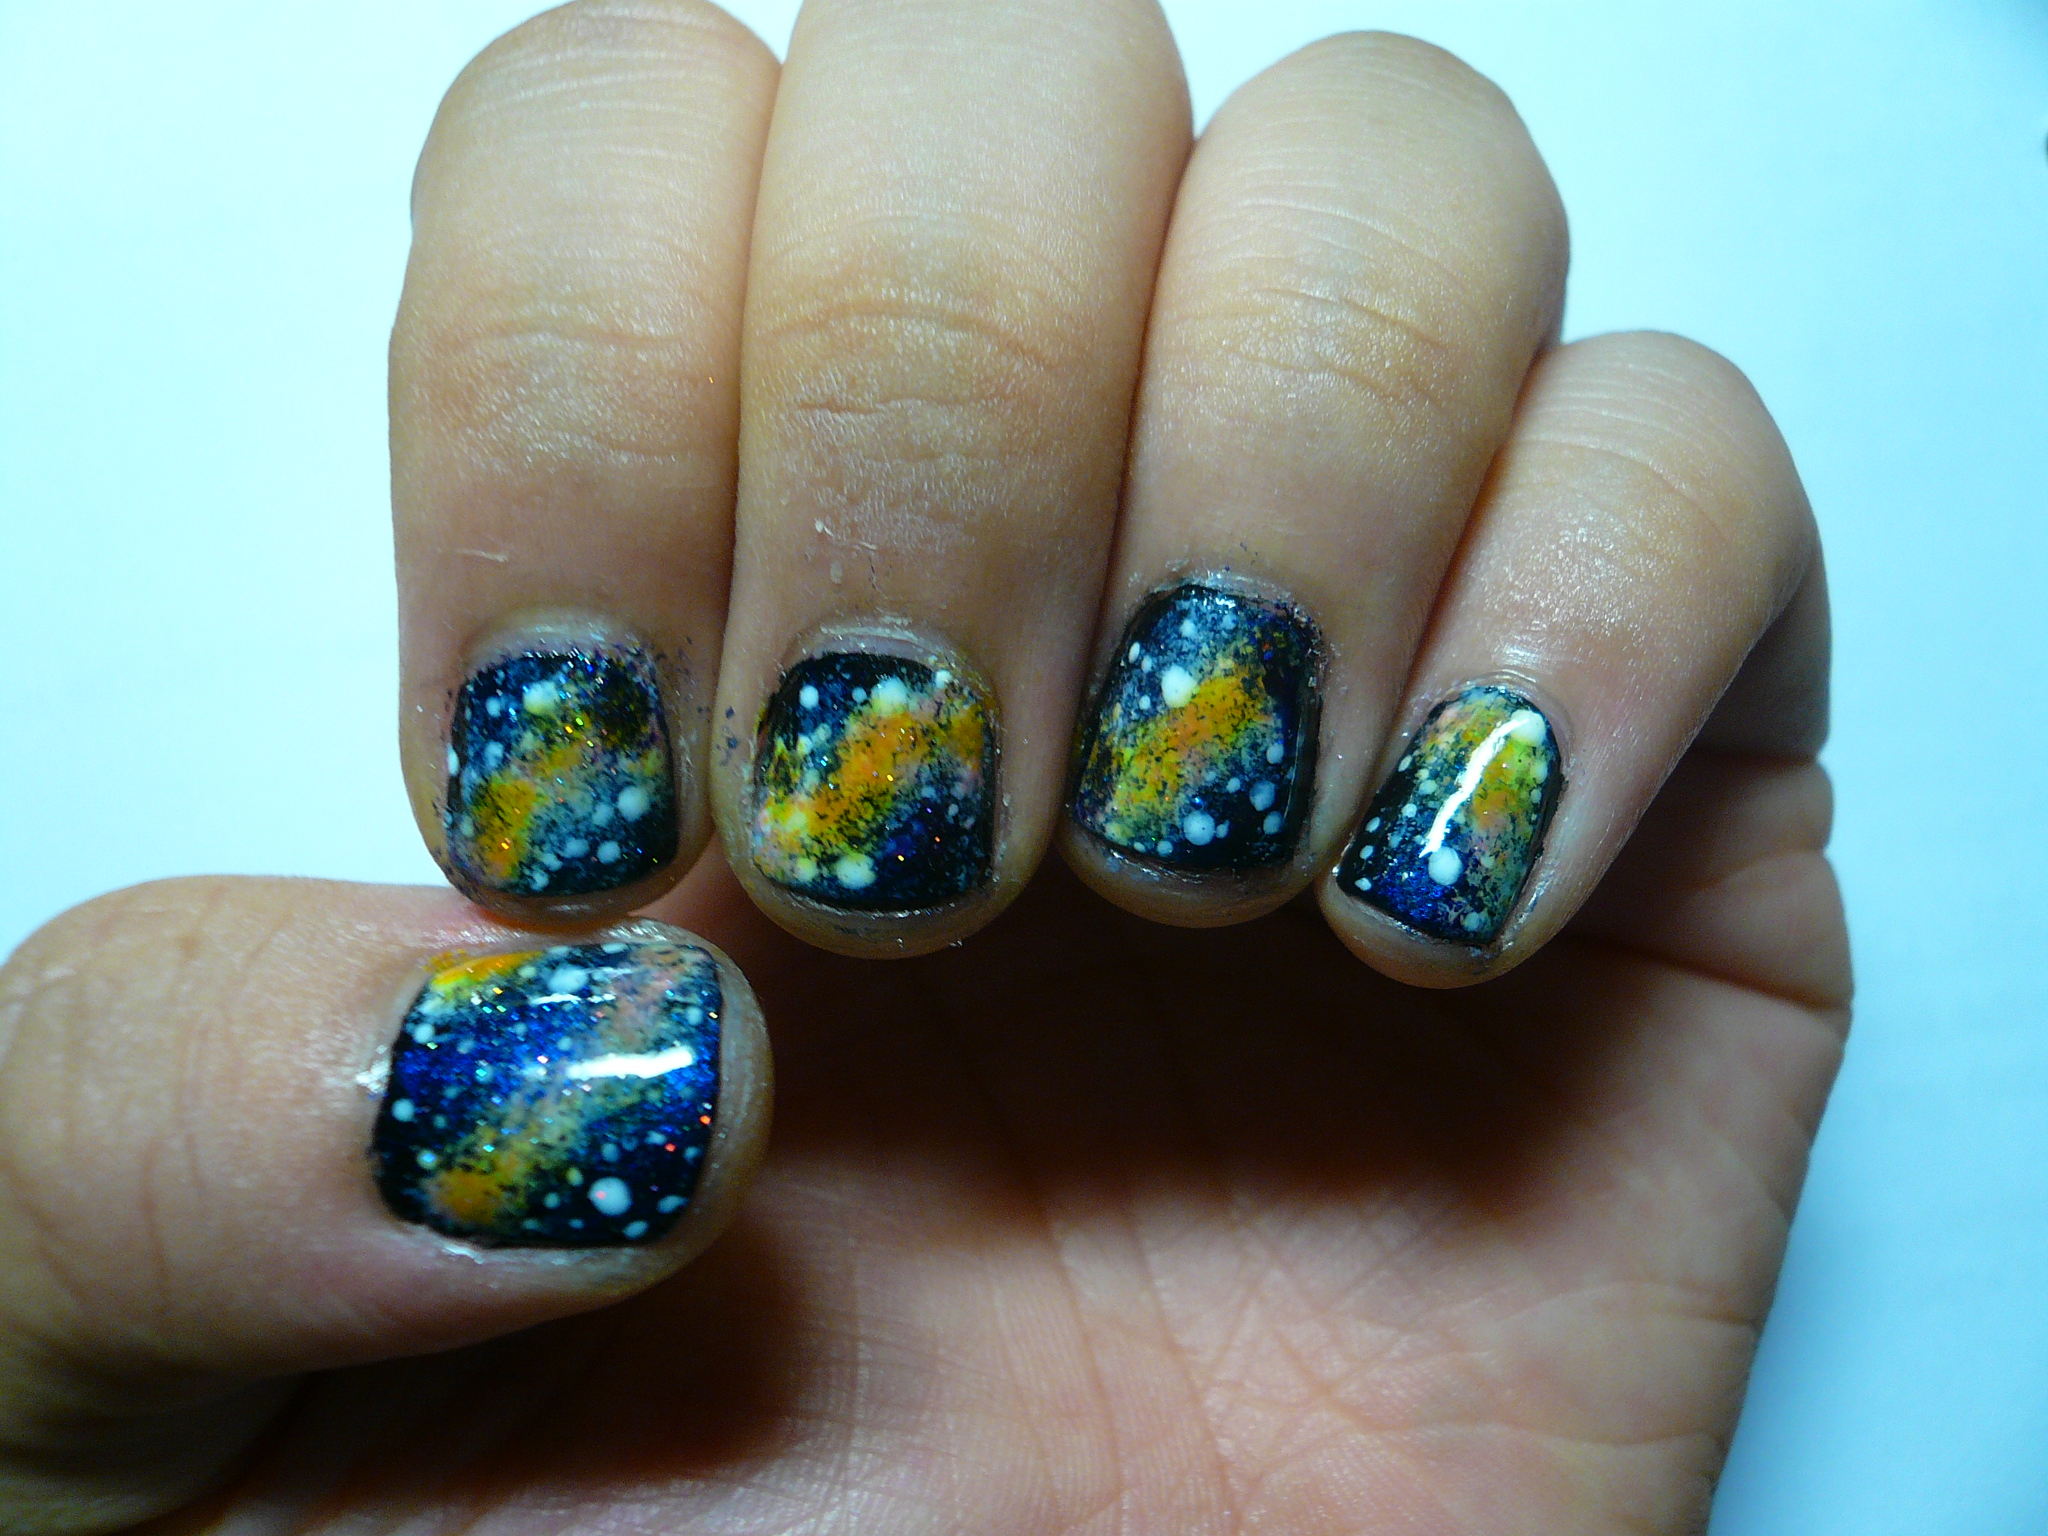
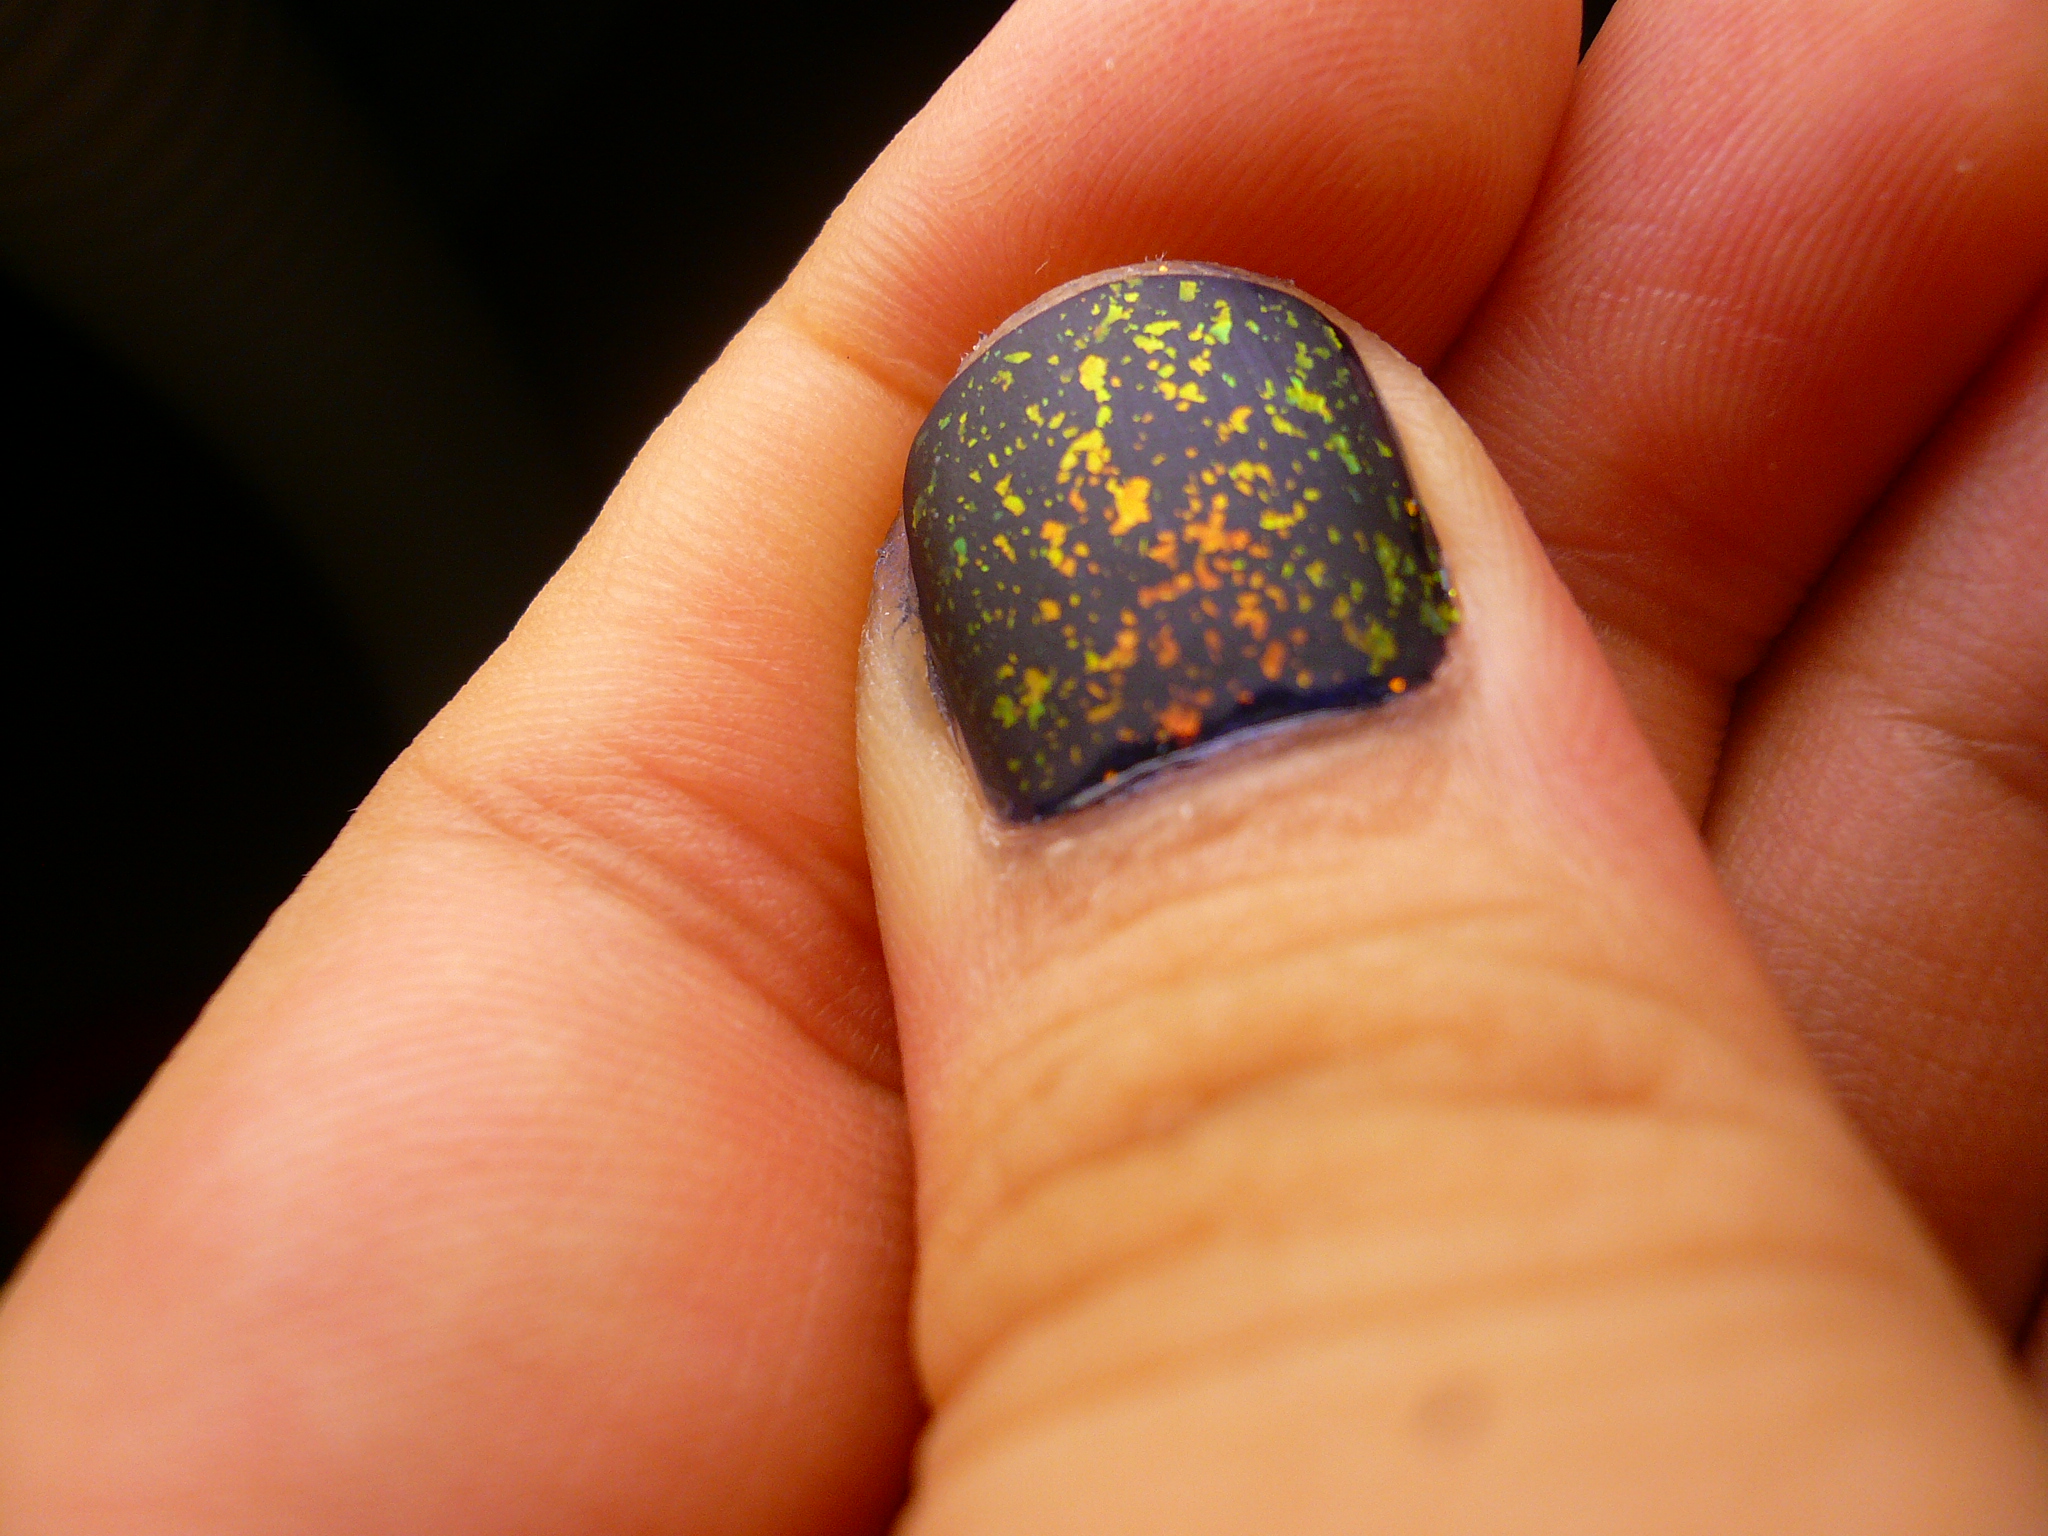
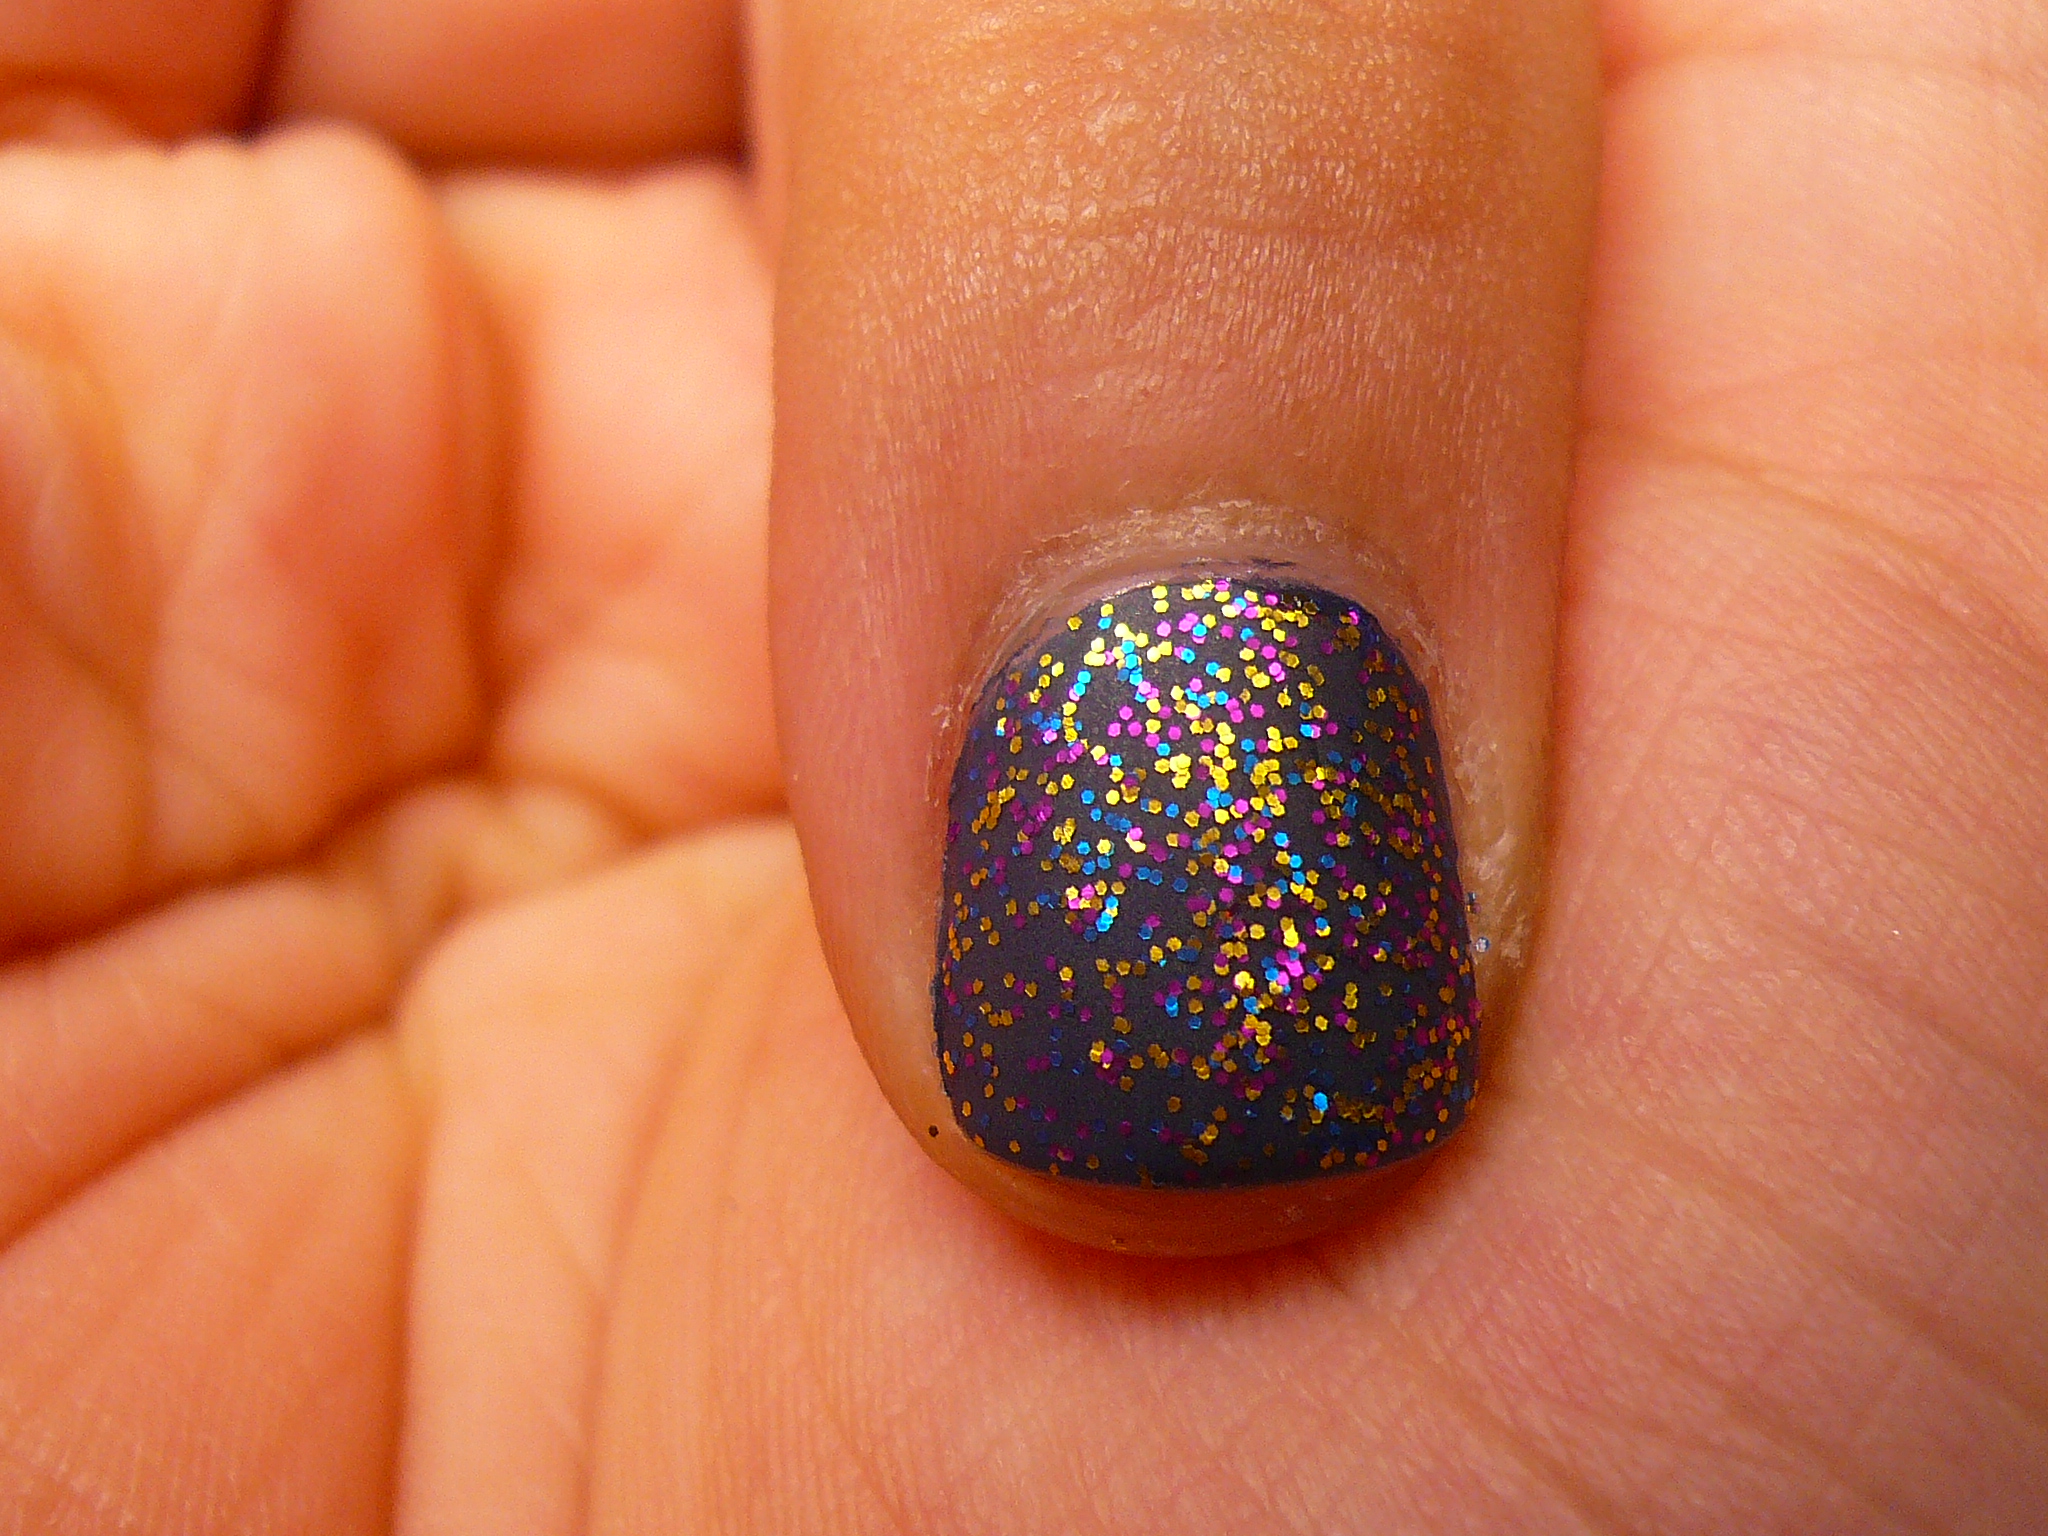
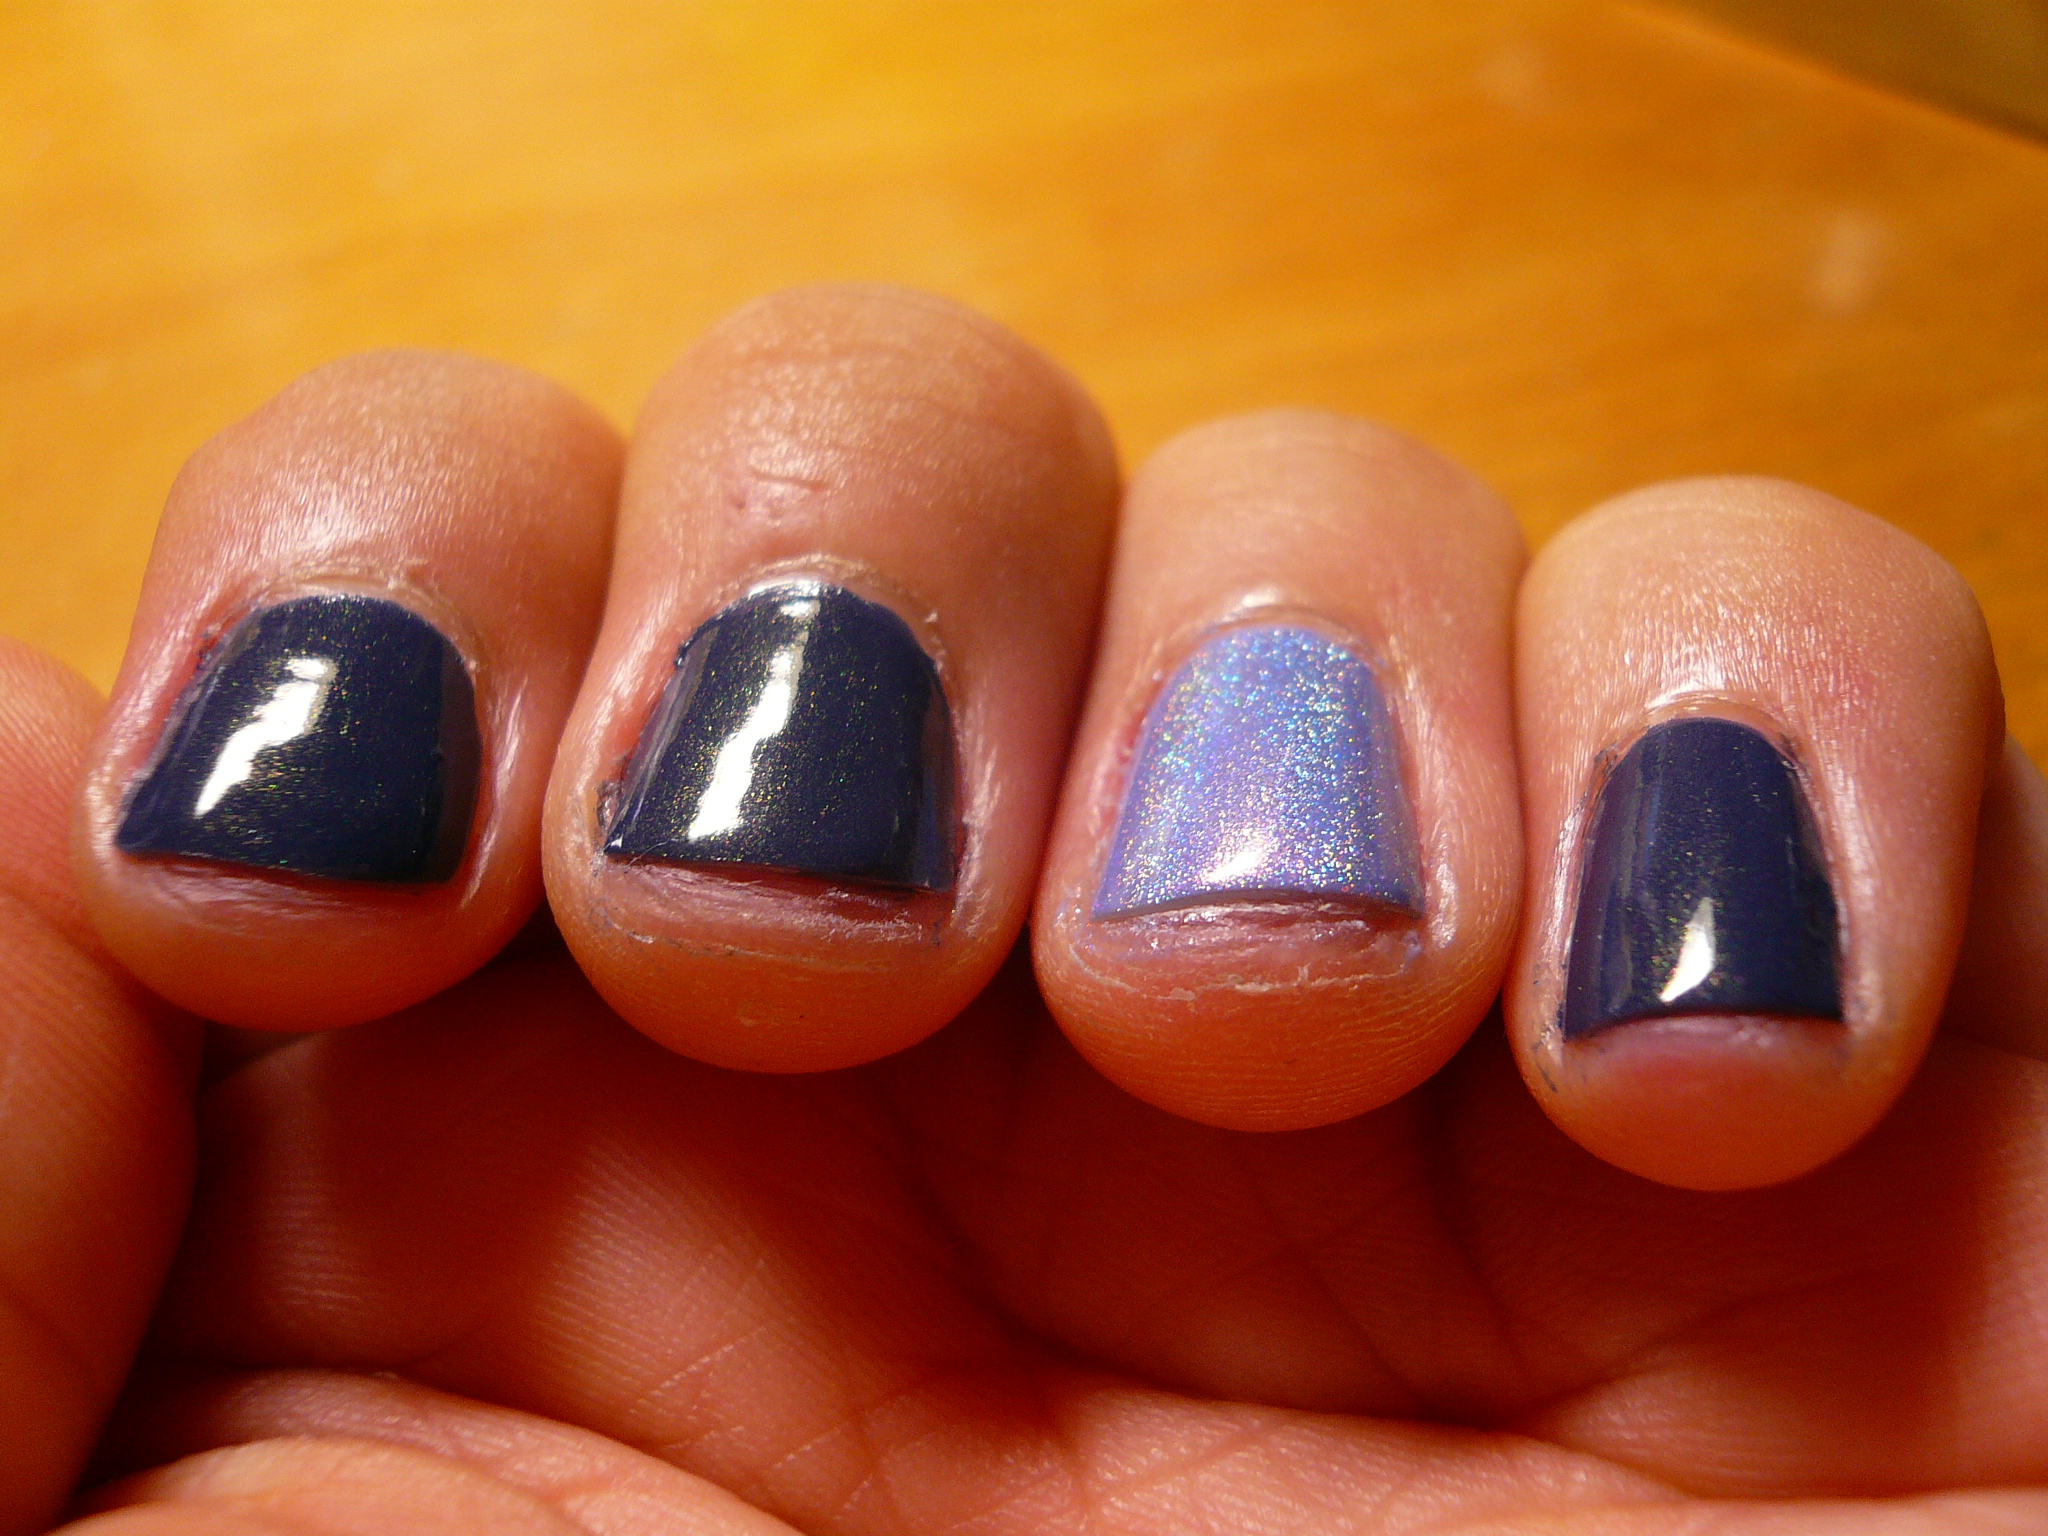
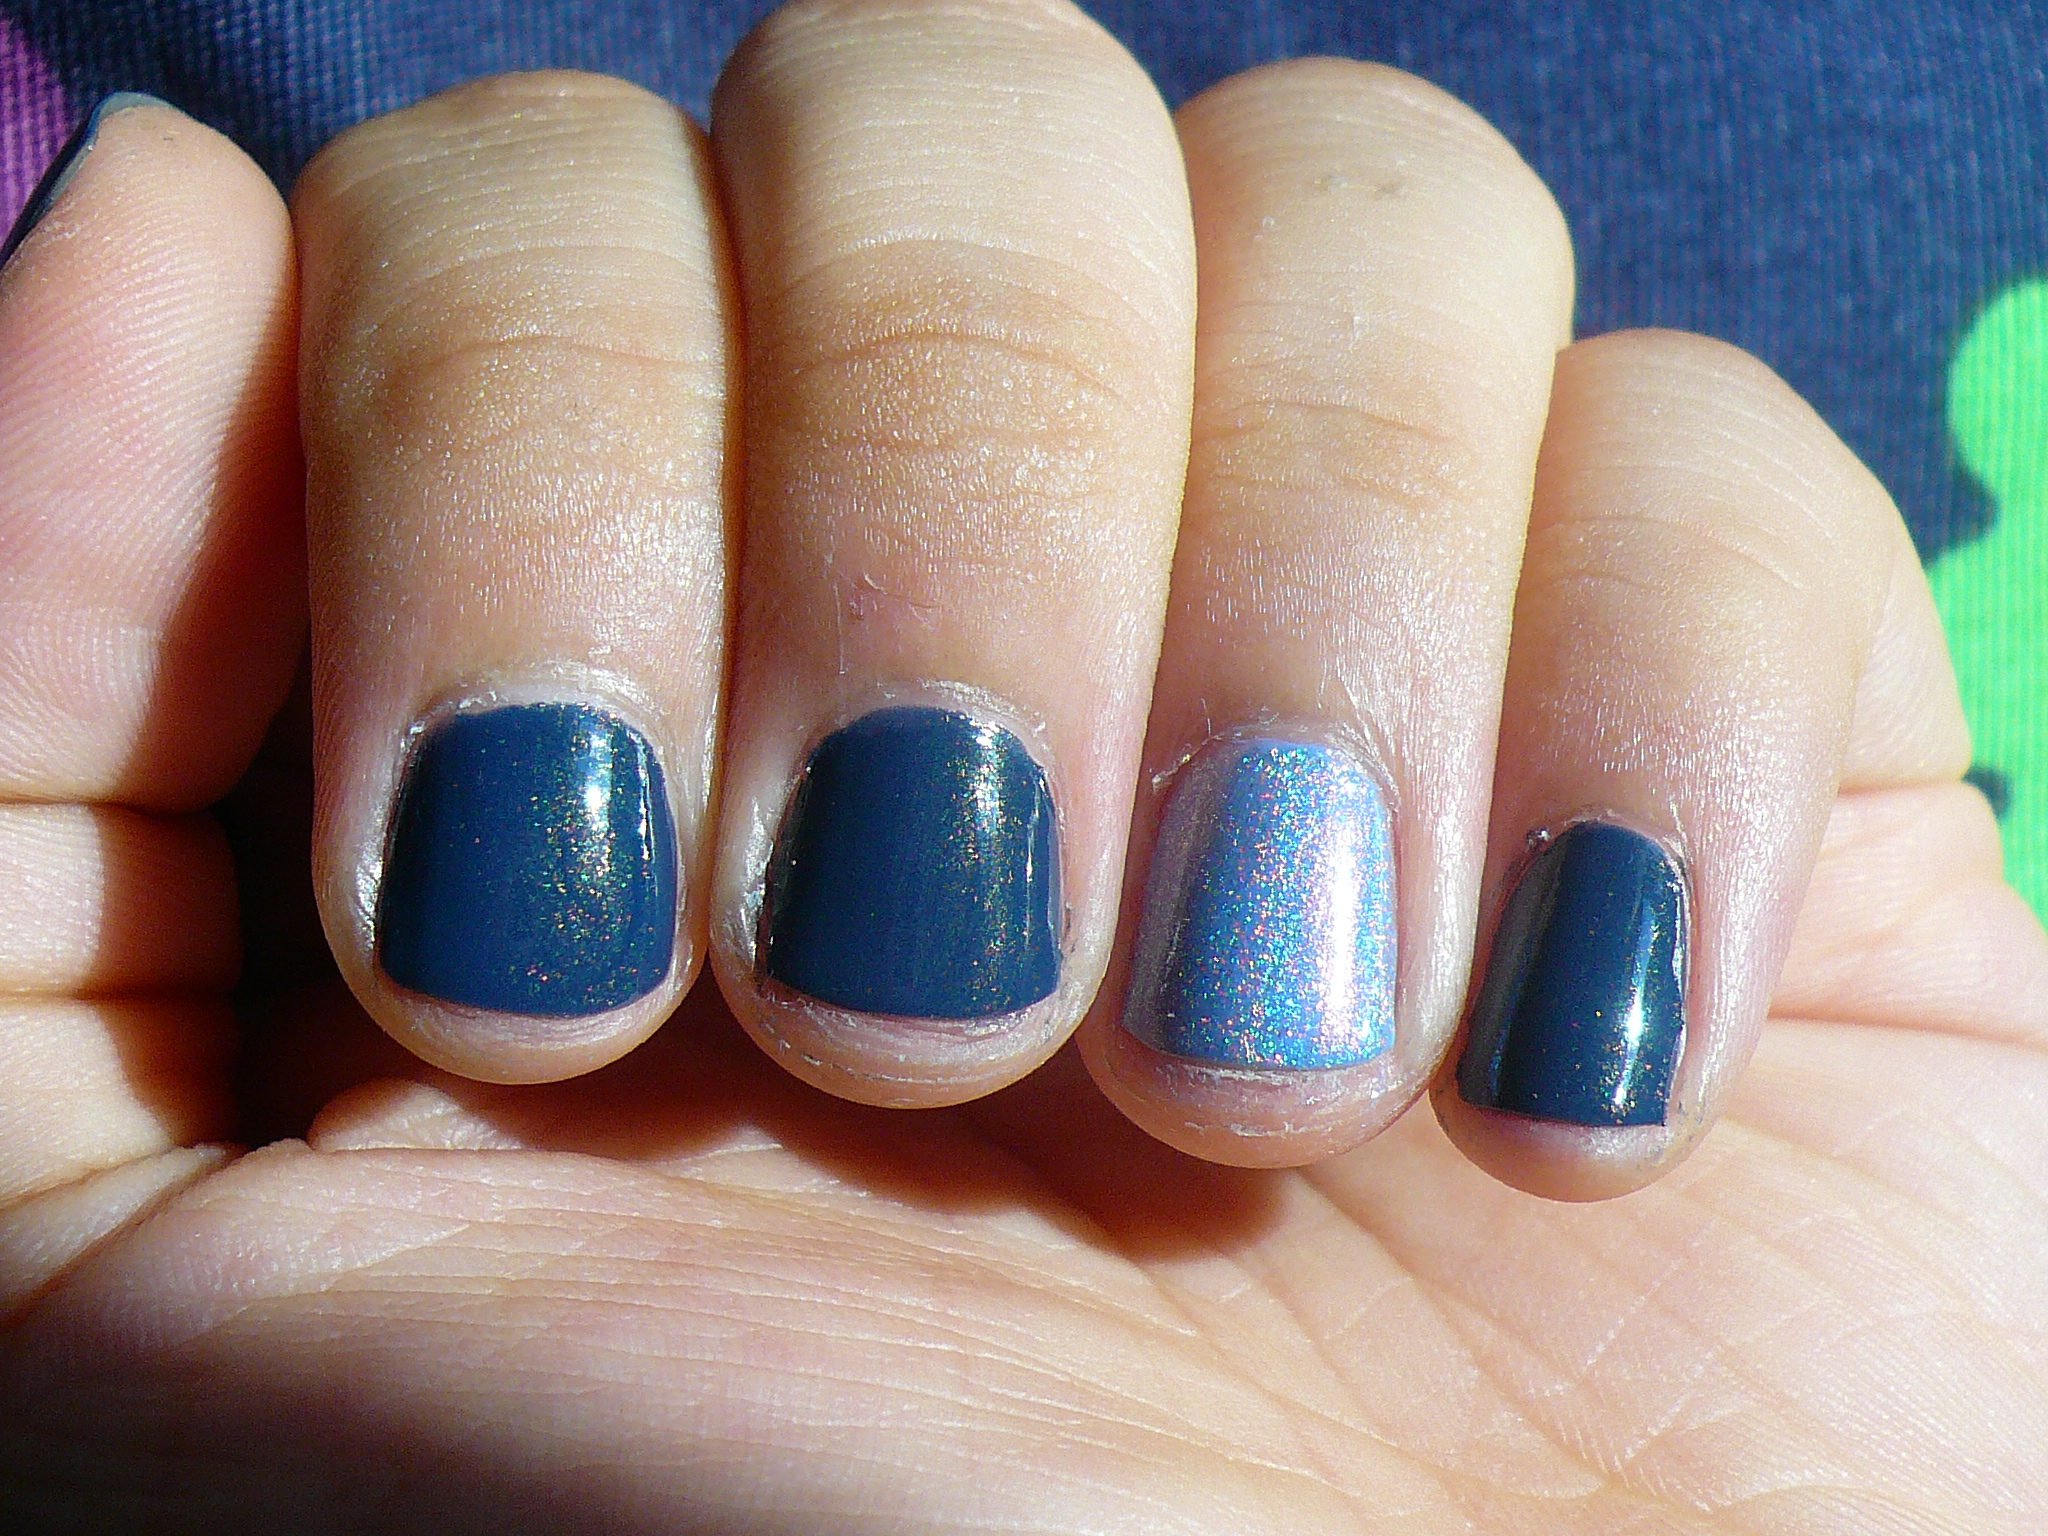
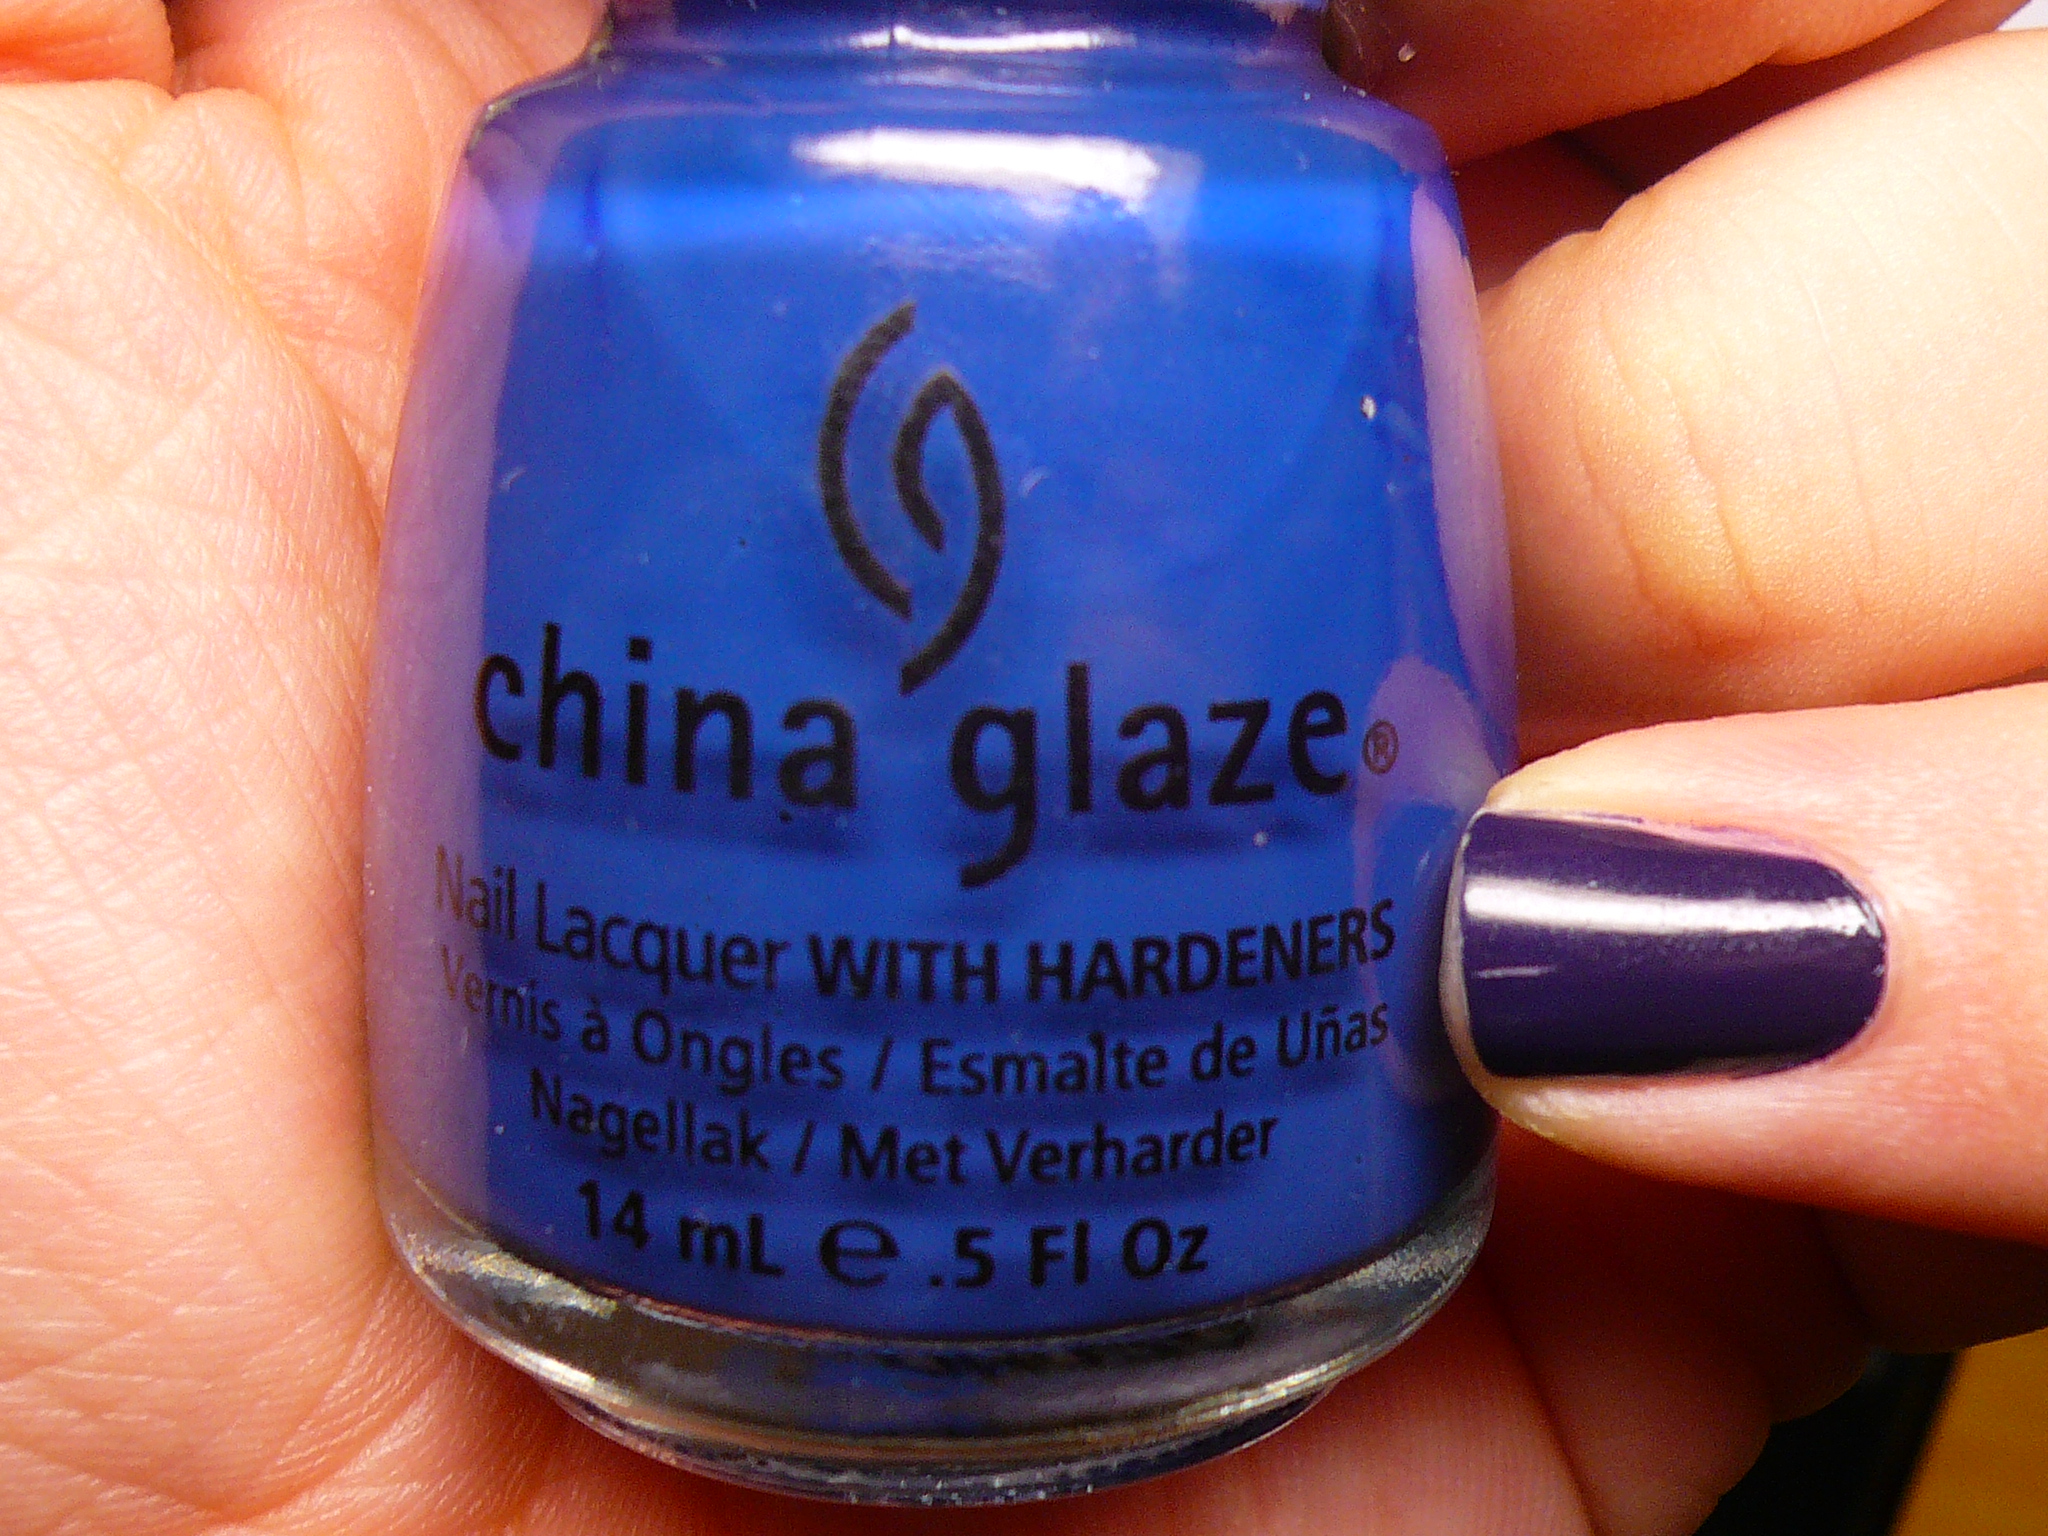
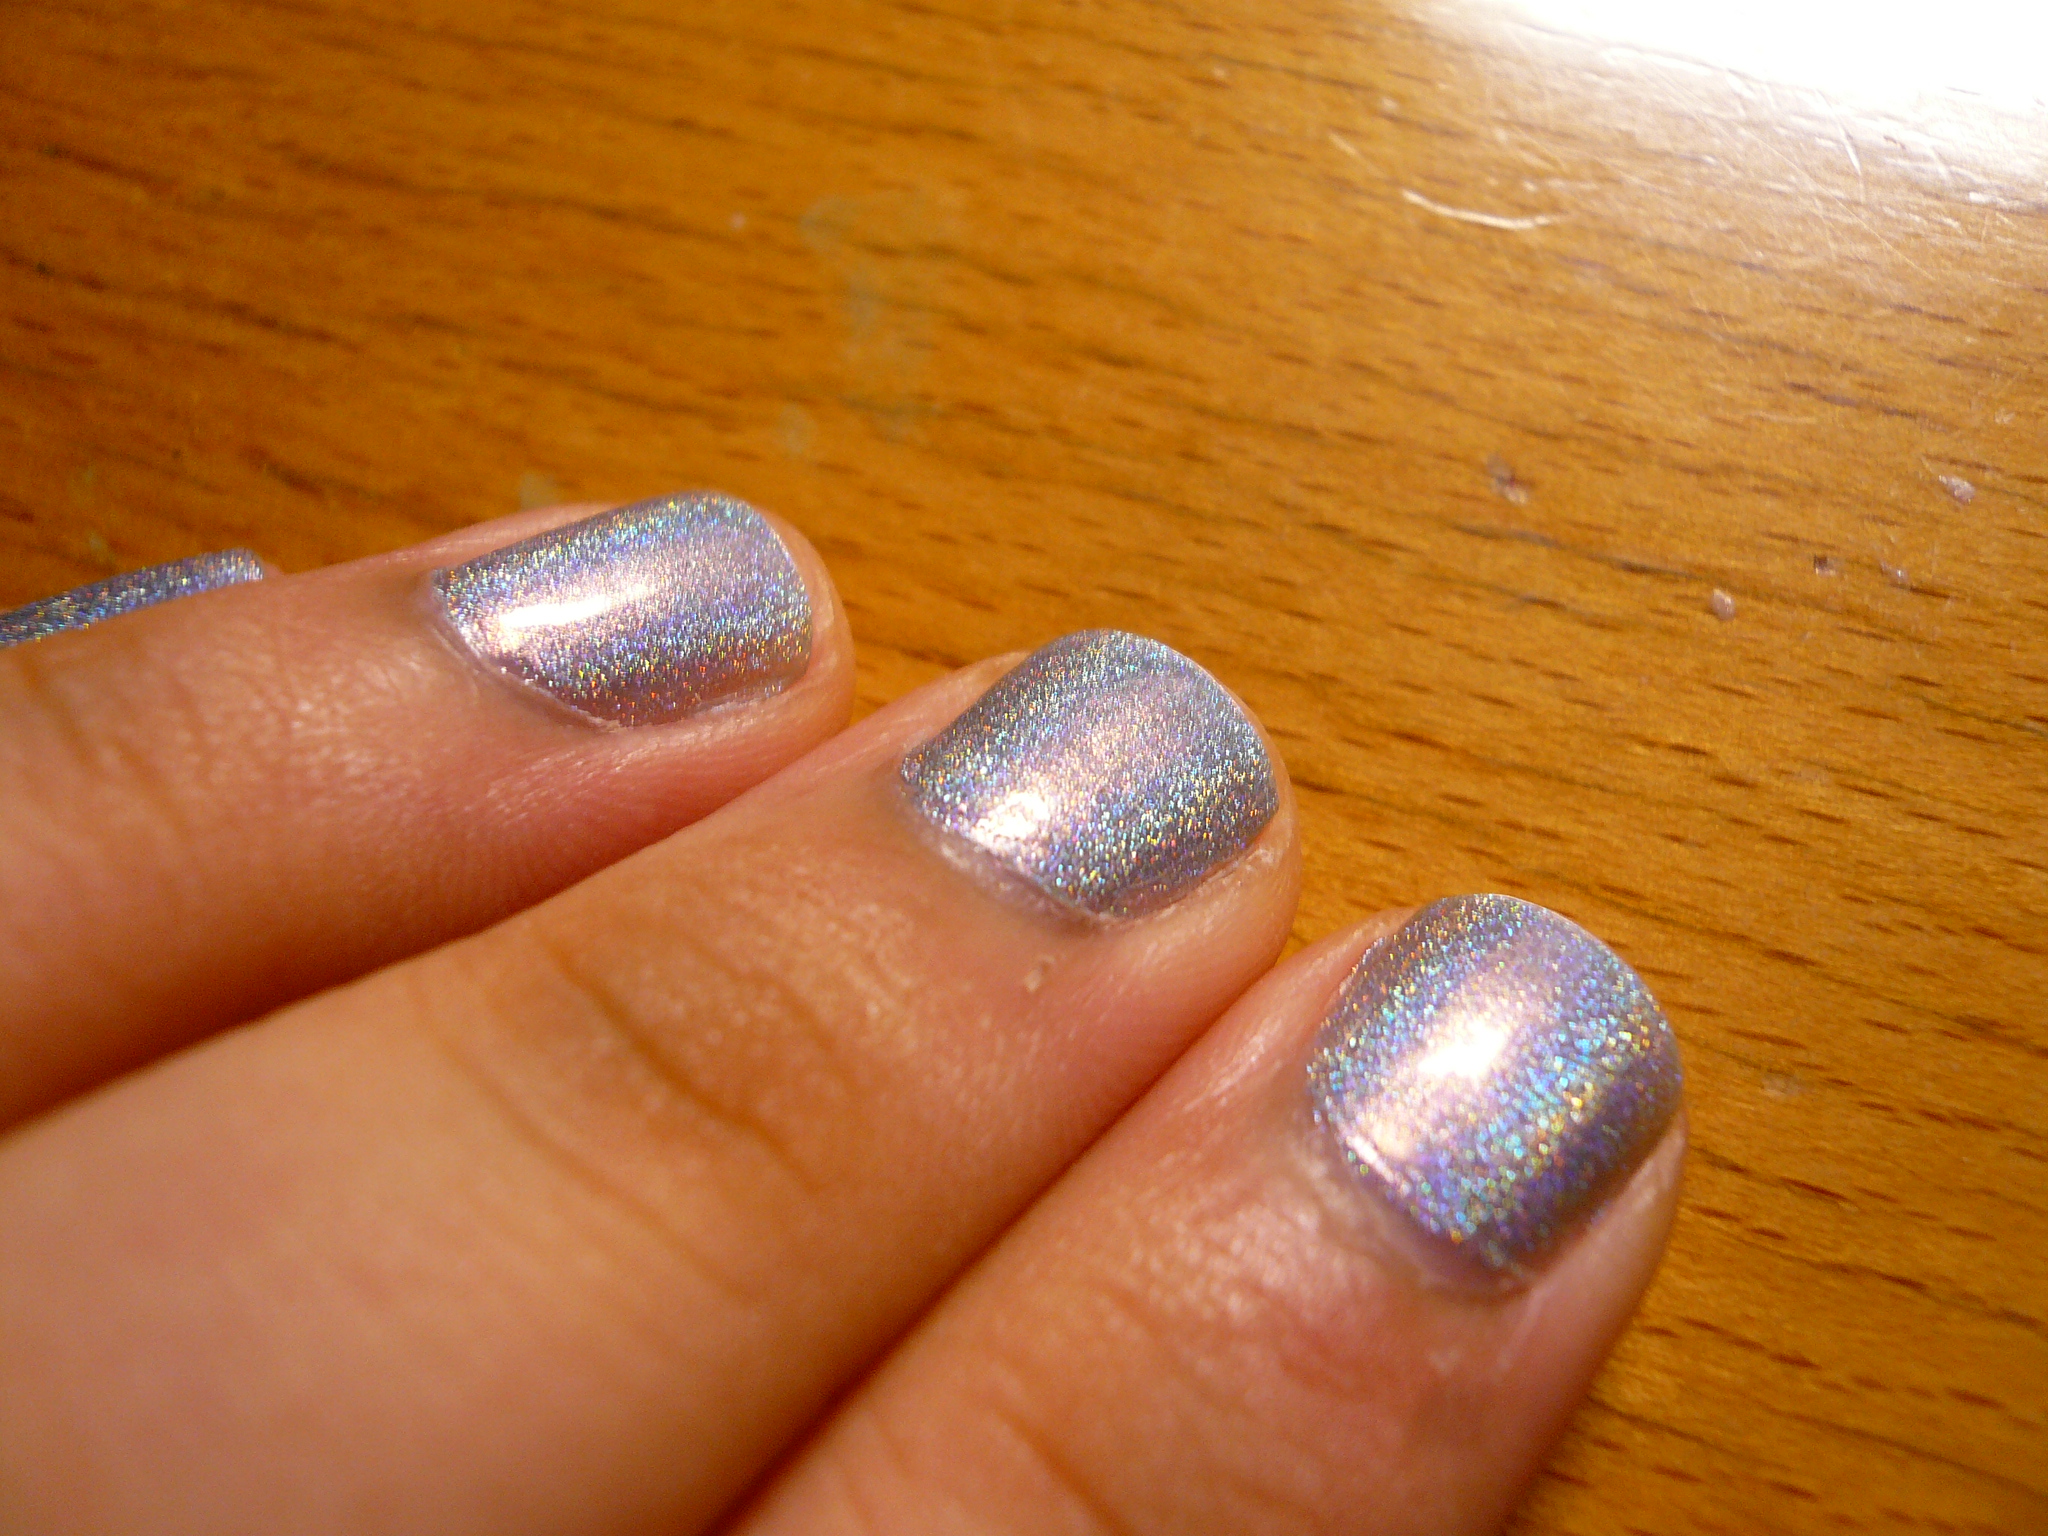
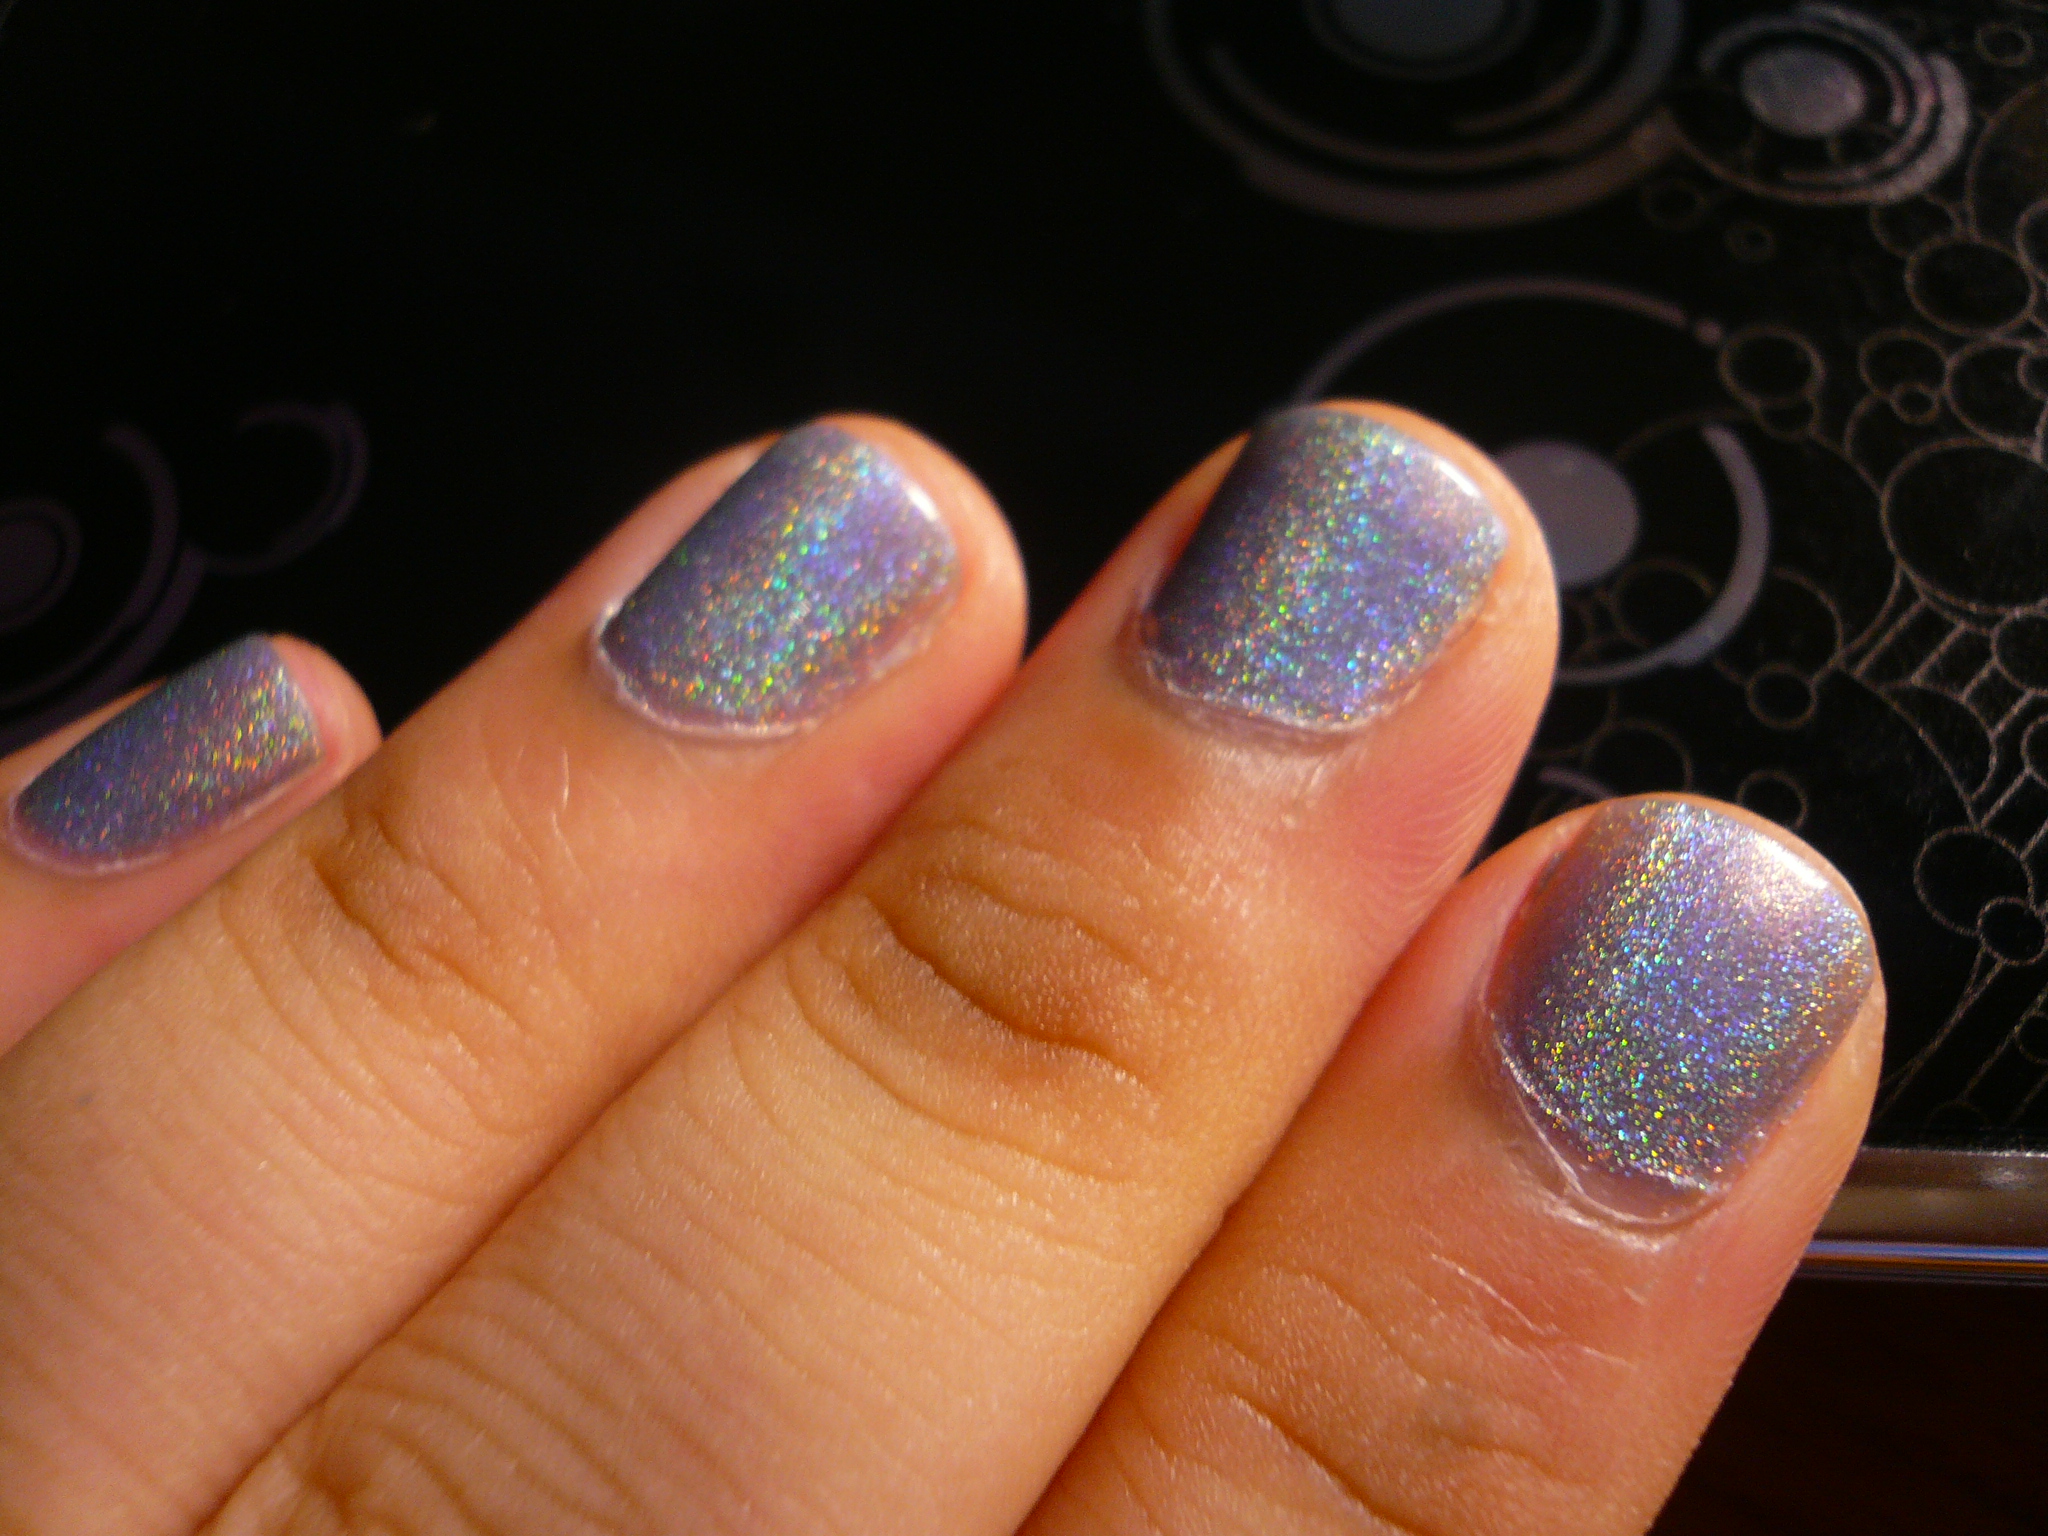
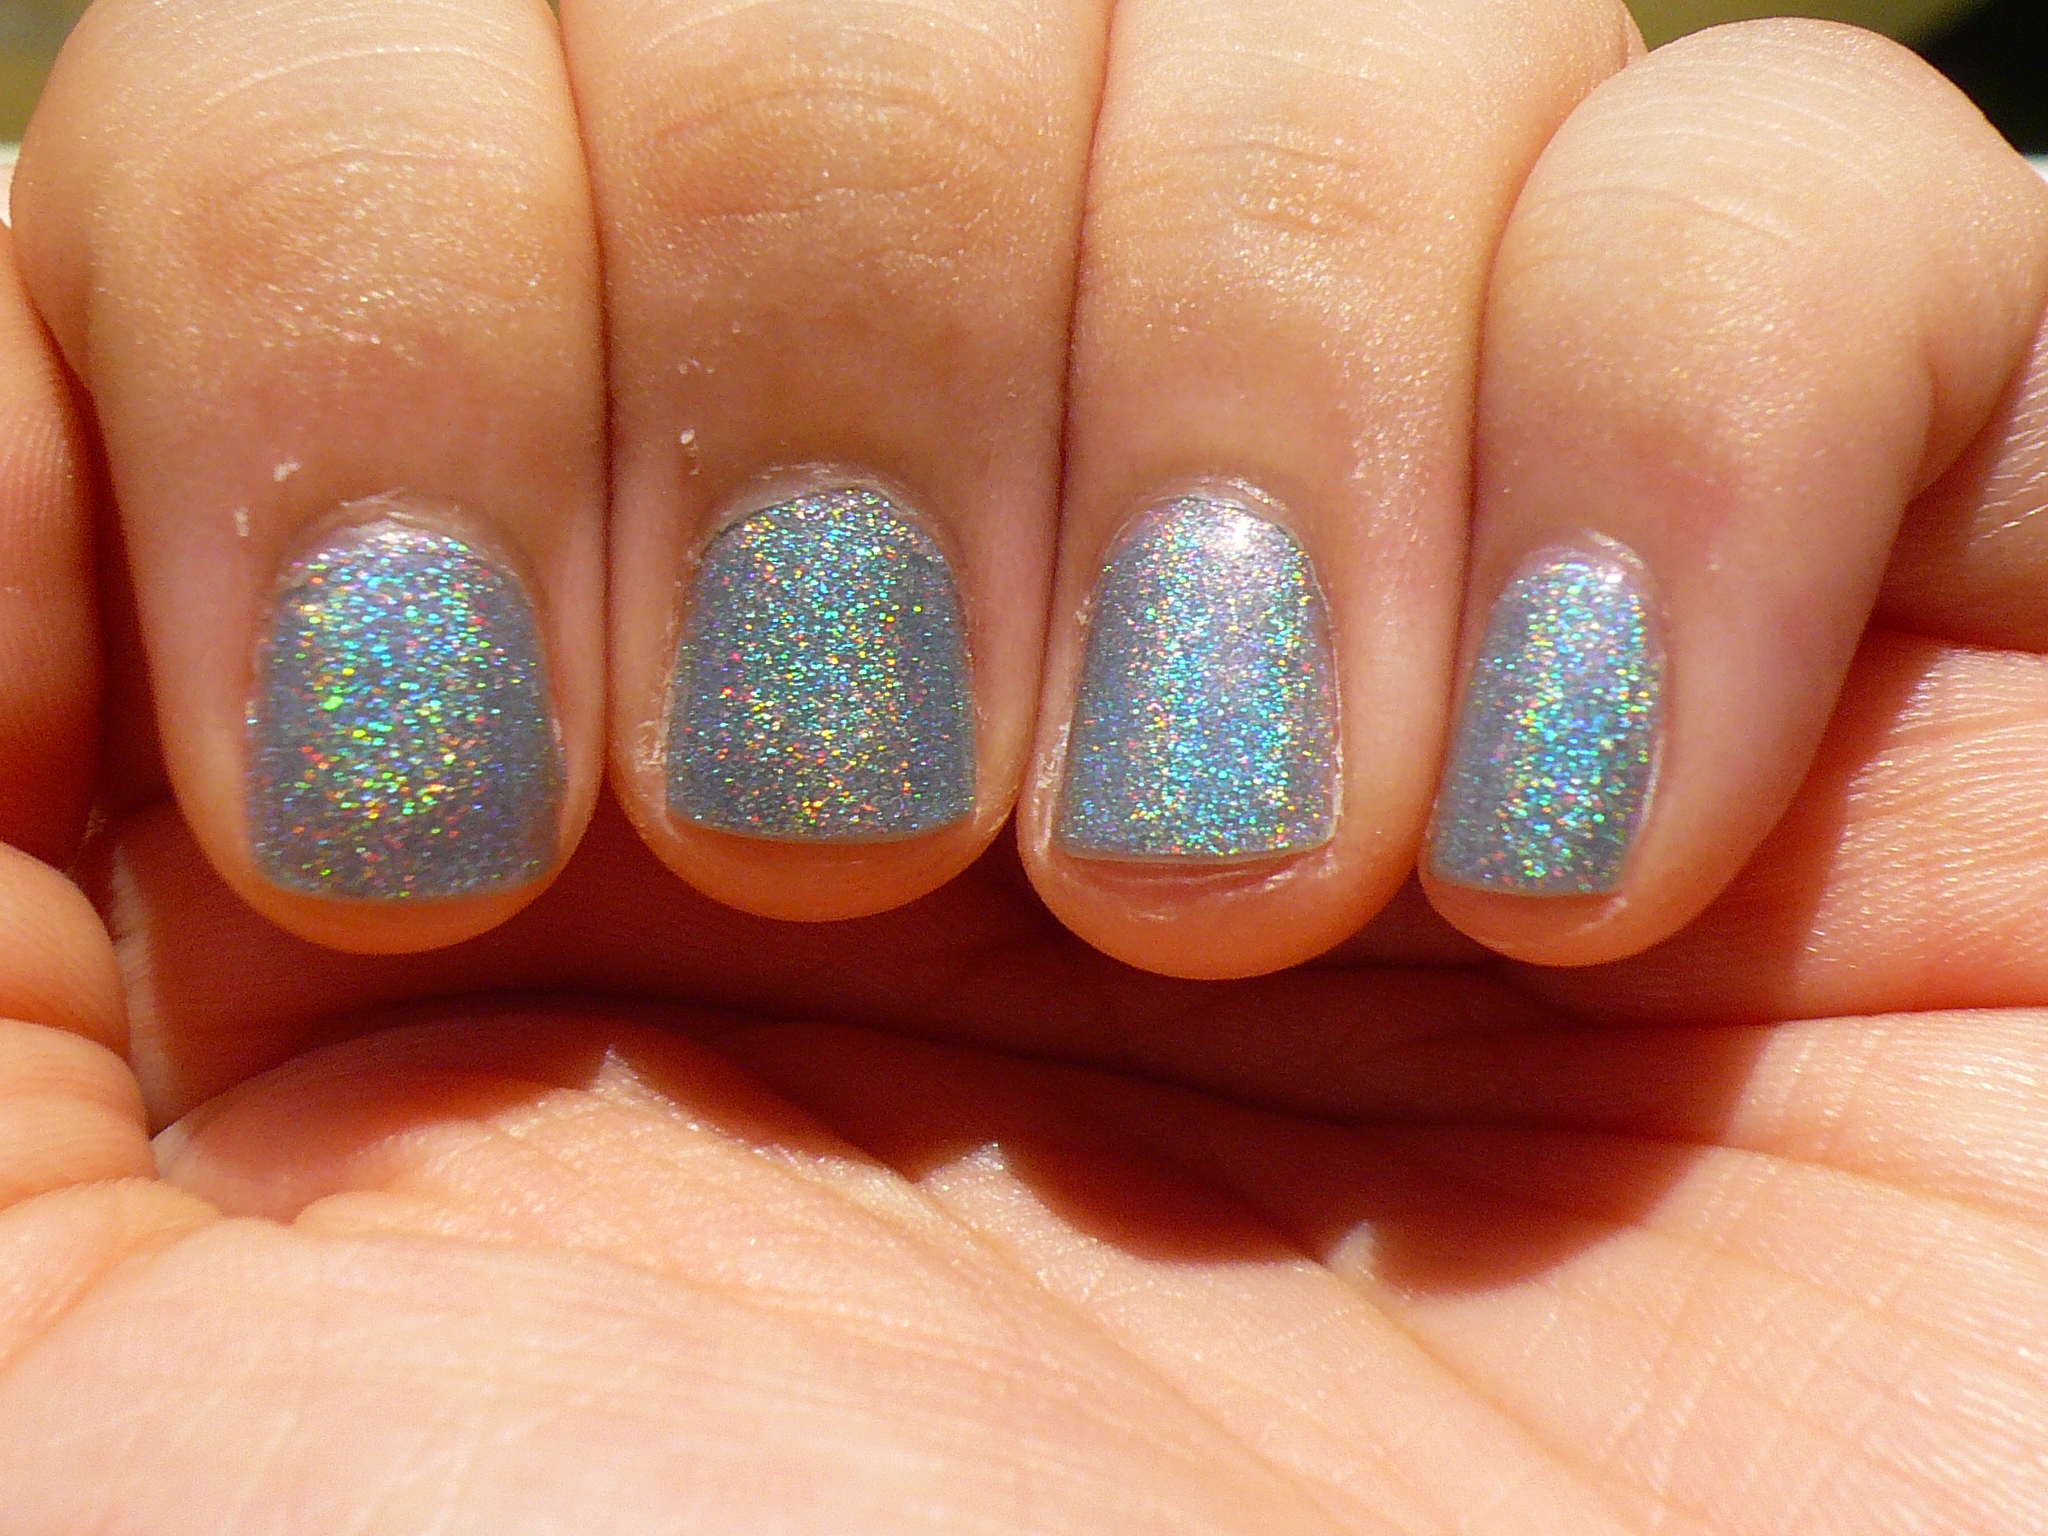
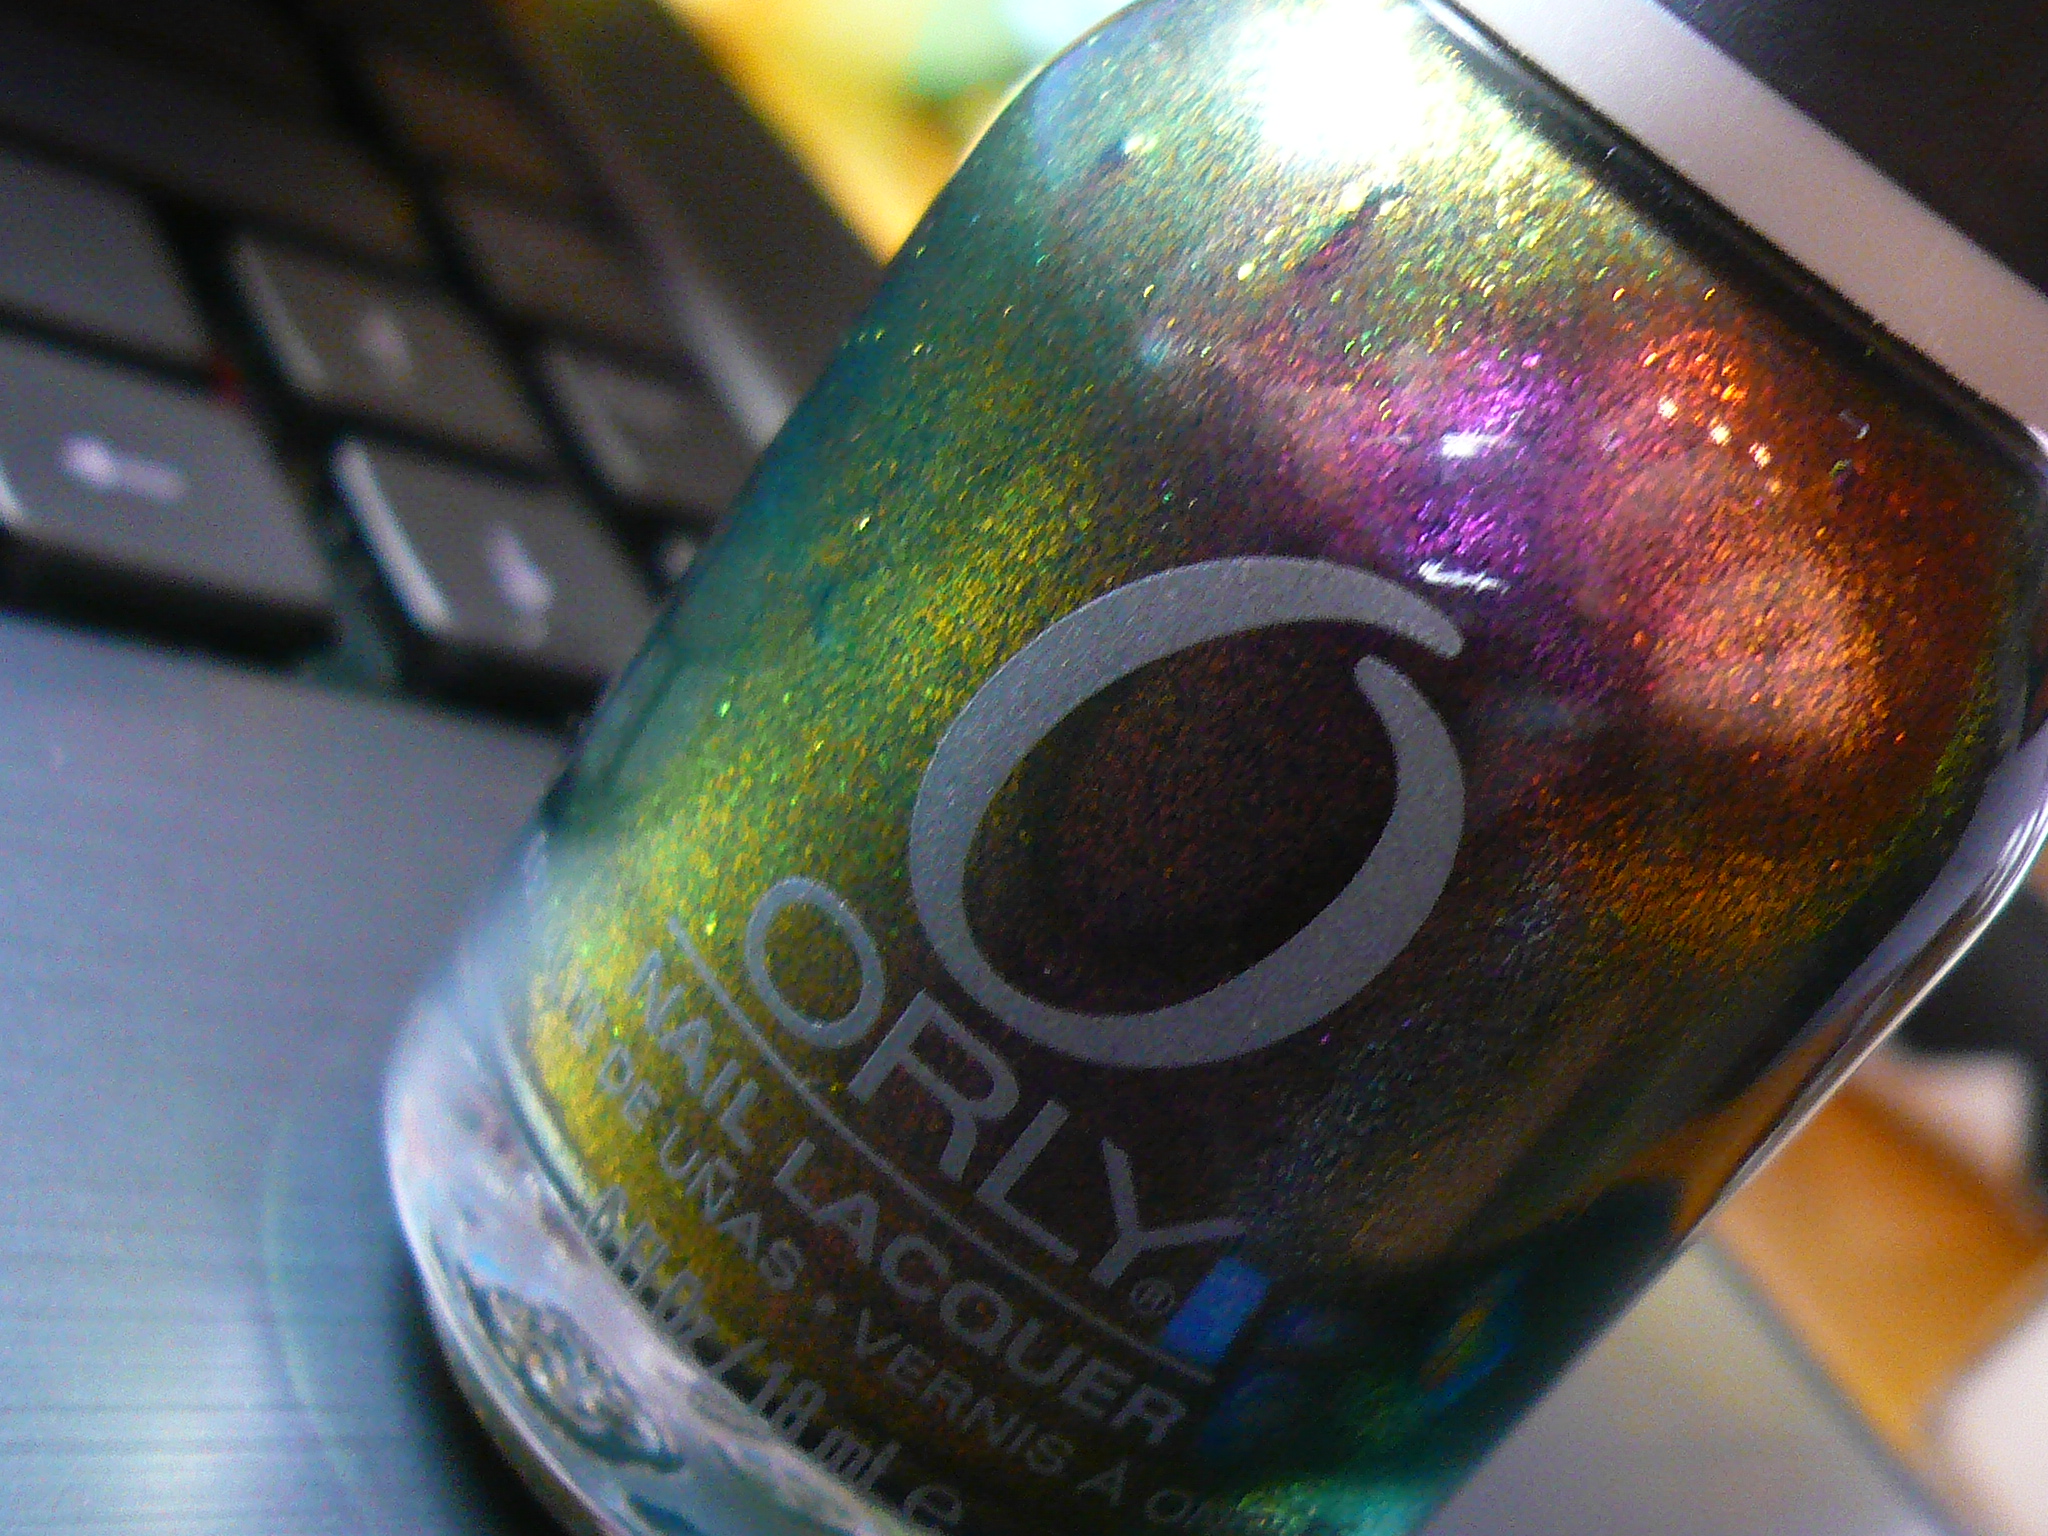
OPI DS Sapphire, an awesome holographic color. I think it's considered a scattered holo. It's not exactly very linear, just a little but more scattered. Then we have Orly Space Cadet. This picture does it no justice at all! Here's how awesome it can look in real life!


It's mainly either green or purple and I have no idea how I managed to capture so many colours in this photo!

Both DS Sapphire and Space Cadet needed 3 coats (Space Cadet sometimes needed 4 coats even) but they were both worth the additional coat(s) and were still relatively easy to handle!


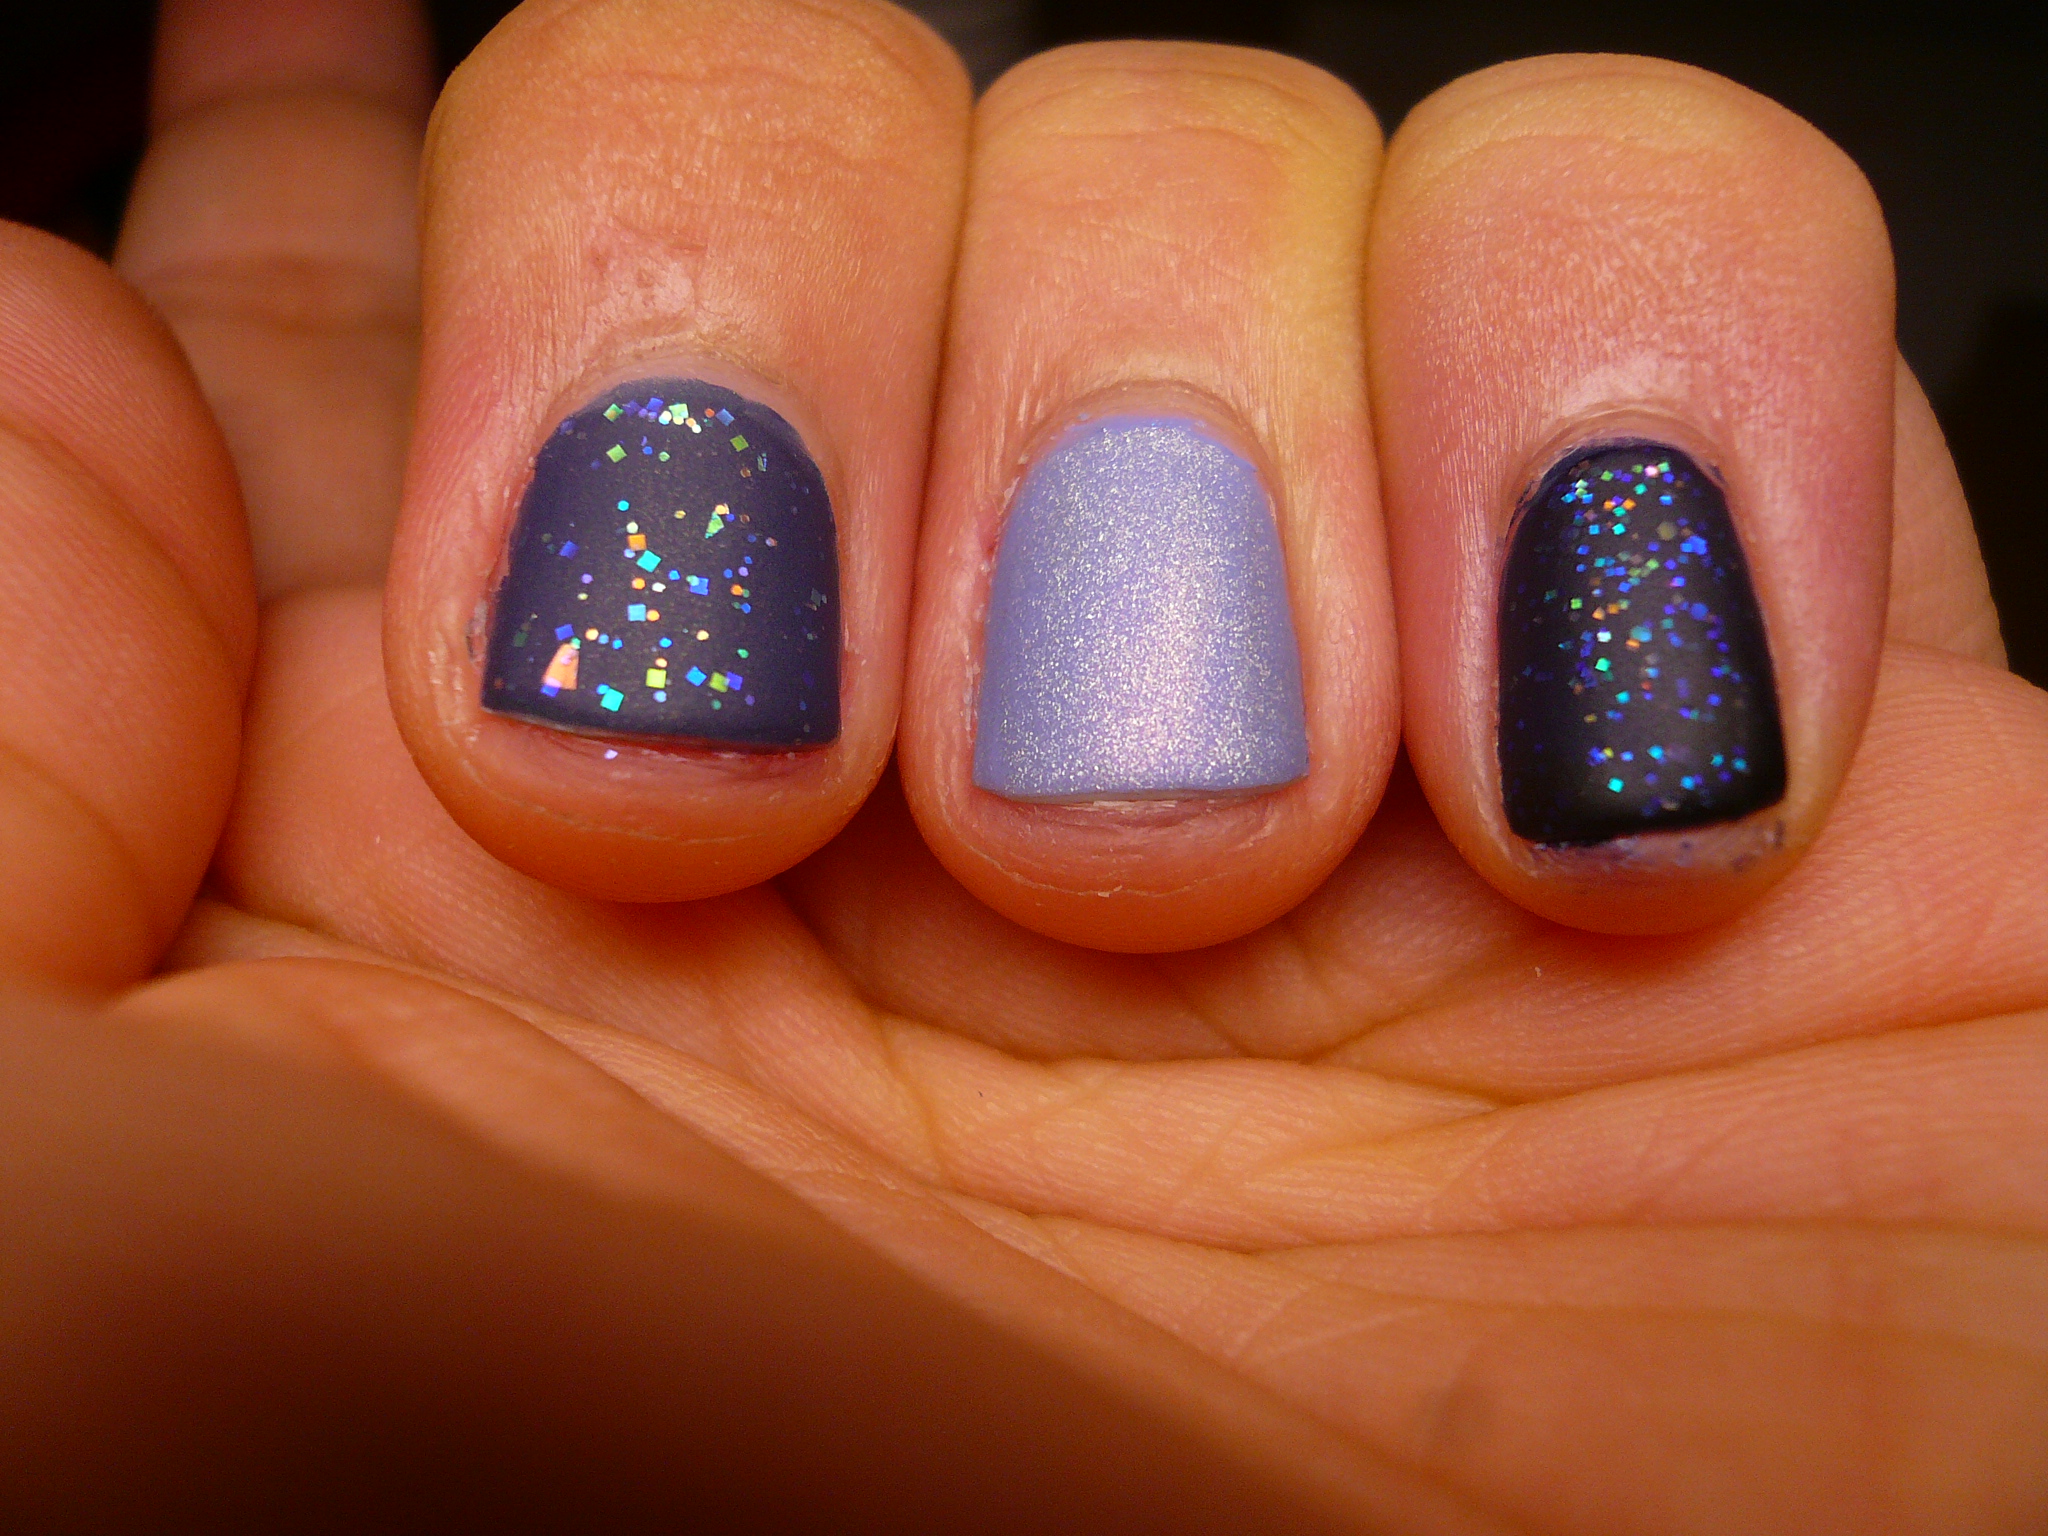
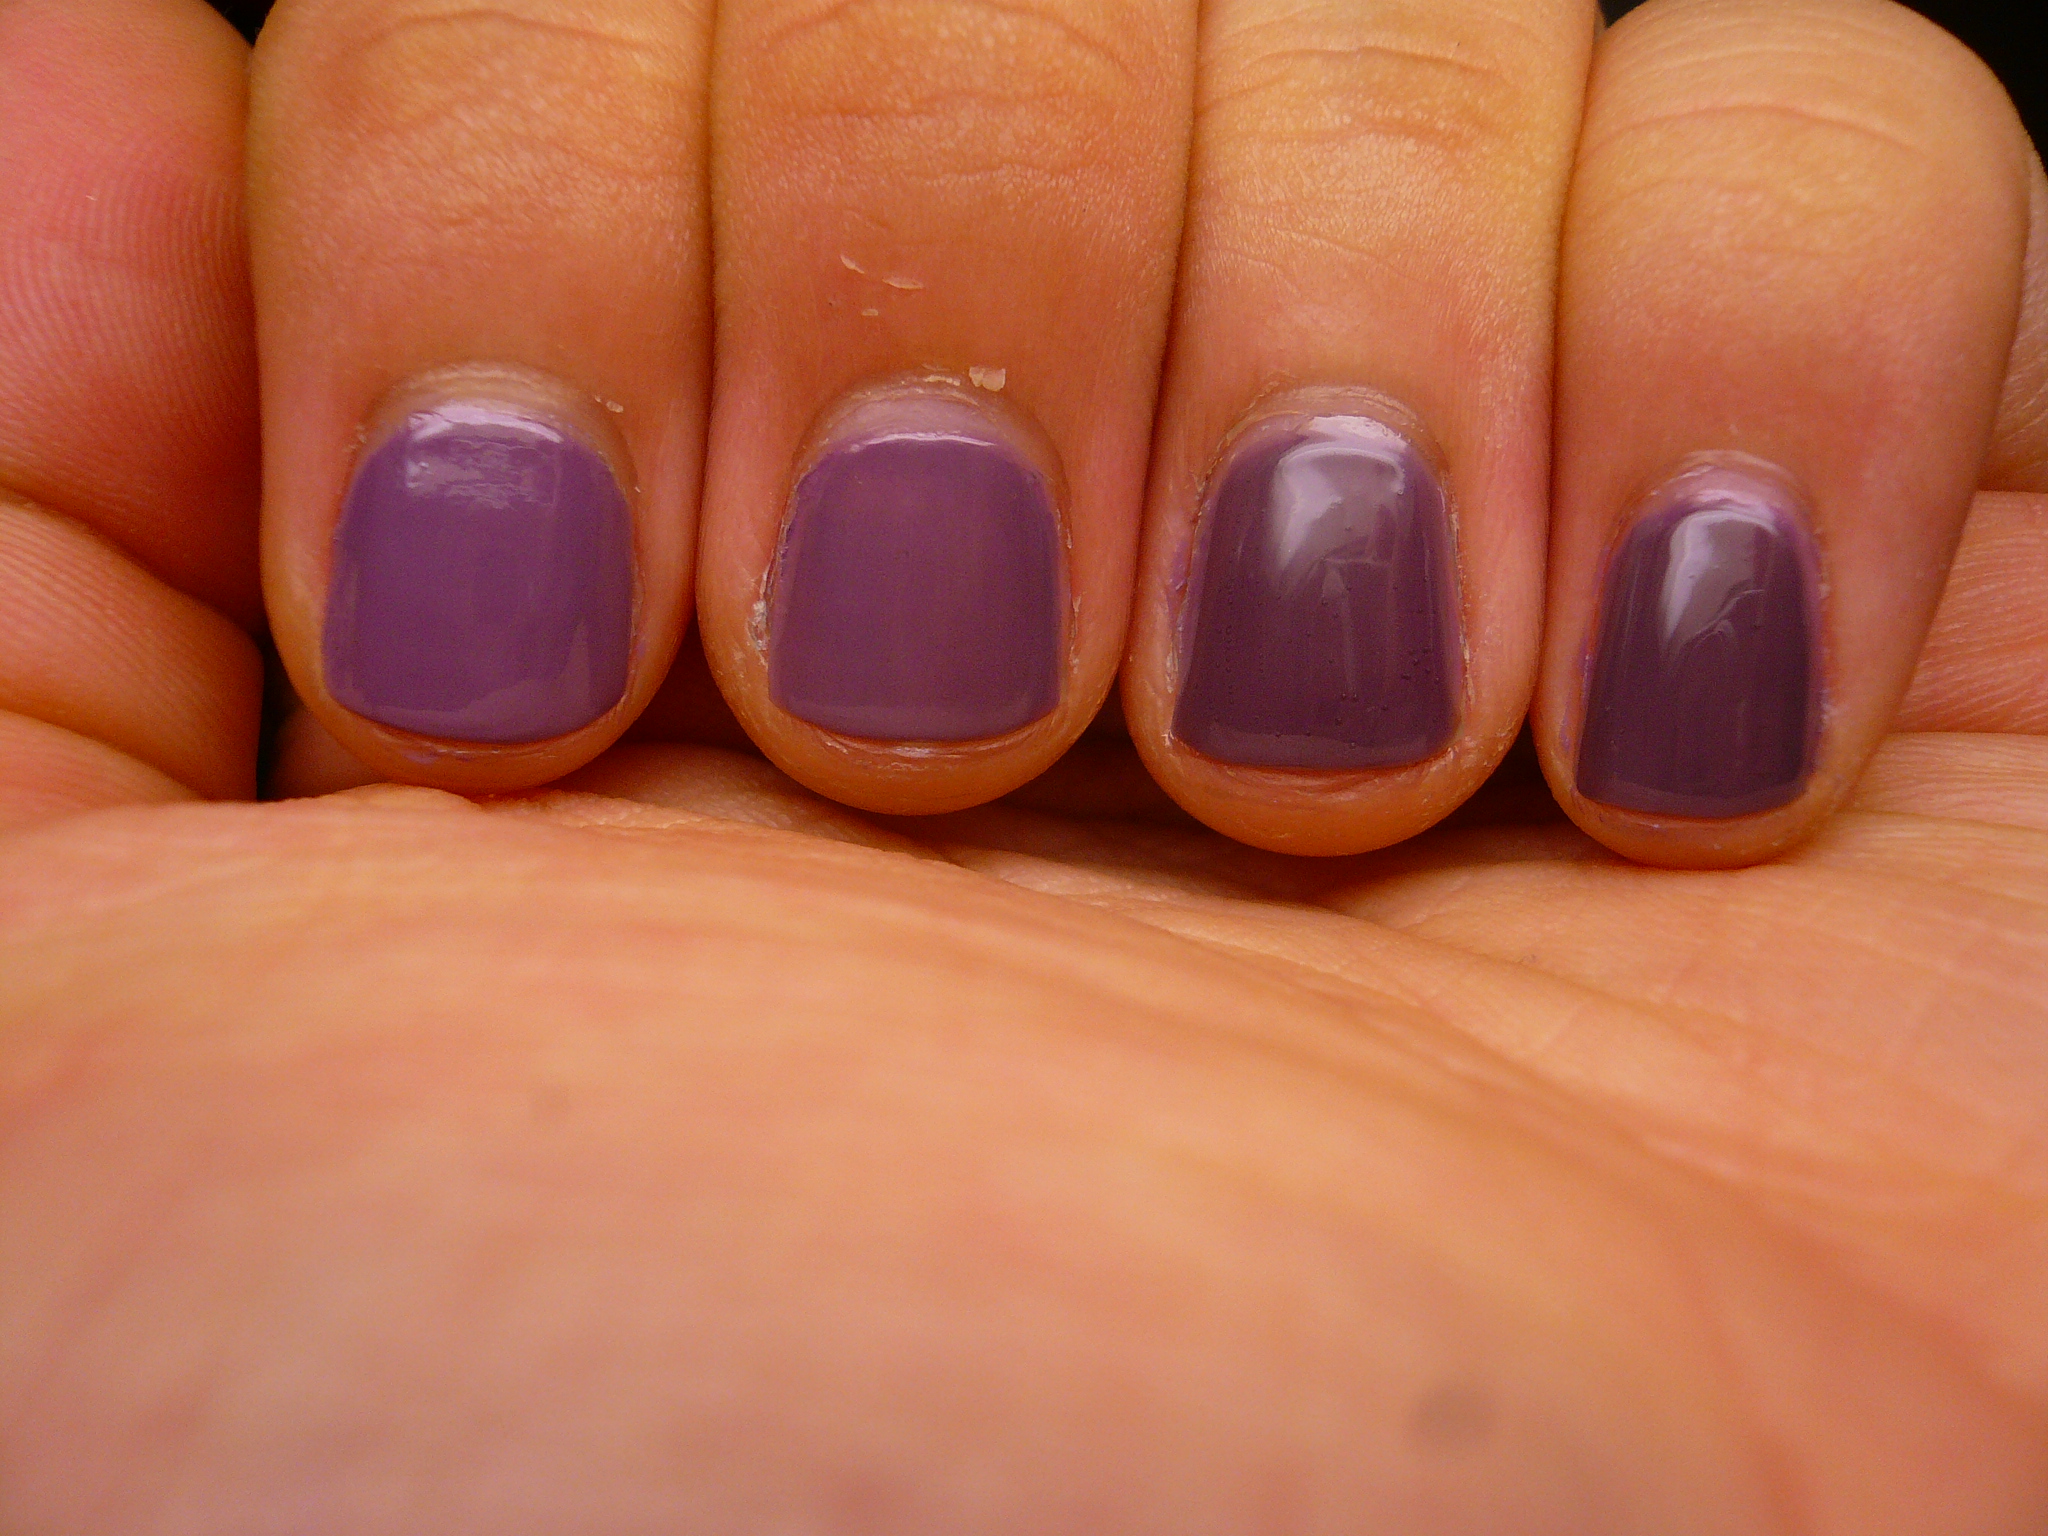
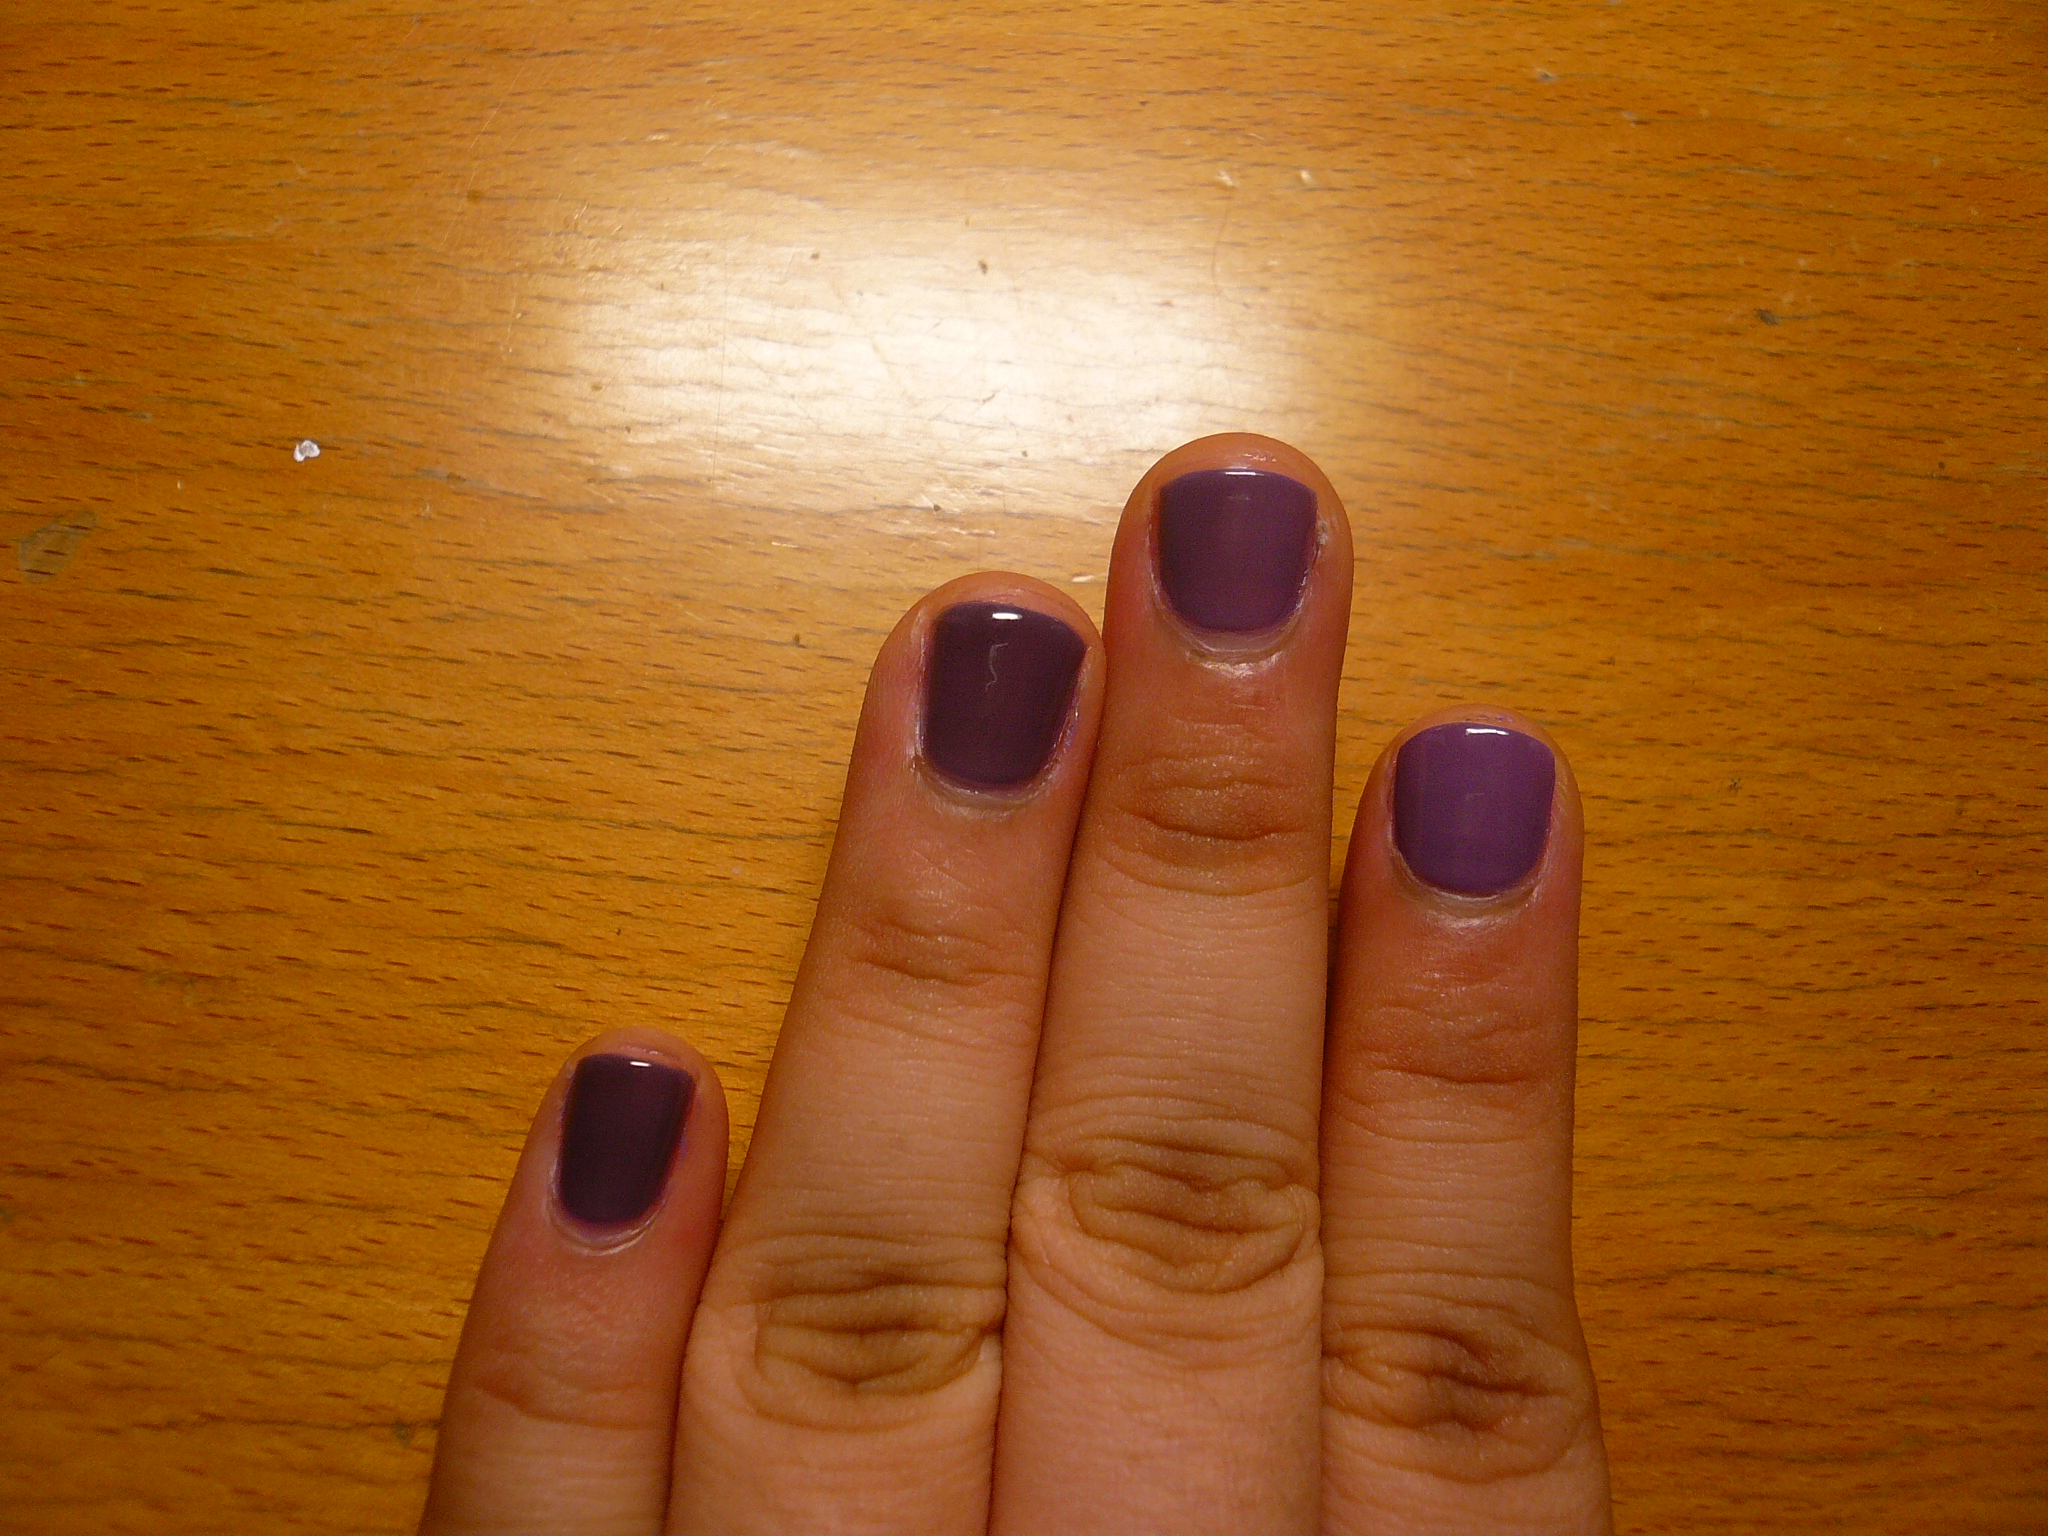
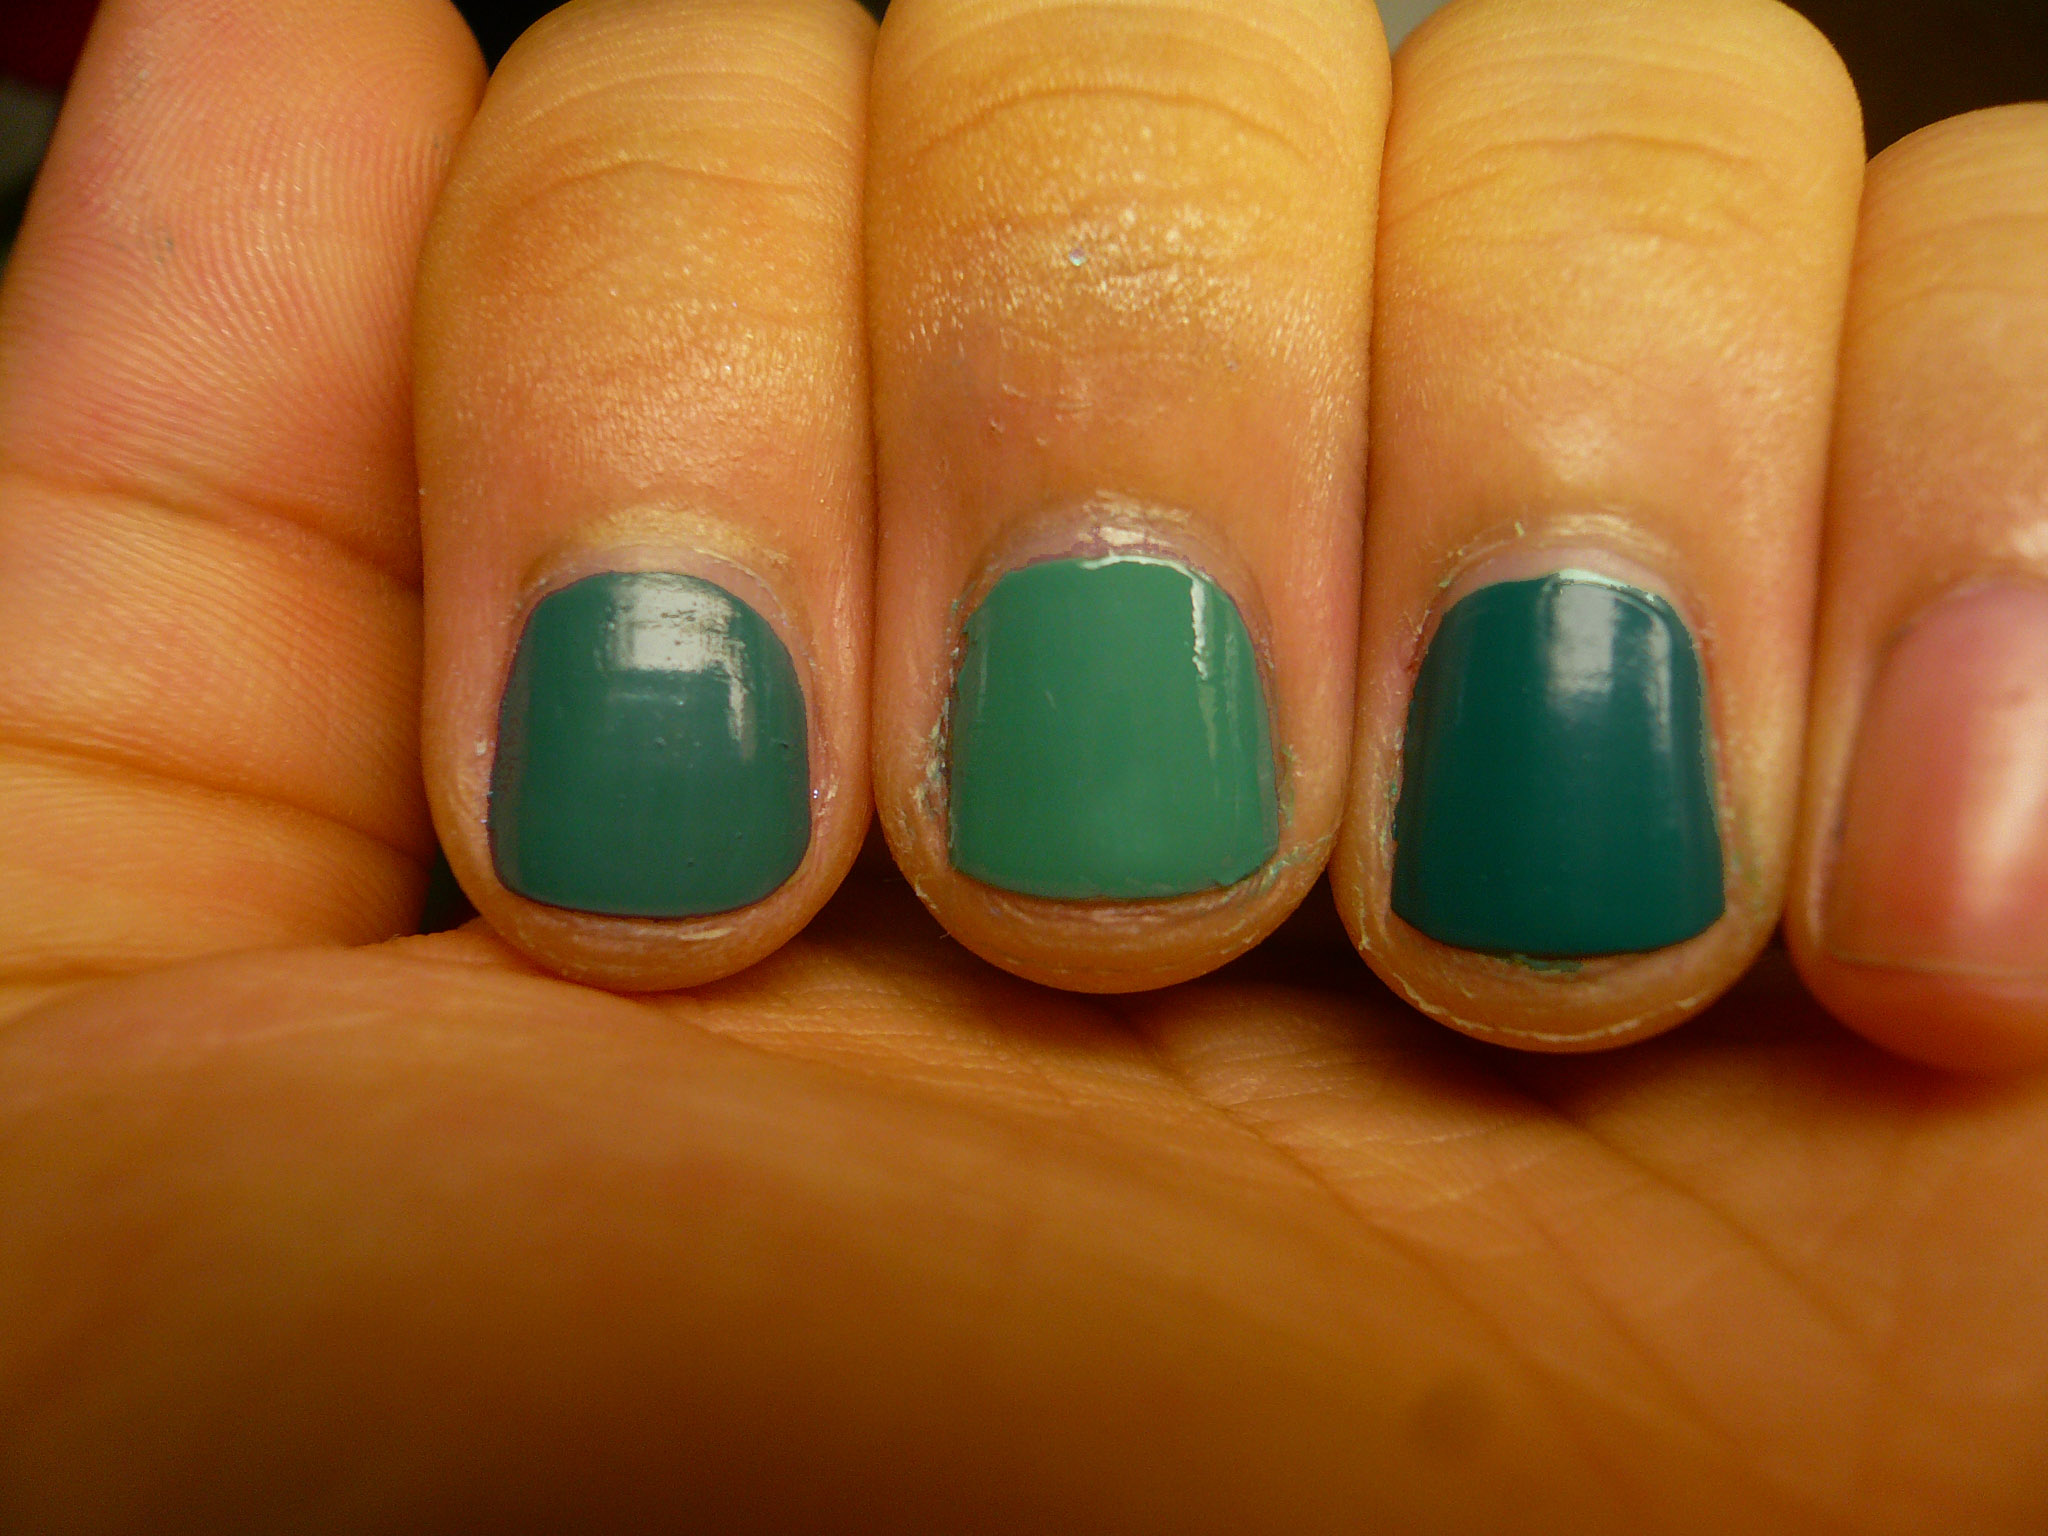
L-R: OPI Siberian Nights (swatched here), From A to Z-urich and Java Mauve-a (which looks almost similar to Sinful Colors Vacation Time)

I know the above picture is kind of dark but it's pretty color accurate!

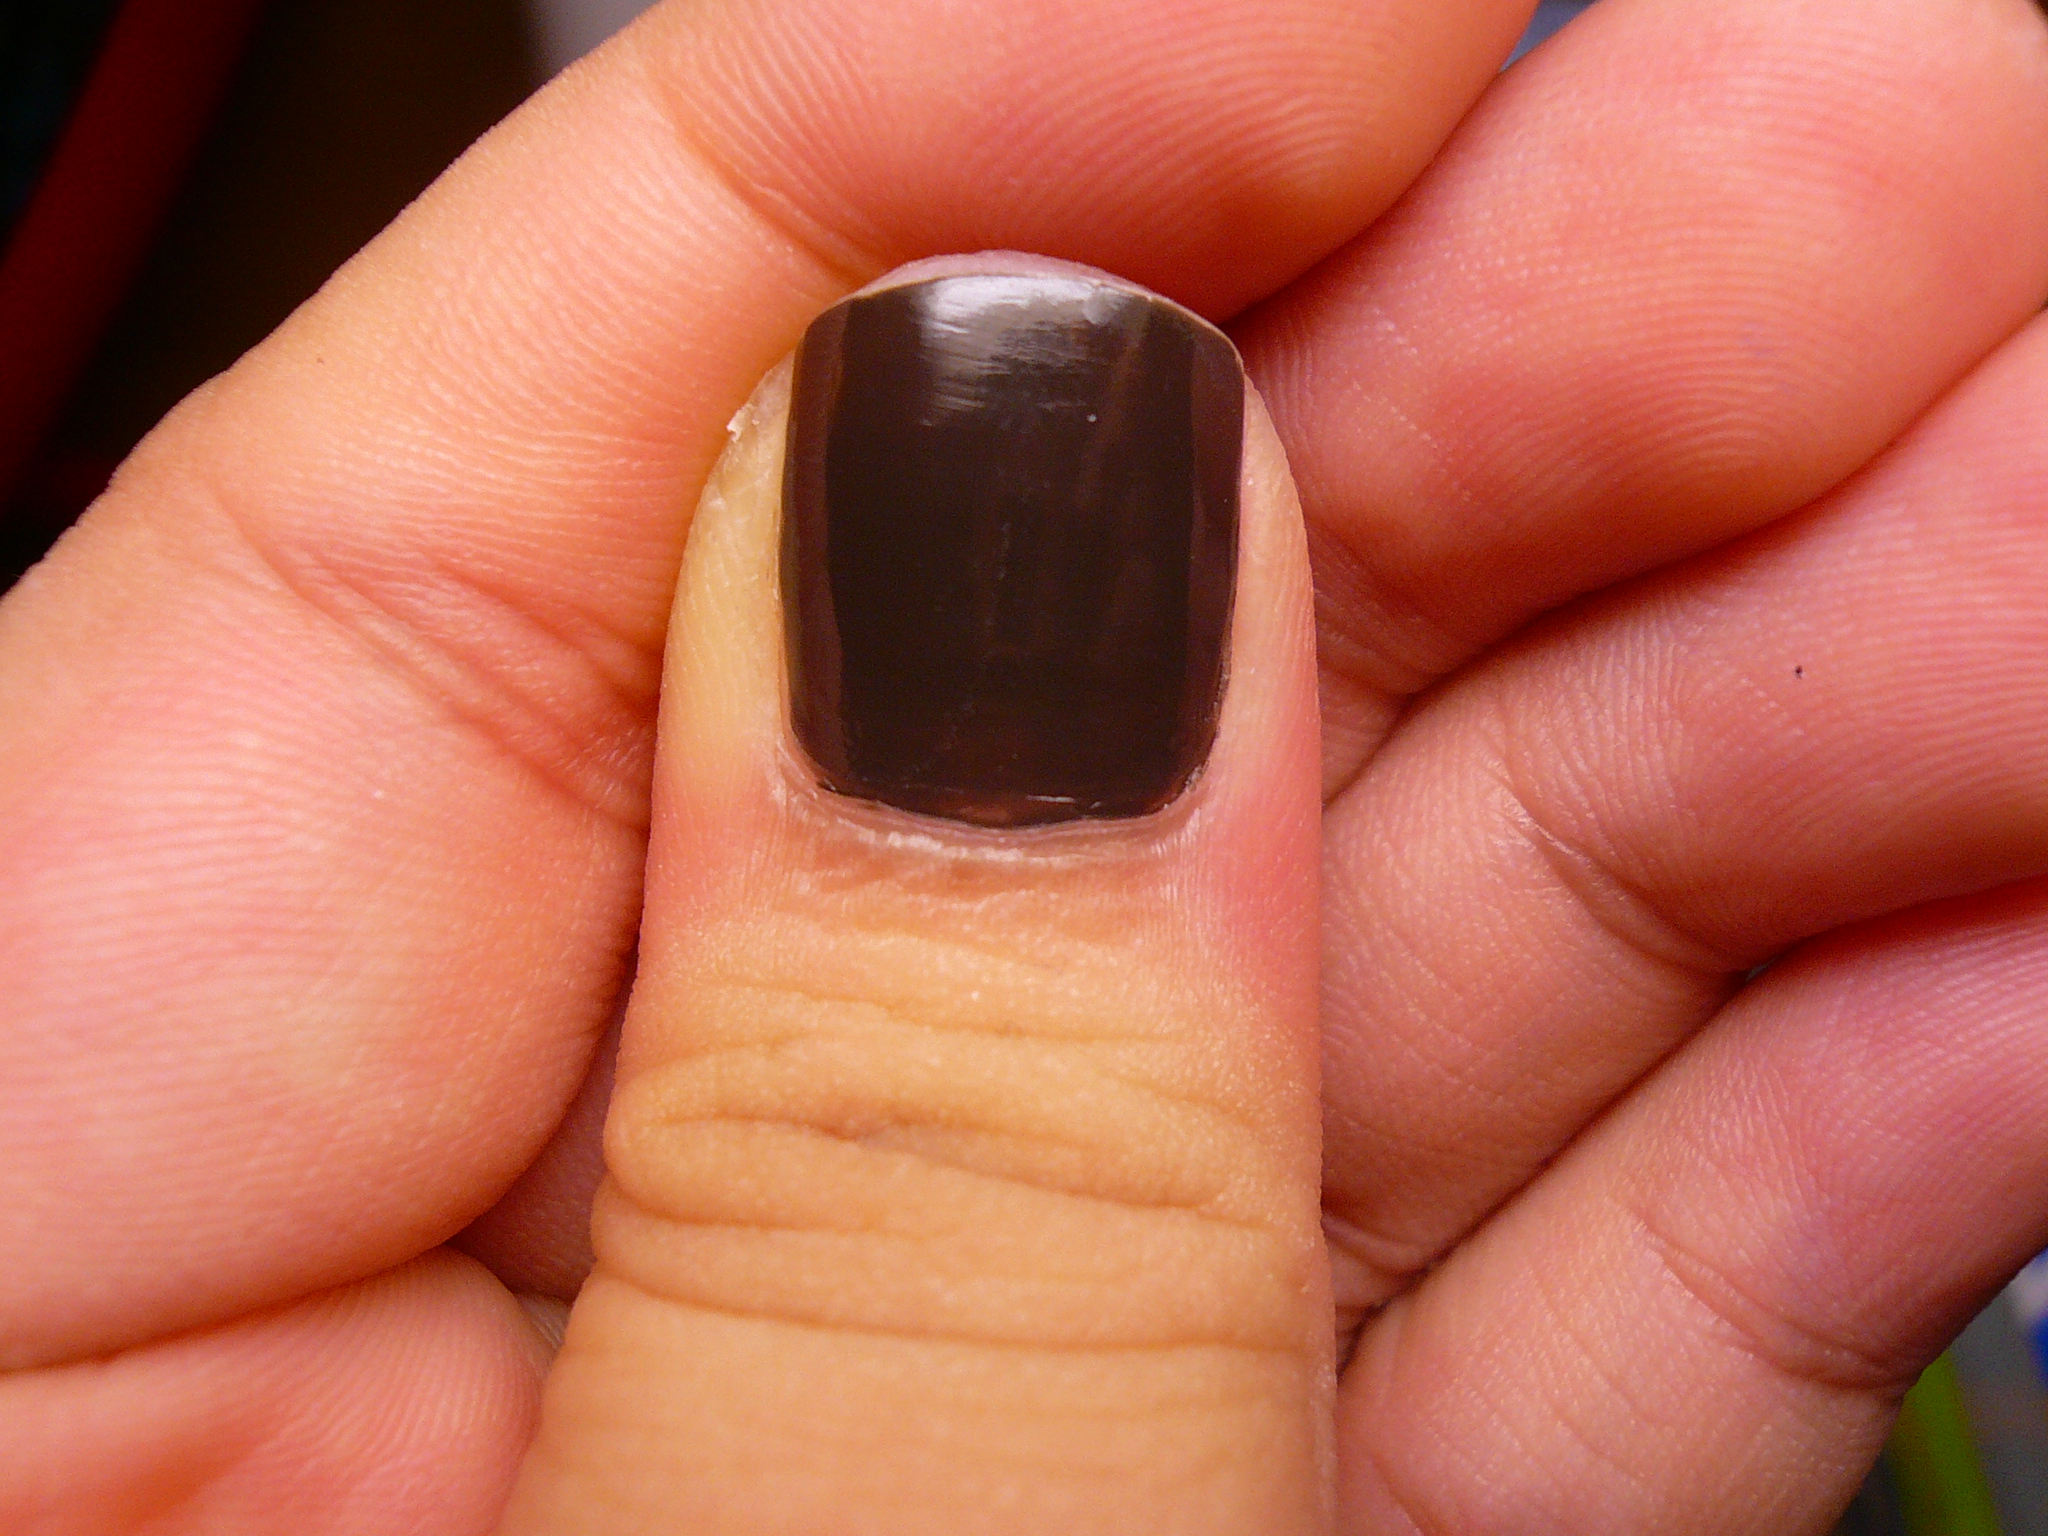
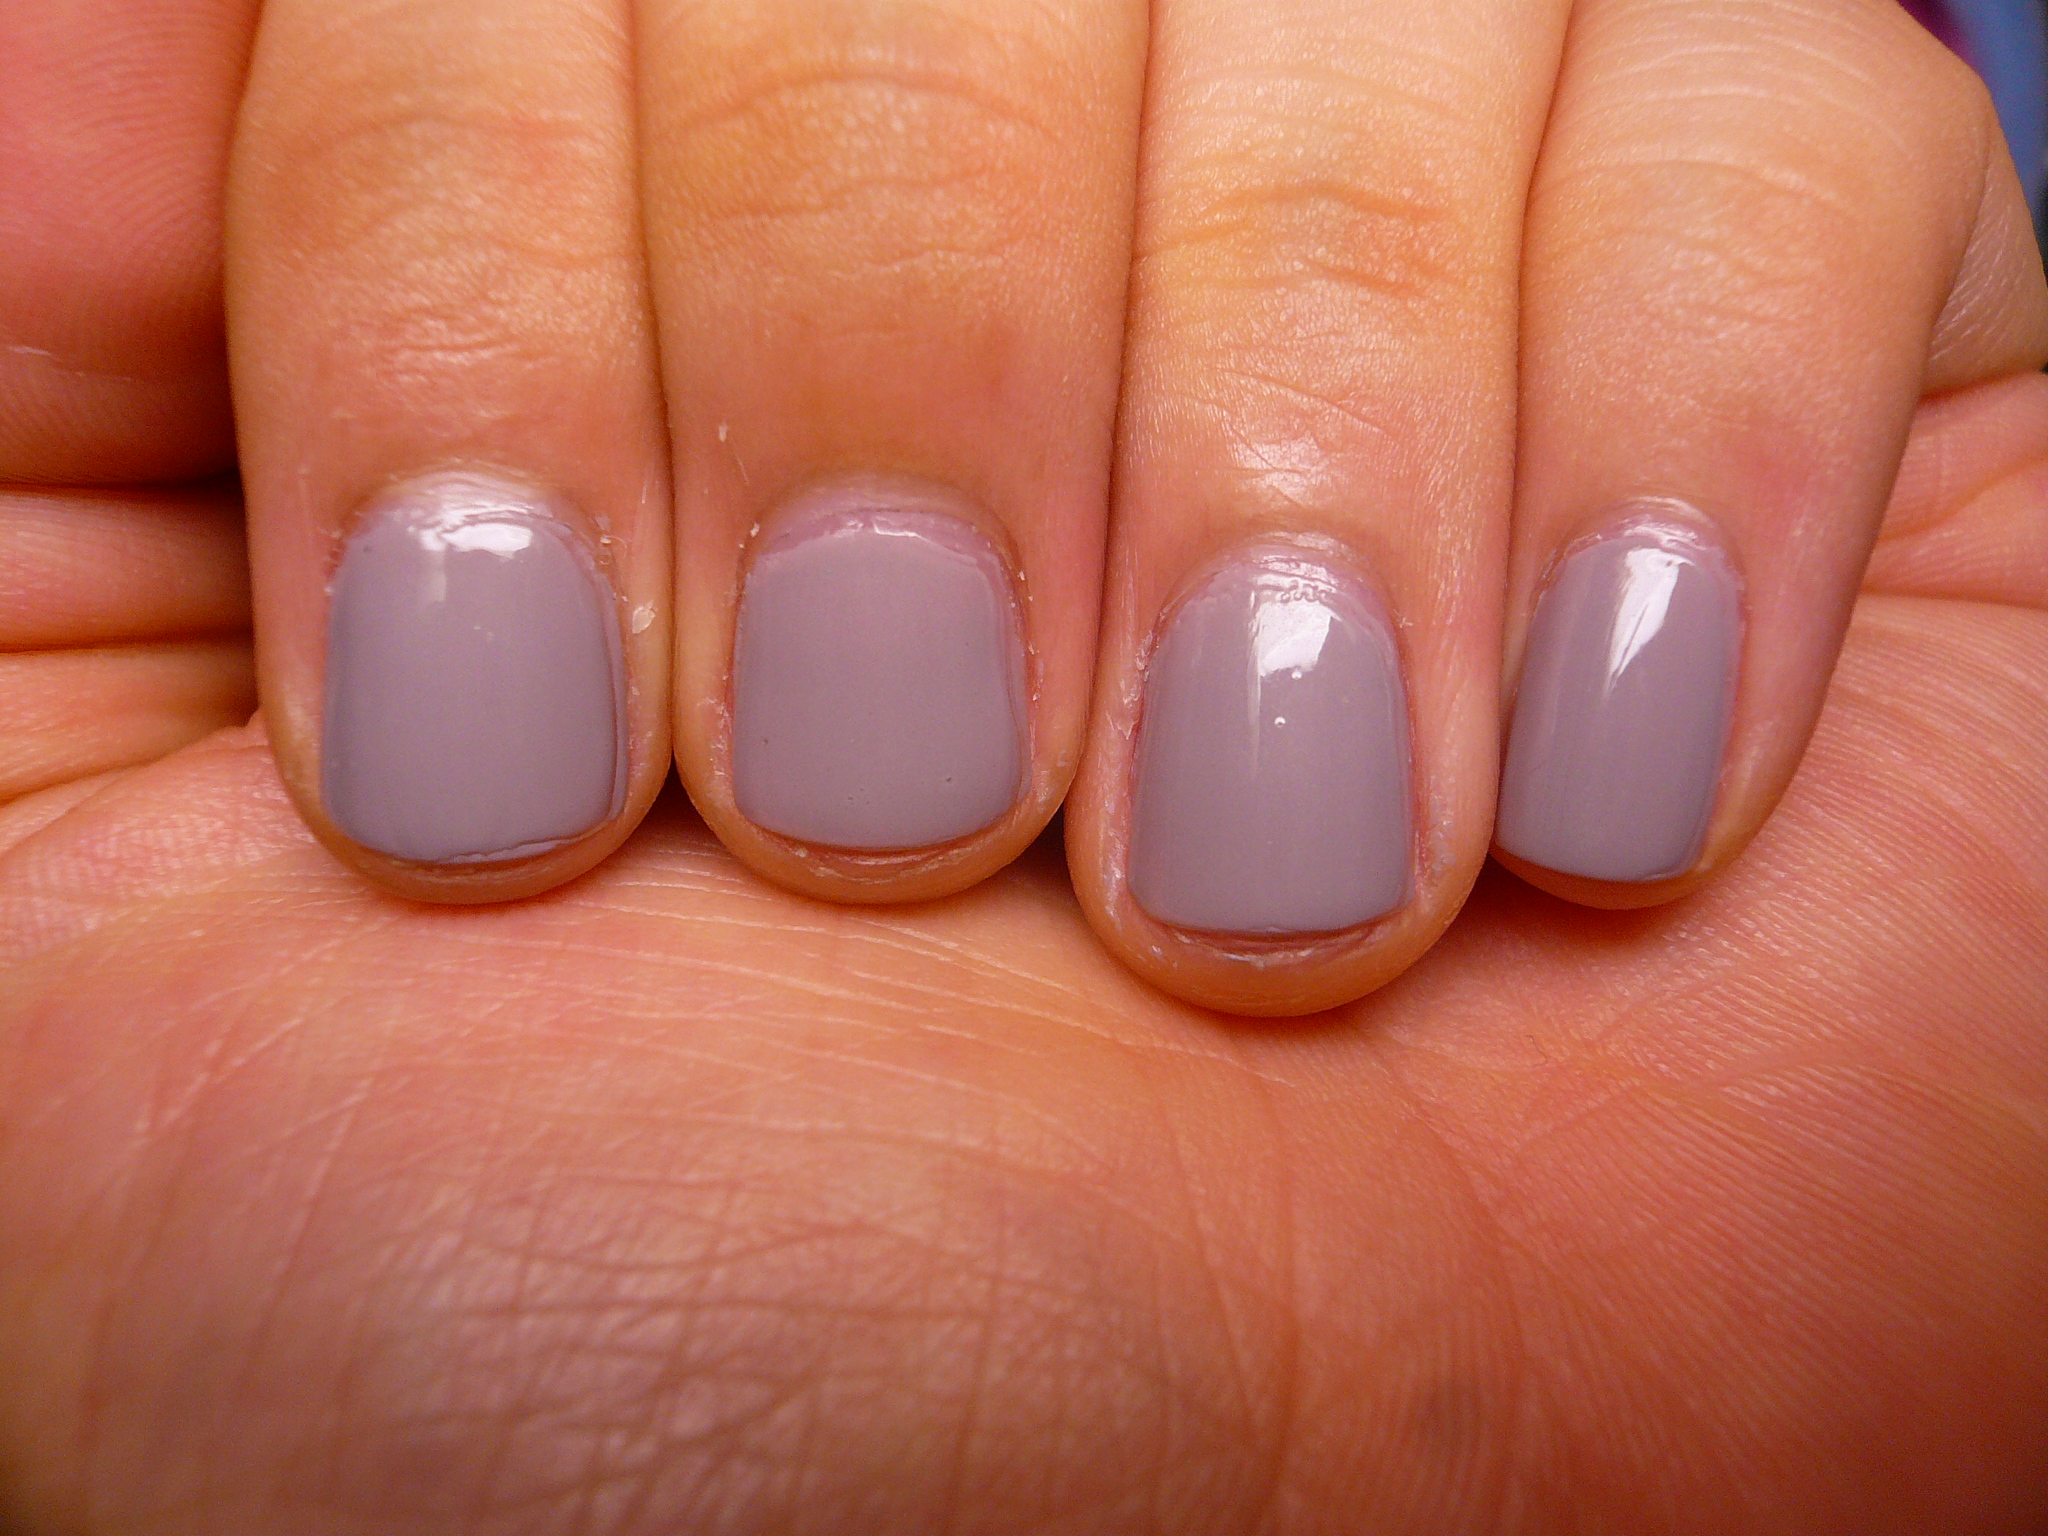
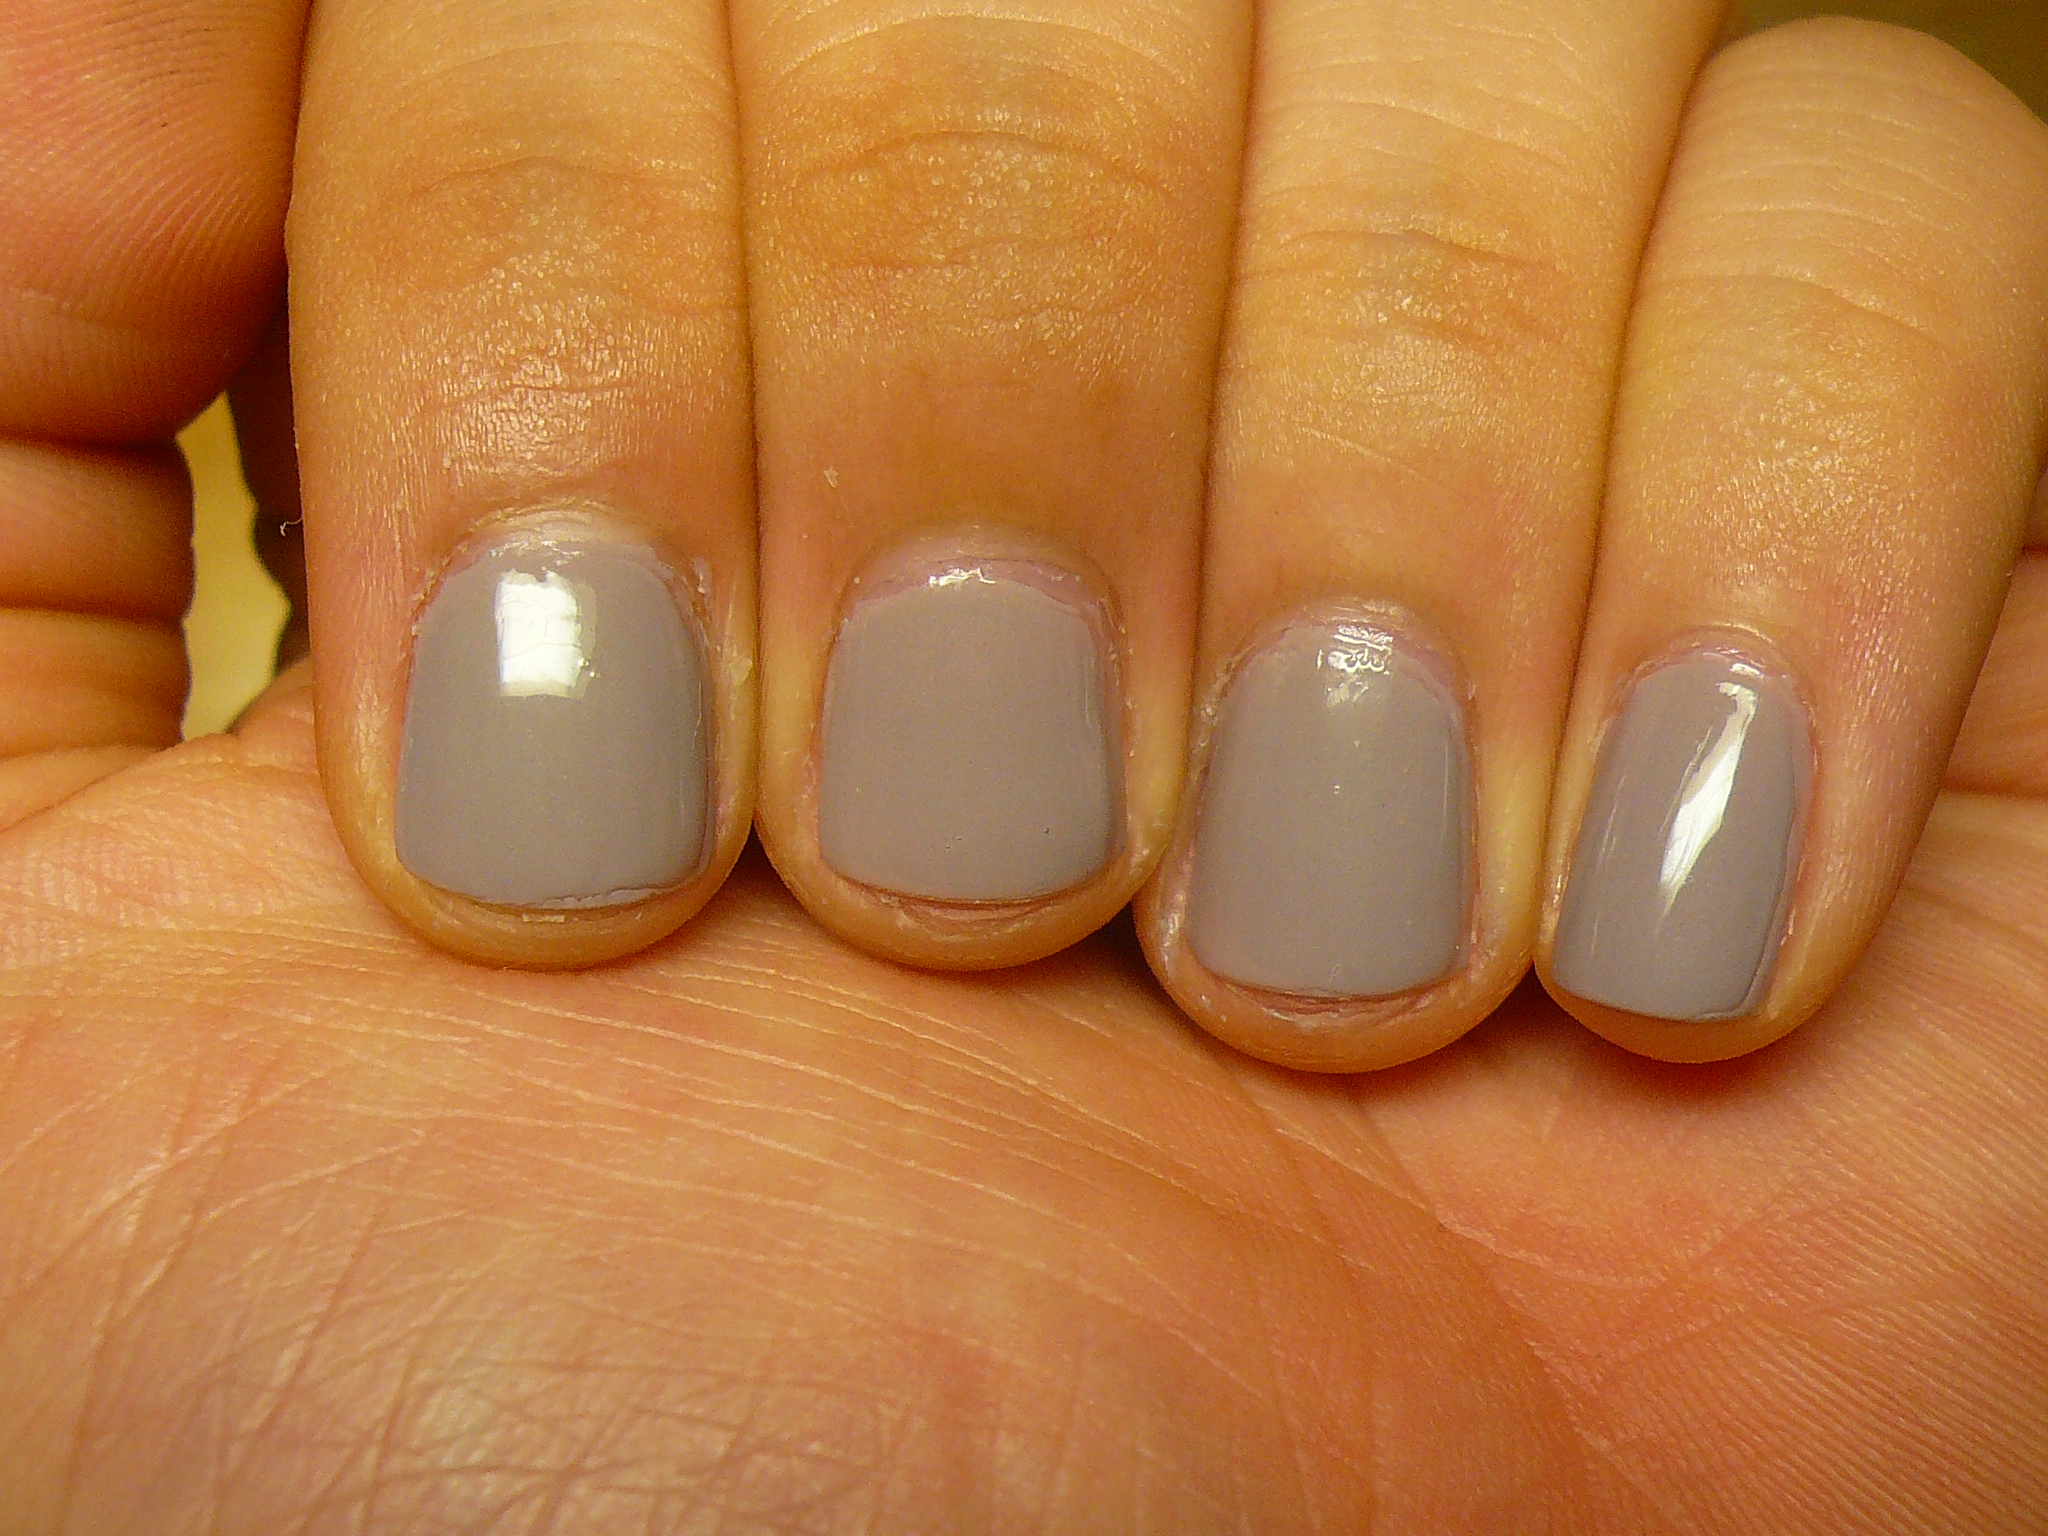
One thing I've got to say about From A to Z-urich is that while it may appear like a berry shade in the bottle, it dries ways differently to an almost vampy shade. Kinda like Malaga Wine but creamier. (PS: I swatched Malaga Wine courtesy of my friend and I'm so tempted to get it! HAHA, but I must resist!)
All three of the colours here only needed 2 coats to achieve opacity!

YUP, that's all for July's Haul! I actually got a (huge) bottle of pure acetone and a buffer too but I'm not showing them because they were pretty cheap! Oh, but I must rave about the pure acetone I got! IT'S AWESOME, especially for clean ups! You know how some blogs teach you to use a small brush dipped in polish remover to clean up? Whenever I used normal polish remover, I was never able to clean up my nails that way! But now, with pure acetone, clean ups are so much easier! It also helps remove the more stubborn colours better with less staining to my nails! Only flaw is that it's pretty drying for the nails so do remember to moisturize after using acetone! Apart from that, I HIGHLY recommend getting pure acetone! I got mine from PNC (in Chinatown)!

Lastly, school's starting again tmr. Sigh. Which means I'll have less time to swatch my polishes but let's hope I can keep the posts coming and do at least one post a week!